


About
T-shirt reconstruction
After Halloween I purchased 3 t-shirts for 70% off the origional price which made for a great deal for me. The problem was that they all shrunk in the wash to sizes I can't imagine many people could have fit into. One of them I couldn't even begin to fit over my head. Luckily there are methods of stretching one's t-shirt to a better fit.
So I thought I'd do a couple of fast recons- each taking less then 15 minutes to do. (the second will only take you about a minute)
Tags
-
 Jade C. added Diamonds And Fringe to Tees that fit
30 Jun 02:32
Jade C. added Diamonds And Fringe to Tees that fit
30 Jun 02:32
-
 LasNiteWasGr8 favorited Diamonds And Fringe
28 Jun 21:25
LasNiteWasGr8 favorited Diamonds And Fringe
28 Jun 21:25
-
 Millie H. added Diamonds And Fringe to cool ideas
25 Mar 21:27
Millie H. added Diamonds And Fringe to cool ideas
25 Mar 21:27
-
Rossy j. favorited Diamonds And Fringe
27 Feb 07:31
-
 mary.toland favorited Diamonds And Fringe
24 Jan 02:12
mary.toland favorited Diamonds And Fringe
24 Jan 02:12
-
Jade C. added Diamonds And Fringe to To small Tees
16 Jan 11:03
-
 Willow G. favorited Diamonds And Fringe
01 Oct 22:31
Willow G. favorited Diamonds And Fringe
01 Oct 22:31
-
 Kassiopia favorited Diamonds And Fringe
10 Sep 08:46
Kassiopia favorited Diamonds And Fringe
10 Sep 08:46
-
 Step 1
Fold it so that your side seams match up.
-
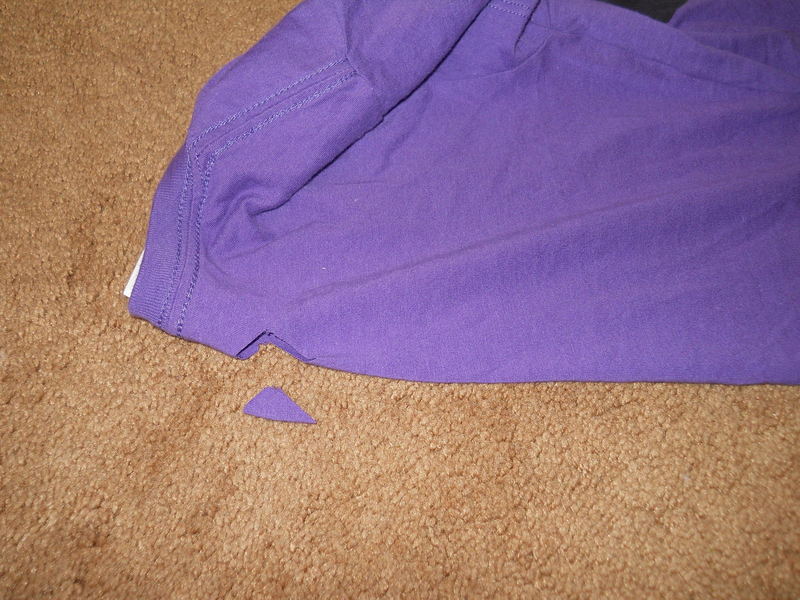
 Step 2
Next at the top of your shirt cut a triangle out like so.
-
 Step 3
Repeat cutting triangles down your shirt as far as you like to go.
-
 Step 4
Next fold your shirt over about an inch like so;
-
 Step 5
Cut triangles down a second row stopping right below the last one on the first row.
-
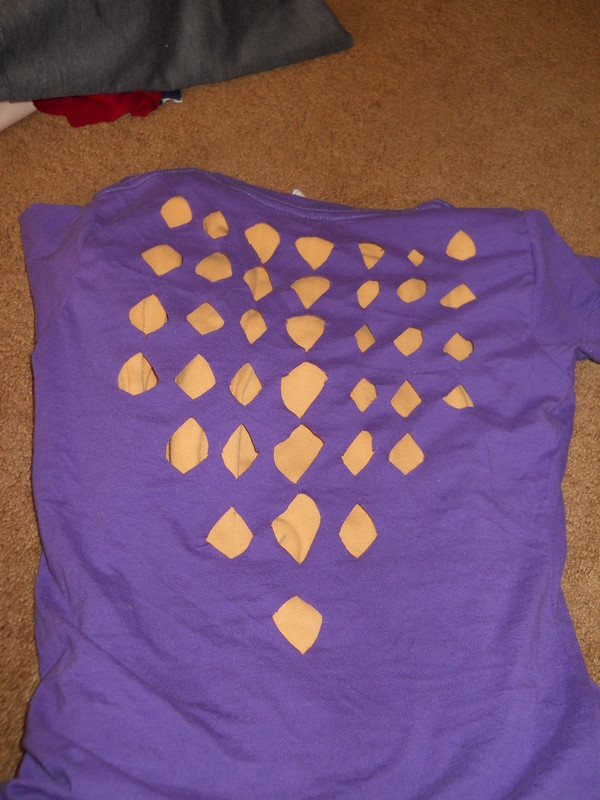
 Step 6
Repeat that process until you've gone as far over as you want to go. I put a bright colored t-shirt under mine so you can see what it looks like when finished.
-
 Step 7
Stratch the back of your shirt and then remove the hem of your shirt.
-
 Step 8
Cut fringe along the bottom of your shirt.
-
 Step 9
Stretch out fringe.
-
 Step 10
I decided I wanted the fringe on my sleeves to be as long as possible so I removed the seam in my sleeve using a seam ripper but if you don't want to do this part you can just cut off the hem and begin to cut fringe on your sleeve if you want.
-
 Step 11
Stretch out fringe on sleeves.
-
 Step 12
Take two strands at a time on fringe on the sleeves only, tie them into knots.
-
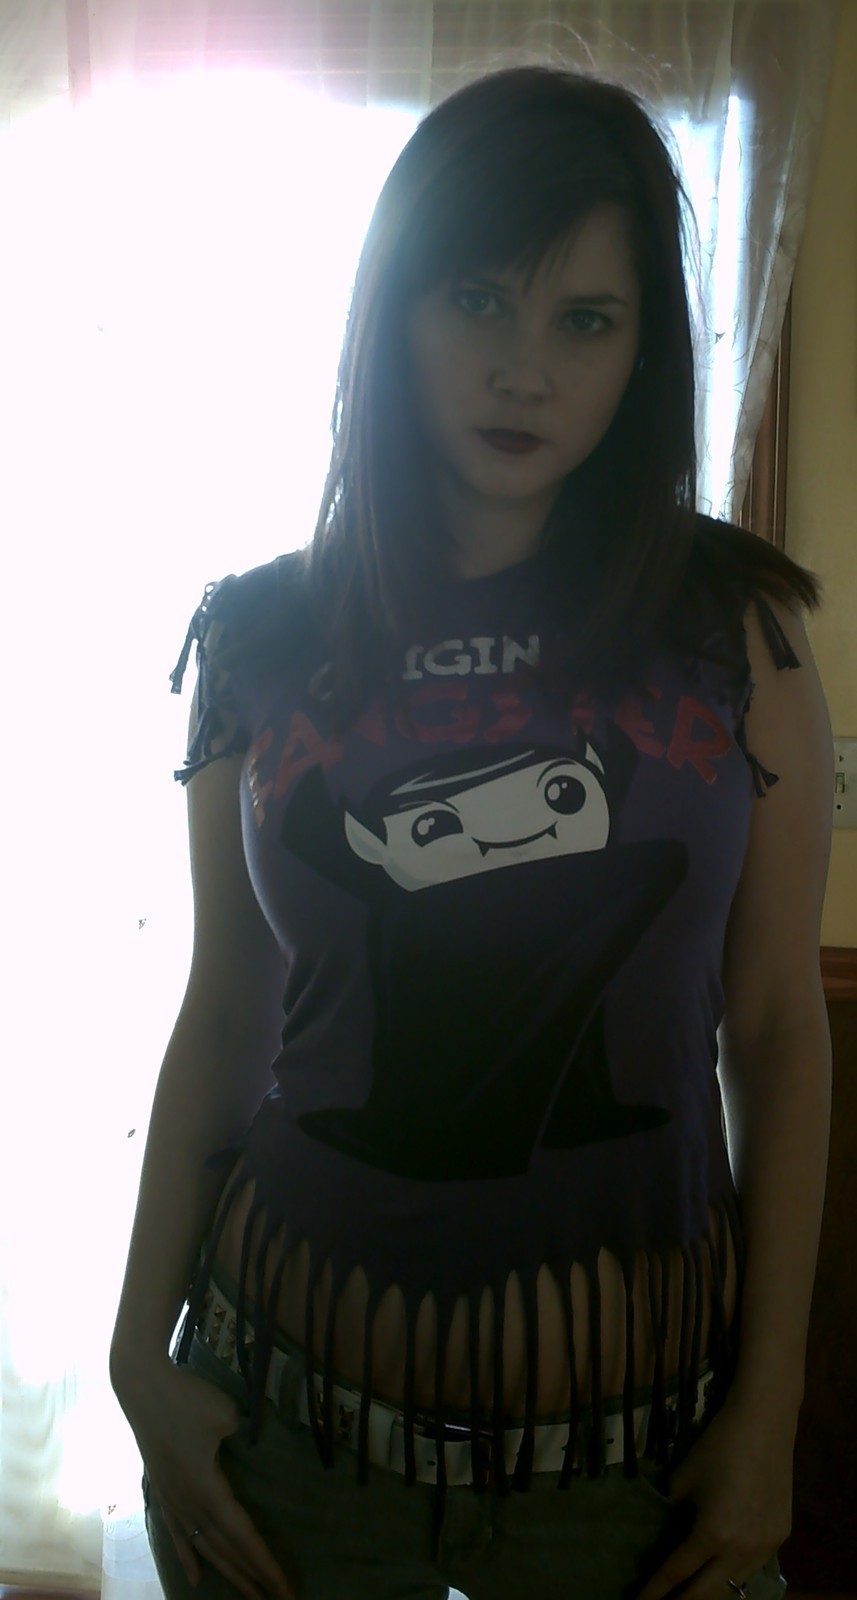
 Step 13
Finished!