


About
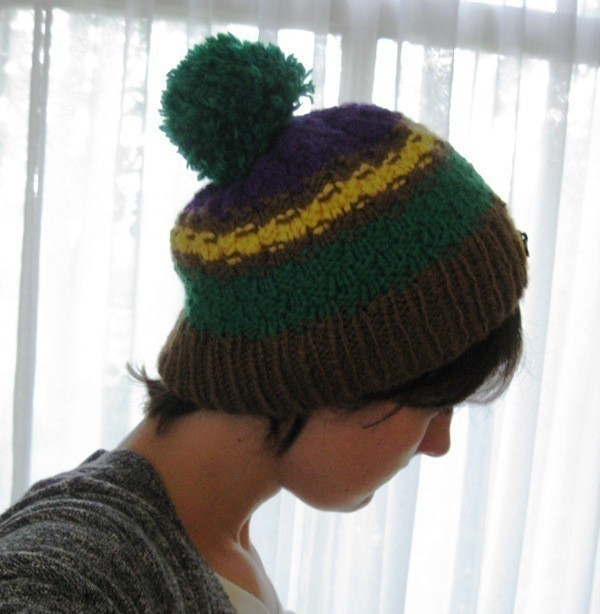
Your own design, your own signature!!! :D
RIB stitch: * knit one, purl one - repeat from*
Check board stitch: *knit 2, purl 2 for 3 rows then purl the knit stitches and knit the purl stiches for 3 rows. repeat from *
gauge: 14st x 29rows measures 10cm x 10cm (4" x 4")
-
 Bella Trix favorited Diy Designer Hat!
05 Nov 13:48
Bella Trix favorited Diy Designer Hat!
05 Nov 13:48
-
 Martha G. favorited Diy Designer Hat!
27 Sep 22:38
Martha G. favorited Diy Designer Hat!
27 Sep 22:38
You Will Need
-
 Step 1
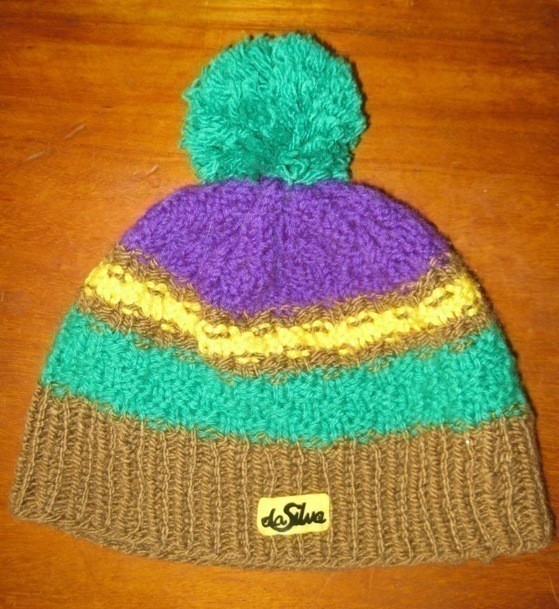
Cast on 80 stitches with brown.
Work 20 rows in rib stitch.
Change to check board pattern and work 9 rows in green change to brown.
knit 3 rows, change to yellow.
knit 3 rows, change to brown.
knit 3 rows change to purple
knit 5 rows in purplerow 24: knit 12 knit 2 together 4 times and repeat this the entire row. (64)
continue to work in check board pattern (keep knitting 2 and purling two, this might not seem right but it will look just fine when you finish the rows)
row 25 & 26: check board pattern
row 27: * knit 4, knit 2 together 4 times, knit 4. Repeat from* (48)
row 28 & 30: check board pattern
row 30: *knit 2, knit 2 together 4 times, knit 2. Repeat from* (32)
row 31 & 32: check board pattern
row 33: knit two together entire row(16)
row 34: knit two together entire row (8)
pull a strand of yarn through remaining stitches, pull tight and tie.
-
 Step 2
THE POM POM
using card board, cut two rectangles measuring 4" long and 1.5" wide.
lay a long strand of yarn in between take your ball of yarn and start to wind it around the two pieces of cardboard. (this uses up a lot of yarn!!!)
Once you think you're done cut one side of it open and tie it very tight with the yarn you put in between.
Shape it rolling it in your hands and then cut off the excess to shape it even more.
Attach to top of your hat.
-
 Step 3
Using a piece of Shrinky Dinks draw your desired design onto it. I used my last name.
Keep in mind once you put it in the oven it will shrink up to 7 times its actual size.
My design measured 12 cm first and now measures only 3,5!!
To make it stand out more, lay a contrasting colour of felt underneath and sew it onto your hat.


 1
Origami Clothes »
Money Origami Hat
1
Origami Clothes »
Money Origami Hat
 2
Envelopes »
Green Collage Envelope
2
Envelopes »
Green Collage Envelope
 3
Digital Artwork »
How To Turn A Picture Into A Line Drawing In Photoshop
3
Digital Artwork »
How To Turn A Picture Into A Line Drawing In Photoshop
 4
Pumpkins »
Pumpkin Plushie
4
Pumpkins »
Pumpkin Plushie
 5
Envelopes »
Blue Collage Envelope
5
Envelopes »
Blue Collage Envelope


I knited too much green actually, so the violet part was not very big. And my brown yarn was too big i think, because i found the rib part a little too long ..
Anyway, i will knit it again !
man i wish i could knit...