

About
DIY Chalkboard Key Hangers
Instructions on my blog:
http://www.craftymeesa.blogspot.com/2012/11/diy-chalkboard-key-hangers.html
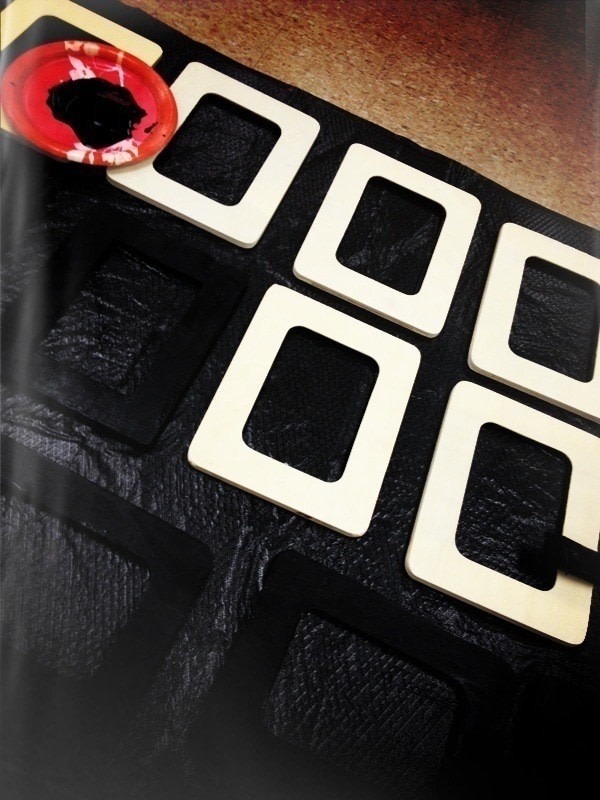
I also used 4" x 6" chip board to go behind the design to give it some support. This is optional.
-
 Jennifer A. favorited Diy Chalkboard Key Hangers
17 Mar 18:10
Jennifer A. favorited Diy Chalkboard Key Hangers
17 Mar 18:10
-
 Rebecca M. favorited Diy Chalkboard Key Hangers
10 Jan 17:26
Rebecca M. favorited Diy Chalkboard Key Hangers
10 Jan 17:26
-
Kristen B. added Diy Chalkboard Key Hangers to Room Ideas
01 Jun 21:09
-
 Minerva H. added Diy Chalkboard Key Hangers to Home
13 Dec 21:15
Minerva H. added Diy Chalkboard Key Hangers to Home
13 Dec 21:15
You Will Need
-
 Step 1
I made 11 total. First start with a layer of chalkboard paint. Paint vertically or horizontally. Let dry for one hour, then apply a second coat in the other direction.
-
 Step 2
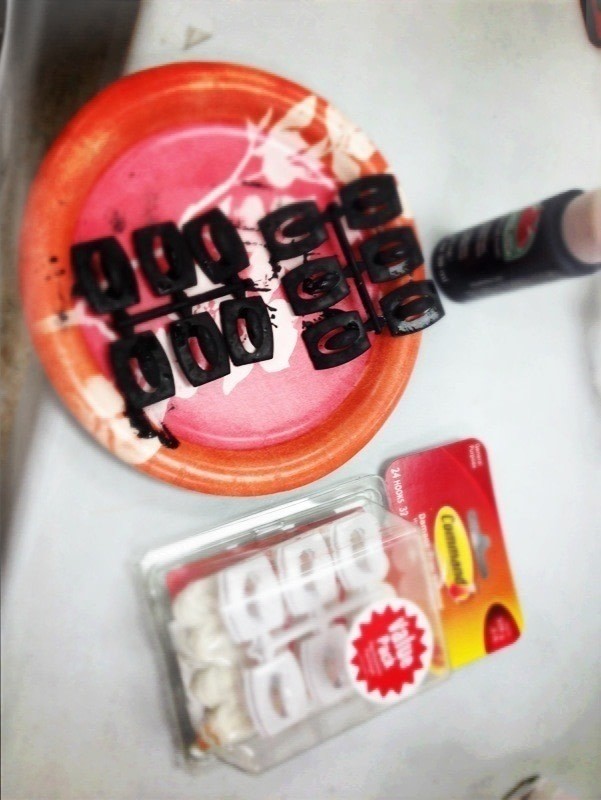
Wait time specified on Chalkboard paint for drying, then apply your key hook. I used white Command Hooks to save time. This crafty girl likes to work fast! Paint the hooks black to match the chalkboard paint with acrylic paint.
-
 Step 3
Seal with Clear Nail Polish or Clear Spray Paint to prevent chipping of the black paint on the plastic surface.
-
 Step 4
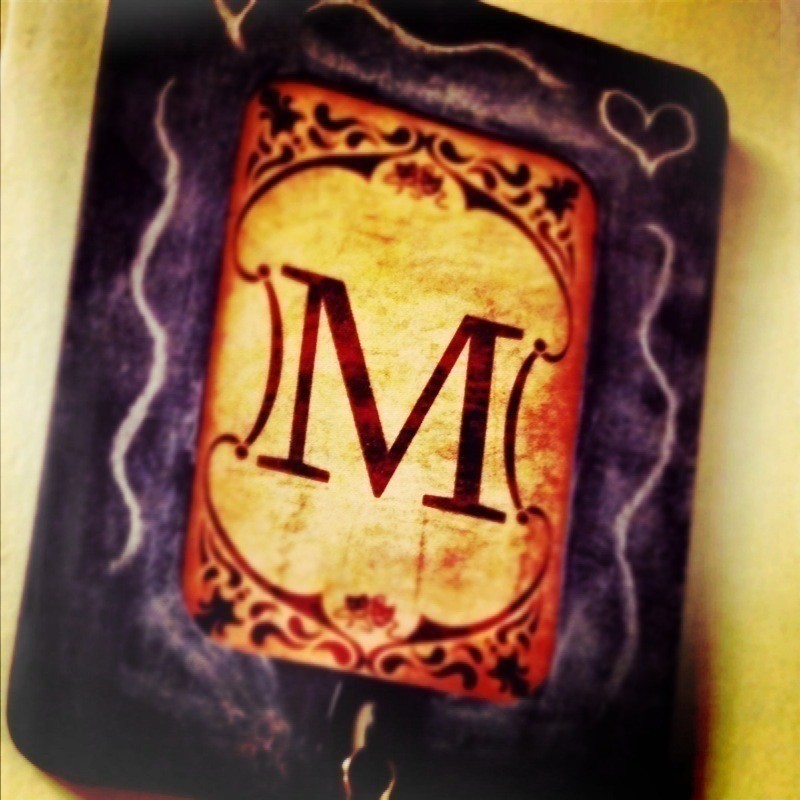
I went to the computer and designed each person's first initial onto a neat vintage background, then inserted theater masks on the top and bottom. This is the fun part! Get creative and customize for the recipient or yourself!
You can also design a last initial and use a hook on each bottom corner.
Cut to 4" x 6" to fit the frame.
Optional: Glue onto 4" x 6" Chipboard for durability.
-
 Step 5
After Command Strips are dry, apply them by cutting the rounded surface off the bottom of the adhesive strip.
-
 Step 6
Place Command Picture Hanging Strips to the back on the top. Follow instructions on back panel.
-
 Step 7
Cure Chalkboard surface by coloring in the paint with chalk, then rub off with a wet towel.
All done! All 11 only took me a couple hours to complete. These would make wonderful Christmas presents, His and Hers for newlyweds, birthday gifts, co-worker presents.... the list can keep on going. The chalkboard is great to leave reminders for yourself or for anyone in your family.


 1
Origami Clothes »
Money Origami Hat
1
Origami Clothes »
Money Origami Hat
 2
Envelopes »
Green Collage Envelope
2
Envelopes »
Green Collage Envelope
 3
Digital Artwork »
How To Turn A Picture Into A Line Drawing In Photoshop
3
Digital Artwork »
How To Turn A Picture Into A Line Drawing In Photoshop
 4
Pumpkins »
Pumpkin Plushie
4
Pumpkins »
Pumpkin Plushie
 5
Envelopes »
Blue Collage Envelope
5
Envelopes »
Blue Collage Envelope
