


About
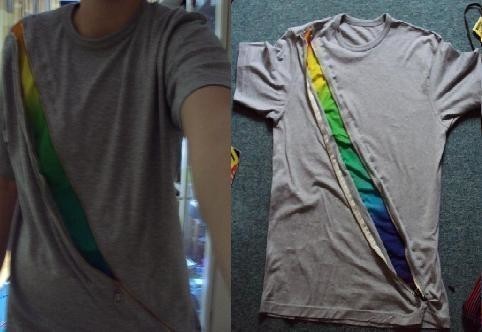
Just unzip to show the secret rainbow super hero in you!
It's summer vacation, so I'm bored out of my mind. I decided I didn't have enough cool shirts, so I made this one.
And I even made a how to, too! So you all can make it as well, because there's a Rainbow Superhero in all of us :D!
Btw, sorry if there are any weird spelling mistakes. I'm Dutch and 'to sew' is a really weird verb.
-
 Ievars favorited Zipper Rainbow T Shirt Recon
22 Oct 18:15
Ievars favorited Zipper Rainbow T Shirt Recon
22 Oct 18:15
-
 Falene M. favorited Zipper Rainbow T Shirt Recon
29 Dec 01:53
Falene M. favorited Zipper Rainbow T Shirt Recon
29 Dec 01:53
-
 SapphireDoodle favorited Zipper Rainbow T Shirt Recon
24 Jul 07:28
SapphireDoodle favorited Zipper Rainbow T Shirt Recon
24 Jul 07:28
-
 Rebecca B. favorited Zipper Rainbow T Shirt Recon
20 Jul 12:27
Rebecca B. favorited Zipper Rainbow T Shirt Recon
20 Jul 12:27
-
 Aishwarya Purohit favorited Zipper Rainbow T Shirt Recon
09 Jul 05:30
Aishwarya Purohit favorited Zipper Rainbow T Shirt Recon
09 Jul 05:30
-
 Julia V. added Zipper Rainbow T Shirt Recon to Sewing
26 Apr 01:06
Julia V. added Zipper Rainbow T Shirt Recon to Sewing
26 Apr 01:06
-
Julia V. favorited Zipper Rainbow T Shirt Recon
26 Apr 01:06
-
Angie P. favorited Zipper Rainbow T Shirt Recon
17 Sep 23:46
-
 harley r. favorited Zipper Rainbow T Shirt Recon
17 Jun 17:55
harley r. favorited Zipper Rainbow T Shirt Recon
17 Jun 17:55
- JaydeyLikesMac&Cheese favorited Zipper Rainbow T Shirt Recon 09 May 01:36
You Will Need
-
 Step 1
Decide where you want your zipper to go on your shirt. Then mark a line under the zipper.
-
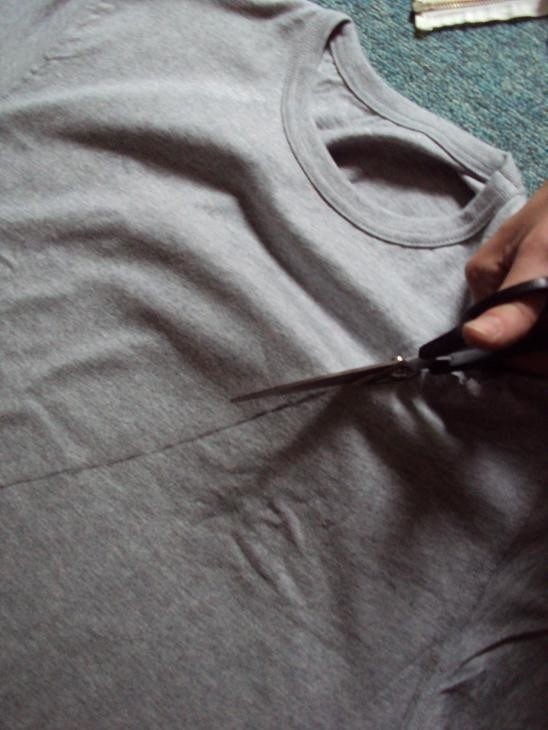
 Step 2
Carefully cut along the line you've just drawn. Make sure you don't cut through the back of the shirt.
-
 Step 3
Place the zipper inside the shirt under the opening. Fold the edges of the opening and pin them to the zipper. You don't have to do the top and bottom just yet, because those are difficult and you won't need to sew those yet.
-
 Step 4
I had some trouble with the top and bottom. I decided to cut a little further than the zipper goes and the make two cuts to the side so I could easily fold the edges. I later sewed those edges onto the rainbow fabric.
-
Step 5
Now sow the zipper on. If you're sewing it with a sewingmachine, I suggest using a zipperfoot.
-
Step 6
Now get your strip of fabric. Make sure it's about 3-4 inches longer than your zipper. I only added 2 inches for seam allowence on mine, but that wasn't enough, because I accidently streched the shirt a little bit when sewing, so I didn't have enough left over at the bottom to make a nice hem.
-
 Step 7
Turn your shirt inside out and pin the strip on your shirt, including a nice double folded hem. In the picture I also pinned the top and the bottom already, but don't do that, because of what I explained in step 6.
-
Step 8
Now sow the strip on. I handsewed the top and bottom, because they're tricky.
-
 Step 9
And there you go. A super cool zipper, rainbow shirt.


Versions

Comments


