


About
A girlie refashion for a little boy's shirt!
Summer is almost upon us, and what better way to celebrate than making a cute new top? Here's a super quick transformation you can do in about an hour! Some basic sewing skills are required, but it's still an easy project for beginners who take their time. Click the photos to expand them to full size and feel free to save them to your computer :D
Tags
-
 AnA W. added Ruffled Crop Top Refashion to Shirts
18 May 07:17
AnA W. added Ruffled Crop Top Refashion to Shirts
18 May 07:17
-
 Key West Witch favorited Ruffled Crop Top Refashion
12 Sep 12:23
Key West Witch favorited Ruffled Crop Top Refashion
12 Sep 12:23
-
 Tamara D. added Ruffled Crop Top Refashion to Sew Tops
03 Sep 21:45
Tamara D. added Ruffled Crop Top Refashion to Sew Tops
03 Sep 21:45
-
 Stephanie N. favorited Ruffled Crop Top Refashion
10 Sep 04:32
Stephanie N. favorited Ruffled Crop Top Refashion
10 Sep 04:32
-
 Miss_Fit favorited Ruffled Crop Top Refashion
08 Jul 21:22
Miss_Fit favorited Ruffled Crop Top Refashion
08 Jul 21:22
-
 Meredith T. favorited Ruffled Crop Top Refashion
29 Jun 02:52
Meredith T. favorited Ruffled Crop Top Refashion
29 Jun 02:52
-
 Fugulicious added Ruffled Crop Top Refashion to To-make list
17 May 20:00
Fugulicious added Ruffled Crop Top Refashion to To-make list
17 May 20:00
-
 effy.kingly favorited Ruffled Crop Top Refashion
08 Dec 14:20
effy.kingly favorited Ruffled Crop Top Refashion
08 Dec 14:20
-
 Zombie Babe added Ruffled Crop Top Refashion to new wardrobe
29 Sep 09:10
Zombie Babe added Ruffled Crop Top Refashion to new wardrobe
29 Sep 09:10
-
 Kristen P. favorited Ruffled Crop Top Refashion
01 Jul 07:51
Kristen P. favorited Ruffled Crop Top Refashion
01 Jul 07:51
You Will Need
-
 Step 1
You need to begin with a shirt that fits at the bust. This boy's 6x shirt from the thrift store fit me great, but the cute print is all it had going for it.
-
 Step 2
Cut straight across the shirt just below where the band of your bra sits. This should be about 3 inches below the armpits of the shirt.
-
The part you cut off will be divided into 4 equal pieces, 2 from the front and 2 from the back. -
 Step 3
Flip the shirt inside out and pinch darts just below the bust. The bottom of the shirt should be snug against your ribcage. Alternatively, you can use a long straight stitch to gather under each breast. (Don't forget to remove the gather threads at the end!)
-
You can connect the 4 strips from the bottom of the shirt, or leave them loose like I did, with 2 for the front and 2 for the back. Gather or pleat them to fit the bottom of the shirt. -
 Step 4
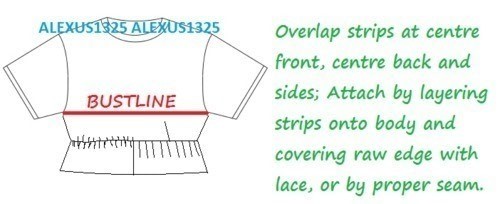
You can stitch the strips to the shirt right-sides-together as in a traditional seam, then apply stretch-lace trim afterwards. I chose to put the strips right on top of the free edge of the shirt and used the lace to cover the raw edges.
-
***Make sure to use a stretch-stitch or a short, narrow zigzag stitch! Otherwise the stitches will pop when you go to put the shirt on.*** -
 Step 5
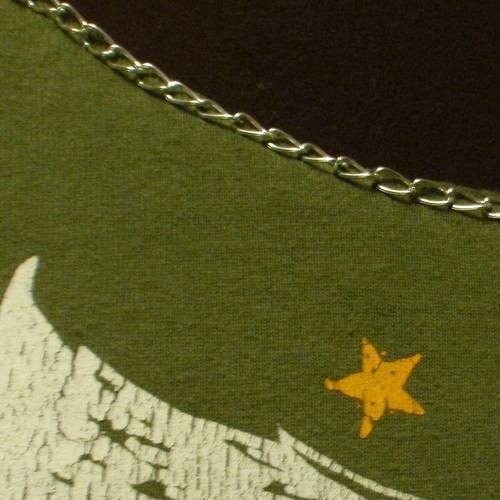
To finish it off, roll up the sleeves and cut out the neckline. You can leave it raw, finish it with binding or more lace, or even handstitch some chain around the edge :D
-
Have fun and keep crafty!


 1
Watercolor Art »
Watercolor Paints Made From Make Up
1
Watercolor Art »
Watercolor Paints Made From Make Up
