


About
Add some color to your home by creating your very own wildflower chandelier!
Simply follow the instructions below for making your own wildflower (or whatever design you choose) chandelier.
Inspired by: http://www.oopseydaisyblog.com/2010/06/a-butterfly-chandelier-megitys-handmade.html
-
 kiki w. added Paper Wildflower Chandelier to Things I need to make for myself
28 Jan 13:38
kiki w. added Paper Wildflower Chandelier to Things I need to make for myself
28 Jan 13:38
-
Sue S. favorited Paper Wildflower Chandelier
16 May 12:59
-
Katrina P. favorited Paper Wildflower Chandelier
15 Apr 22:24
-
 Mandy K. published her project Paper Wildflower Chandelier
13 Apr 09:00
Mandy K. published her project Paper Wildflower Chandelier
13 Apr 09:00
-
 Step 1
Gather your supplies -
- Cardstock - I wanted my chandelier to have an ombre effect, so I used 6 different colors - 2 sheets per color. If only using one color, you will need 8 sheets total.
- Vellum paper - There are lots of different colors to choose from. I chose a cream polka dotted kind - 3 sheets total
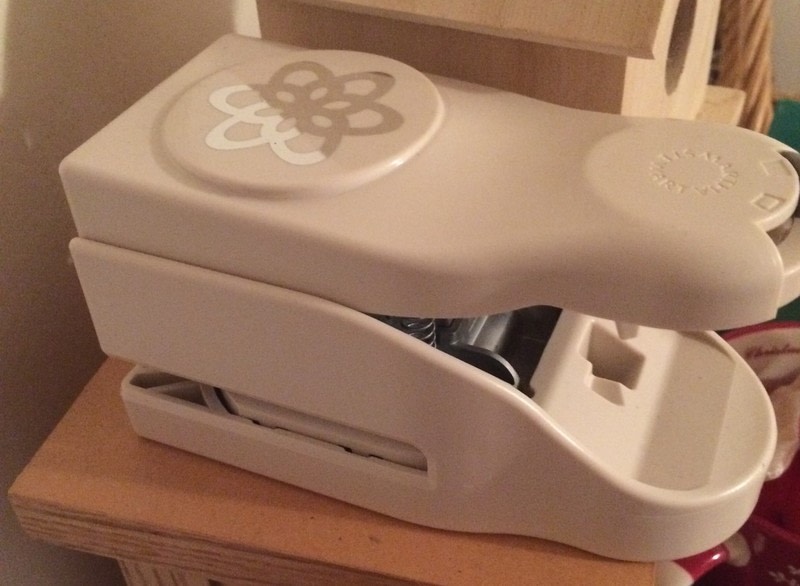
- Paper craft punch - I used the Martha Stewart Layer Punch - Wildflower
- Glue dots or glue - I used Zots - small size (at least 144 dots)
- 12 inch wooden sewing hoop
- Elastic cord - cut 12 pieces at about 22 in. in length
- Wire
- Wire cutters
- String - to hang the finished product -
 Step 2
Use your craft punch to cut out a zillion little flowers, or a shape of your choice. My chandelier has a total of 12 strings with 6 flowers on each. Each flower consists of 2 cardstock cutouts and 1 vellum cutout. In total, you will end up punching a total of 144 cardstock pieces and 36 vellum pieces. You may choose to make yours bigger or smaller. Adjust accordingly.
-
 Step 3
Next, apply a glue dot (or glue) to the middle of one cardstock flower.
-
 Step 4
Adhere a vellum flower to the cardstock. Add pressure atop the glue dot is to make sure the two pieces stick together. If this doesn't seem secure enough, feel free to add more glue or glue dots.
-
 Step 5
Apply another glue dot or drop of glue onto the center of the vellum. Lay an elastic cord across the glue. Make sure it is about 3 inches below the top of the cord so you have enough left to be able to tie it to the wire.
-
 Step 6
Lay another cardstock flower on top of the glue and the cord. Essentially the vellum and cord will be sandwiched between the two cardstock flowers.
-
 Step 7
Repeat steps 3 - 6 until you have 6 complete flowers spaced out on one string. Continue with the rest of the strings or until you have the desired amount for your chandelier.
-
 Step 8
Next, wrap two pieces of wire to create a cross in the center. Make sure it is centered and tight.
Tie and knot the strings to the wire. It might help to have the hoop already hanging for this part.
Finally, use the string to hang up your finished chandelier. -
 Step 9
One last final note - make sure you have good lighting for this, as it can be difficult to see. As a craft tester, I was fortunate to test out an OttLite. This was super helpful, as it gives off "natural daylight illumination" so you can see what you are doing more clearly. The cool thing about this model of the light is it has compartments to organize some of your small craft supplies. I have posted a picture at the top of the page comparing my project with and without the OttLite. You can see what a huge difference it makes!


 1
Watercolor Art »
Watercolor Paints Made From Make Up
1
Watercolor Art »
Watercolor Paints Made From Make Up
