


About
Make a wall pocket
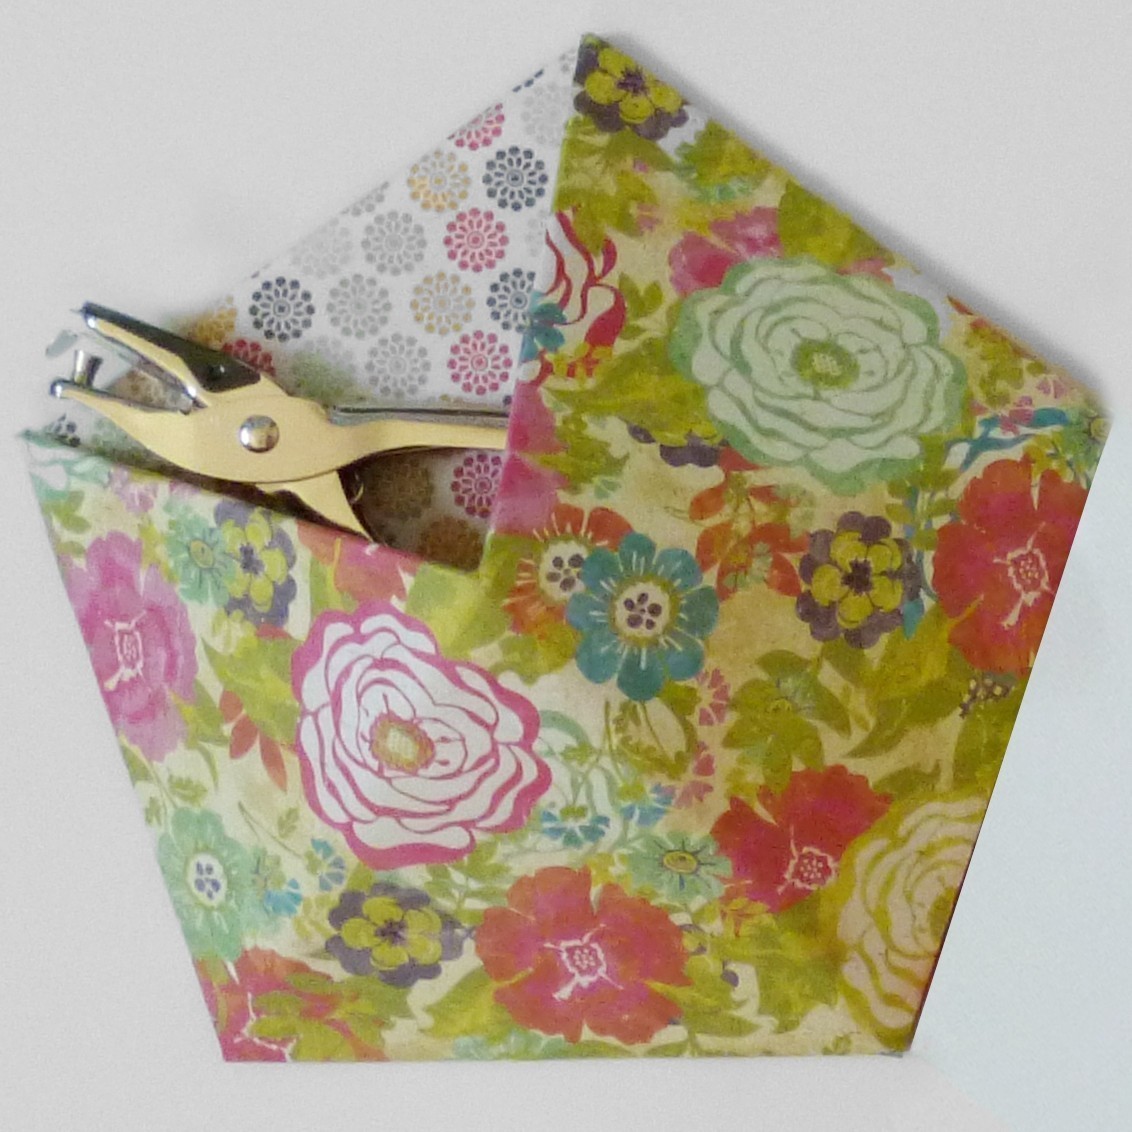
While I'm hardly the greenest gal around I try to do my best. Turn cardboard slated for the trash into treasure. This easy DIY will help you to have fun, stylish and personalized wall pockets to help with your organizational needs!
Downloads
- HoneycombPattern.pdf 137 KB [ Download ]
-
 Rebecca C. favorited Modular Cardboard Wall Pockets
29 Jul 06:40
Rebecca C. favorited Modular Cardboard Wall Pockets
29 Jul 06:40
-
Karina R. favorited Modular Cardboard Wall Pockets
28 Jun 08:41
-
 Coyote added Modular Cardboard Wall Pockets to To-make list
13 Jun 04:27
Coyote added Modular Cardboard Wall Pockets to To-make list
13 Jun 04:27
-
 Jac D. favorited Modular Cardboard Wall Pockets
01 Jun 01:33
Jac D. favorited Modular Cardboard Wall Pockets
01 Jun 01:33
-
 Rebecca M. favorited Modular Cardboard Wall Pockets
22 Apr 00:04
Rebecca M. favorited Modular Cardboard Wall Pockets
22 Apr 00:04
-
 shahaf.ben added Modular Cardboard Wall Pockets to room
17 Apr 10:06
shahaf.ben added Modular Cardboard Wall Pockets to room
17 Apr 10:06
-
Maxine M. added Modular Cardboard Wall Pockets to To-make list
06 Apr 06:16
-
C G. favorited Modular Cardboard Wall Pockets
23 Mar 01:06
-
 isobel.l favorited Modular Cardboard Wall Pockets
10 Feb 20:06
isobel.l favorited Modular Cardboard Wall Pockets
10 Feb 20:06
-
 Lee Rose added Modular Cardboard Wall Pockets to useful
07 Feb 22:50
Lee Rose added Modular Cardboard Wall Pockets to useful
07 Feb 22:50
-
 Step 1
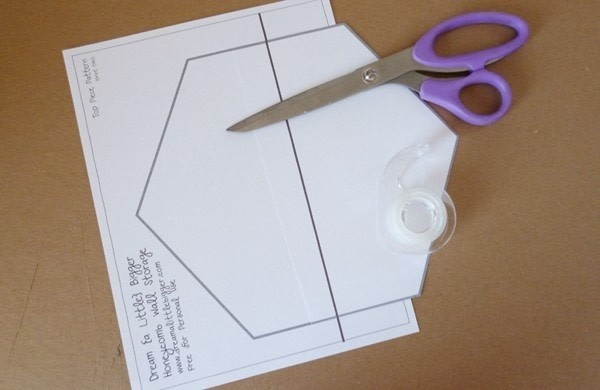
Print off your patterns and get ready to cut out your top and bottom shapes. The top is a hexagon and the bottom is a pentagon. It seems hinky but it works out in the end.
-
 Step 2
Cut out one side and align with the center line on the other side. Use tape to affix and finish cutting out.
-
 Step 3
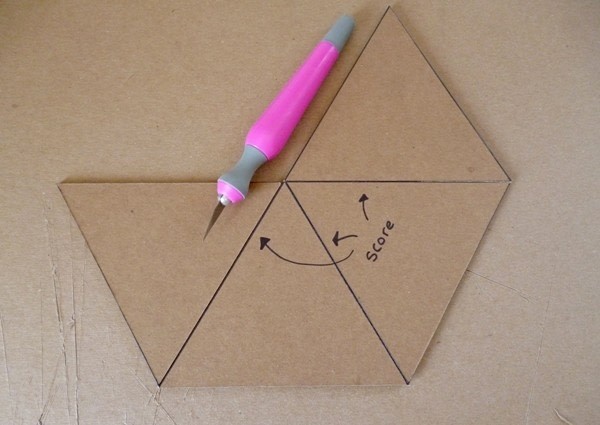
Trace the bottom and top shapes onto your cardboard. Use a ruler to draw a straight line across the hexagon shape from corner to corner like above. The end shape we are looking for isn't exactly a hexagon like our pattern - so you'll need to cut your shape MINUS two of the triangles side by side - like in the image above.
-
 Step 4
After you get your shape cut out, score the remaining lines so that you'll be able to bend the cardboard. Since mine was so heavy duty, I had to score about halfway through but you may not need to go that far - score a bit and see if you get the bend you need for a clean line. If not, score a bit deeper.
Cut out your bottom, or pentagon shape, just as it is.
-
 Step 5
ext you'll be covering your pentagon shape with one of your pieces of scrapbook paper. Use spray adhesive to cover one side of the cardboard. Allow a second or so to get tacky and then place your paper on top and smooth out. Turn over and cut a diagonal line from the edge of the paper to the corner of the pentagon.
-
 Step 6
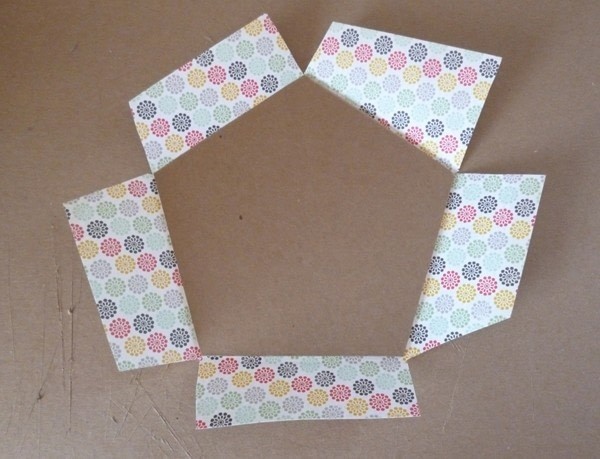
Fold each section in over the back and trim as necessary so that no flap is visible from the front side when folded over. Using your adhesive, spray a small amount on each flap, fold in and allow to dry.
-
 Step 7
Now we're going to attach our front piece to our super pretty back piece. Take your front piece and get it folded in like in the picture. Notice that it makes a pentagon shape. Pretty cool, huh?
-
 Step 8
Go ahead and place your top piece on the bottom. Take a look and see where it will be attached and get ready to glue! You'll notice that the edges don't sit on top of the pentagon, but rather immediately beside the edges.
Place a thin line of hot glue on the edge of one side of the bottom piece.
-
 Step 9
Situate your top piece quickly. Hold and allow the glue to set. Repeat for the remaining sides. Go behind and fill in any holes or gaps with your hot glue like you would caulk something.
-
 Step 10
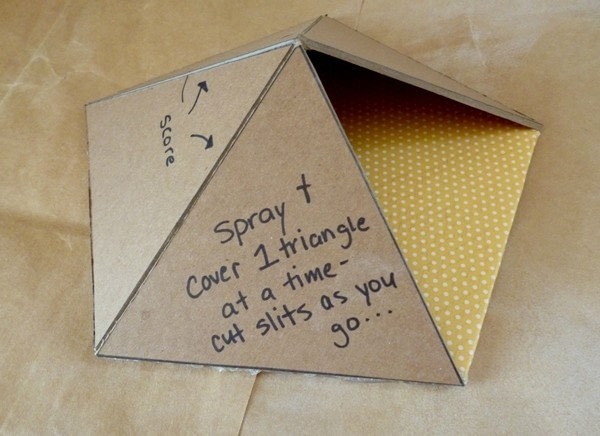
Now that everything is attached, it's time to make your top portion as pretty as the back! (p.s. protect the inside with some wadded up paper) Using your spray adhesive, cover one triangle and allow to get tacky. Place your paper on top and smooth down. Cut a slit from the edge of the paper to the corner of that triangle. Repeat for each triangle of the front.
-
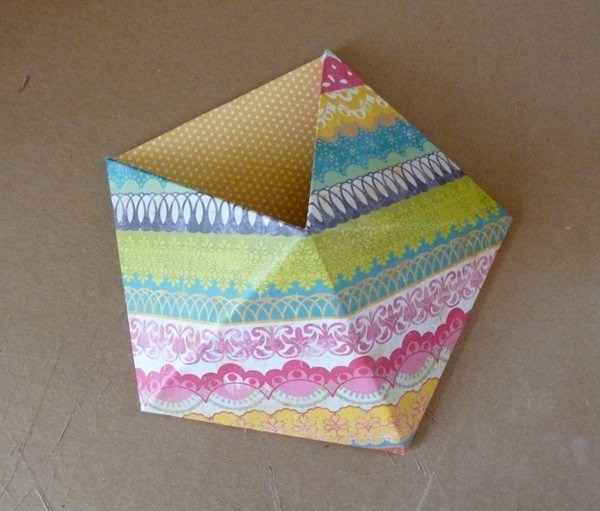
 Step 11
When the front is covered completely and has had a bit of time to dry, flip it over and trim up each section of the flap so as not to overlap the front of the shape.
-
 Step 12
Turn over and trim up the paper that is overlapping the opening. Fold into the mod a couple of times and trim as necessary to make sure you get a nice, clean fit. Spray with adhesive and affix permanently.


Versions


Comments


