

About
An awesome tool used for so many projects!
This technique can be used for many different projects. For example closings closures for earings and many more. This technique helped me accomplish many projects. Therefore I wanted to share it with you! It takes some practice to get better so keep trying!
-
 Key West Witch added How To Wire Wrap to Jewelry Know-how
30 Jun 12:47
Key West Witch added How To Wire Wrap to Jewelry Know-how
30 Jun 12:47
-
Key West Witch added How To Wire Wrap to Jewelry
19 Mar 15:27
-
 Chelsea R. favorited How To Wire Wrap
20 Jan 11:29
Chelsea R. favorited How To Wire Wrap
20 Jan 11:29
-
 Sarah Sylvia S. favorited How To Wire Wrap
25 Jul 04:22
Sarah Sylvia S. favorited How To Wire Wrap
25 Jul 04:22
-
 opal.hartman.7 favorited How To Wire Wrap
12 Mar 04:07
opal.hartman.7 favorited How To Wire Wrap
12 Mar 04:07
-
 Elentine added How To Wire Wrap to Jewellery
15 Jun 22:13
Elentine added How To Wire Wrap to Jewellery
15 Jun 22:13
-
 henkita favorited How To Wire Wrap
10 Sep 14:37
henkita favorited How To Wire Wrap
10 Sep 14:37
-
 belladonna favorited How To Wire Wrap
30 Aug 20:40
belladonna favorited How To Wire Wrap
30 Aug 20:40
-
Lee D. favorited How To Wire Wrap
06 Aug 01:13
You Will Need
-
 Step 1
First, take your wire and cut it about 2 inches. Use a flexible wire not too thin or too thick.
-
 Step 2
Then, bend your wire at a 100 degree angle. Not a complete 90. It makes a difference.
-
 Step 3
Next, take your rounded plyers or normal plyers and make an eyehole with the excess at a 90 degree angle.
-
 Step 4
Then, put the eyehole on the plyers and start wraping around the bottom, like so. I usually only wrap three to four times. Now, cut off the excess wire at the end and tuck it in with flat nose plyers.
-
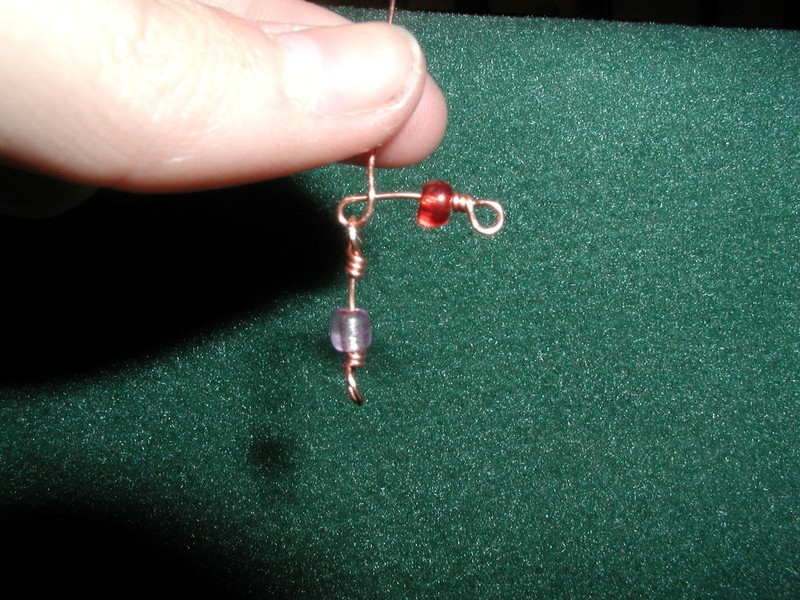
 Step 5
Just add your bead! It can be any type bead. Here i used seed beads. I like using long beads for earings. I used seed beads for bracelets.
-
 Step 6
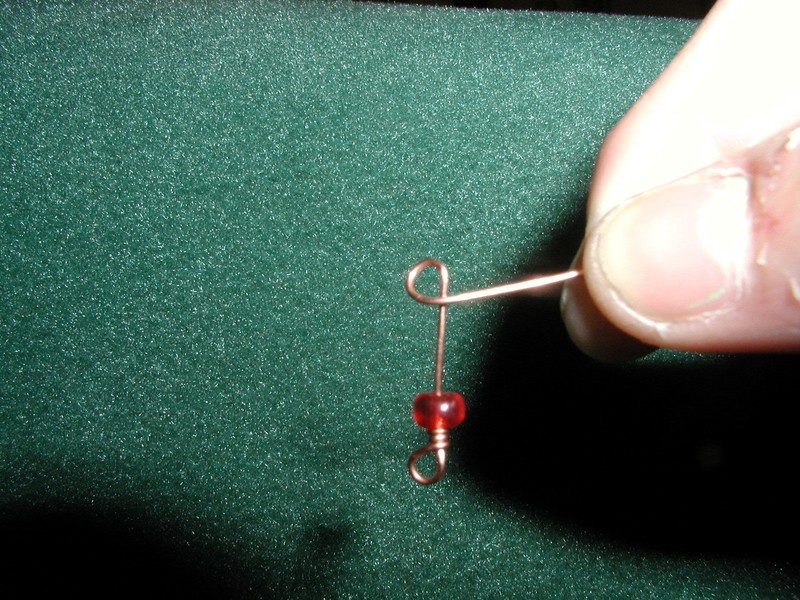
In this picture, I made the eyehole too high. You want to have it very close to the bead.
-
 Step 7
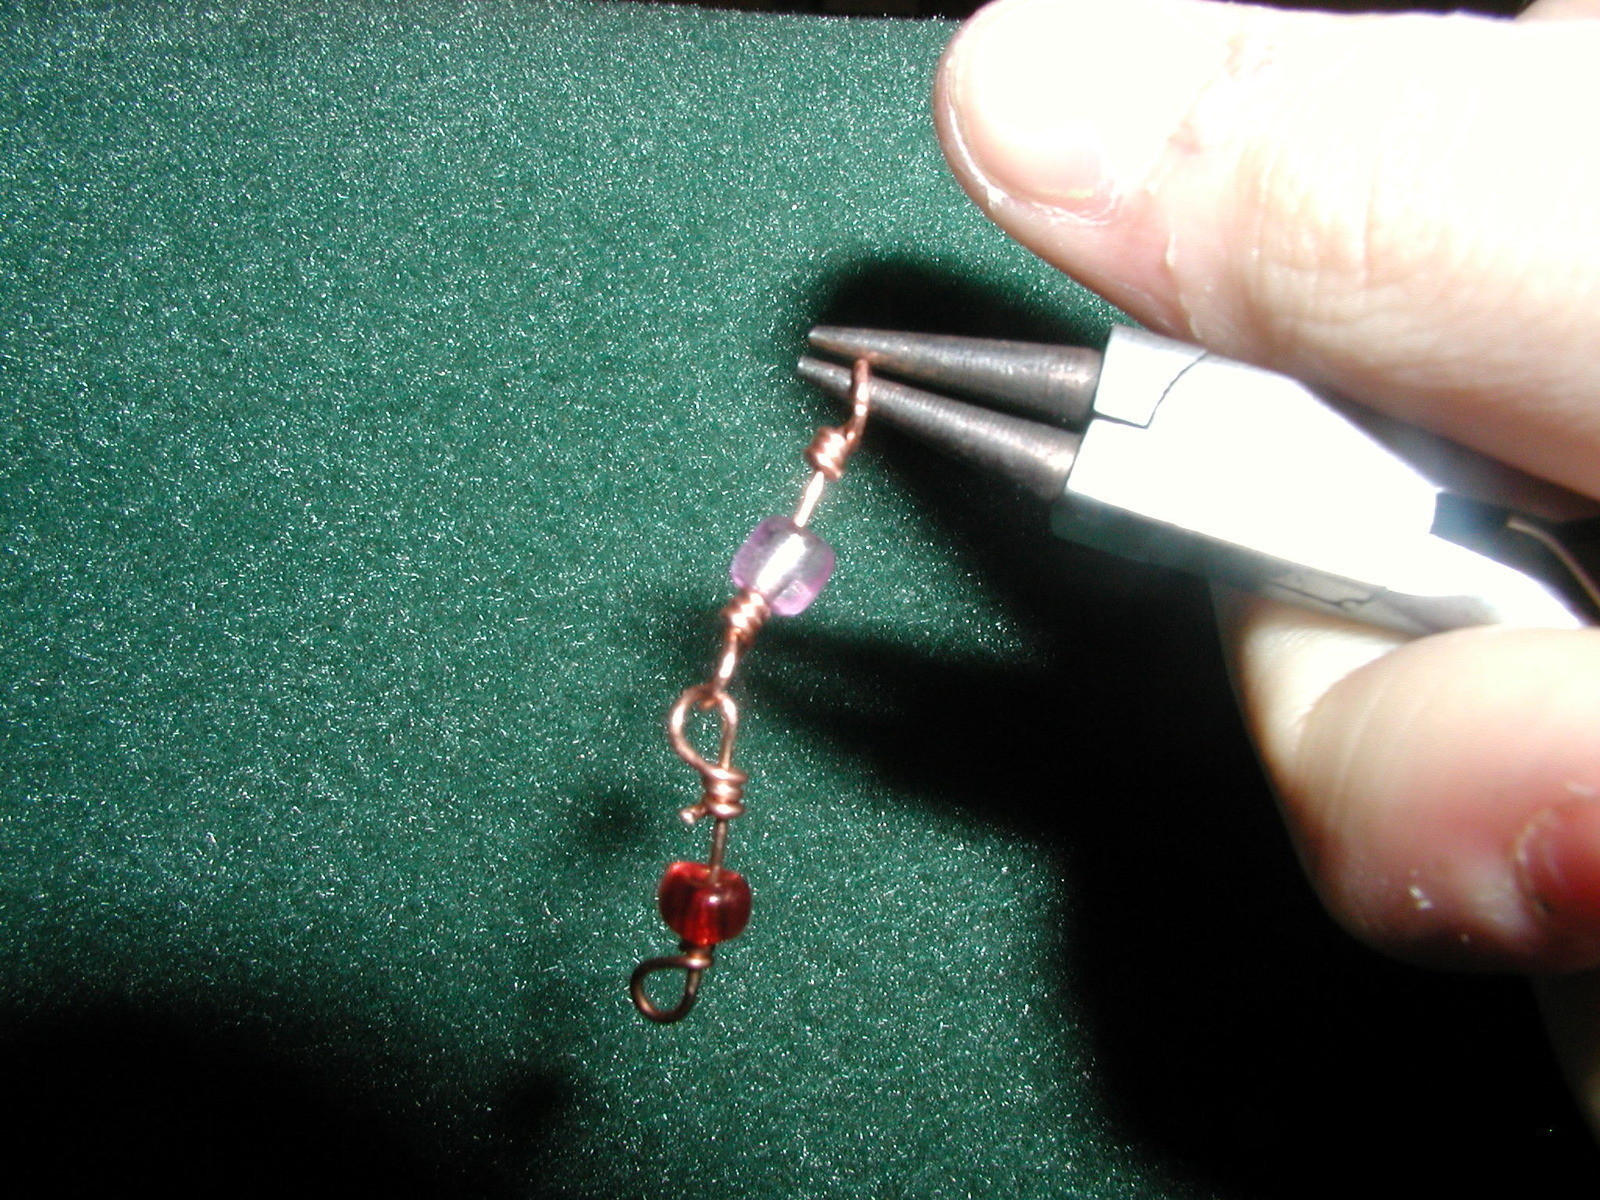
If you want to keep adding onto it look. Before you start wrapping it slip the next wire wrapped bead into the eyehole. Then, just start wraping like in step 4.
-
 Step 8
And viola! there you have wire wrapping. keep adding wire wraps to make a bracelet or earings.


Comments

