About
I don't take you through the full process here but this is probably th emore important of the many time-consuming steps it takes for me to make a doll's face.
Before I begin…
I am using a pattern that I am very used to and in particular, this facial construction tipset (I hesitate to call it a tutorial per se) works the best with a pattern that has two side pieces, one or two pieces for the face, and then you’re going to want to glue down some fiberfill or use a Q-tip (which is what I use) to shape the nose before placing a ‘skin cover’ over the constructed head. If anyone has any questions about my patterns or patterns in general/whatever, then just shoot me a message.
Tags
-
 The Bat entered her project Facial Construction 101 to Secret Santa
01 Jan 20:34
The Bat entered her project Facial Construction 101 to Secret Santa
01 Jan 20:34
-
 silentband favorited Facial Construction 101
15 Jun 06:41
silentband favorited Facial Construction 101
15 Jun 06:41
-
 KMEW favorited Facial Construction 101
06 Nov 04:04
KMEW favorited Facial Construction 101
06 Nov 04:04
-
 WerewolfCas favorited Facial Construction 101
16 Sep 10:15
WerewolfCas favorited Facial Construction 101
16 Sep 10:15
You Will Need
-
 Step 1
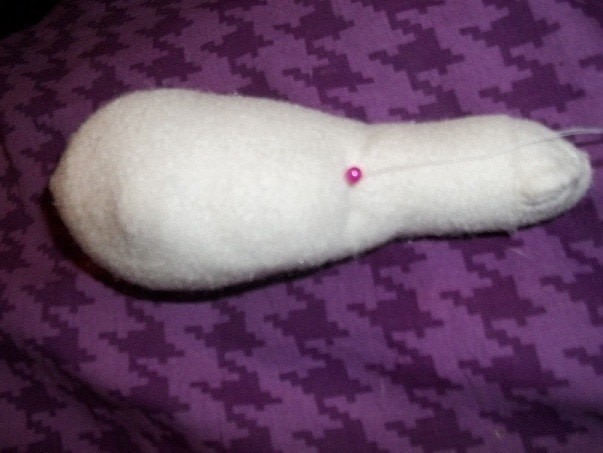
Take a good look at your head and measure out the anchor points. Your anchor points are going to be where you pull very tight on the string when you want to make dimples for where the features are. So when from here on out I say ‘make an anchor’ I am telling you to pull tightly and pass through maybe 2 times so that you create a nice indent.
I mapped out my anchor points on the picture so that way you can see all the places where I pull the ‘skin’ really tight to make a dimple to kind of shape the face. -
 Step 2
Make the chin. Do this by making your first anchor point at the bottom of the face where the pieces of the sides of the face meet the front pieces of the face under the skin cover. Just pass your needle and thread on through and tie it off, make a longer line for a squarer chin and a little dot for a feminine, pointed chin look.
-
 Step 3
Passing the needle UNDER the skin, make anchor points where the ears would be. Do this with the thread passing under the skin on both sides. After you’ve created the chin and two indents where the jawbone would meet the ears, then have the thread sit ON TOP of the skin fabric and pass the needle and thread to the chin’s anchor point. Do this on both sides so that way you have your basic face shape.
-
 Step 4
Once you’ve reached the anchor point at the ear, start from there and pass the thread UNDER the face skin to where you’ve mapped out your inner eye anchor (the PINK pins). Before you actually make that anchor, pass the needle through the nose to the other side under the skin to your second inner-eye anchor. This will draw the top of the nose tighter and help to shape the nose better when we get to it. Now make your inner-eye anchors.
-
 Step 5
Now that you have your inner-eye anchors, it’ll be easier to spot your outer-eye anchors. (The GREEN pins) If you don’t know how to measure this, just use the string and make a diagonal line from the tip of the nose and that should measure about right. Depending on the ethnicity of your doll, your outer-eye anchor may be higher or lower than your inner-eye anchor. In this case, this doll is a Japanese man so his outer-eye anchor is going to be slightly more raised than the inner-eye anchor.
After you make your anchor points, you can either leave it at that and skip to Step 6 and start the nose or you can make more anchors to further define the shape of the brow and eye, keep in mind that if you’ve pre-constructed the face in between the skin layer and the skin cover layer then you probably will only really need these two anchor points. -
 Step 6
After you make the eyes, pass the thread under the skin and go down to about midway between there your nose sticks out and your chin is, this will be the anchor point for the middle of the lips. After you create this point, make two more about an 8th of an inch apart and these will be the corners of your mouth. Now you can lay the thread over the skin to make the mouth line. Create a forth anchor point above where you want your upper lip to end.
-
 Step 7
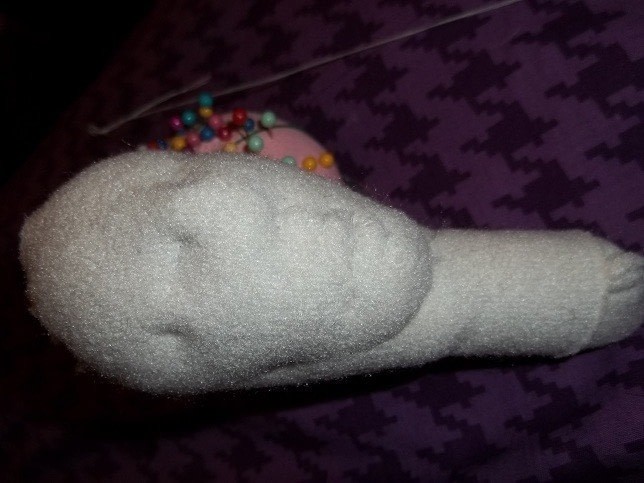
Finally, we get to the nose. All you have to do from here is just create an anchor point above the upper lip’s anchor point and rather than just going into the skin fabric, go right up the nose and come out where the top of your nostril would be. Do this again on the other side and you should have a decent looking nose with dimples where the cheeks connect.
All Finished!
I hope this helps people out a bit. I get a lot of questions on how I make my faces so I decided to write this up to kind of …. Sort of… try to… explain the process I go through. All in all.. this takes about a half hour to about 45 minutes to do.