


About
No one morns the Wicked...
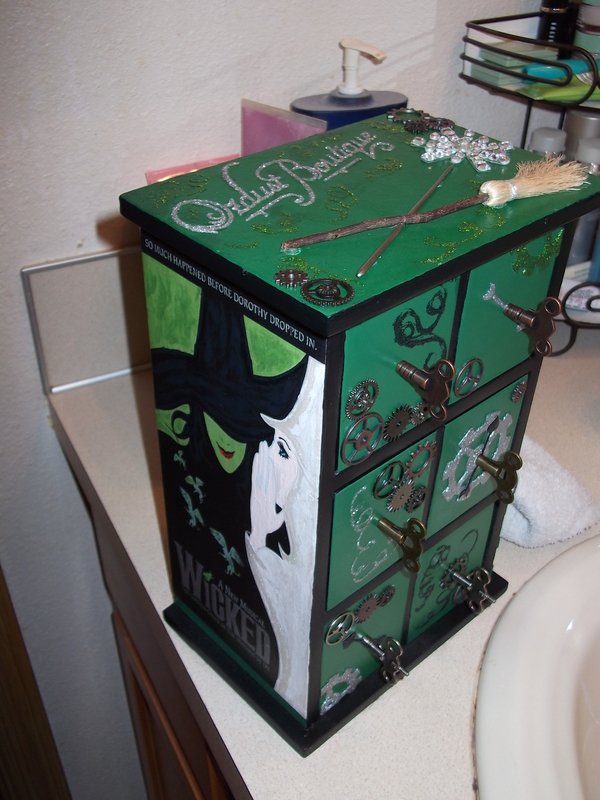
I've had this chest of drawers for months and couldn't figure out how I wanted to re-vamp them. I wanted to do something different with it, something outside my realm of bats, spiders and all things ooky spooky. I recently saw the Wicked musical and I had a stroke of inspiration. Clock gears and glitter and witch hats oh my!
-
 Rebecca M. favorited Wicked Jewelry Box
15 Jun 03:26
Rebecca M. favorited Wicked Jewelry Box
15 Jun 03:26
-
 cornelia.featherstone favorited Wicked Jewelry Box
08 Jun 14:32
cornelia.featherstone favorited Wicked Jewelry Box
08 Jun 14:32
-
Barbara M. favorited Wicked Jewelry Box
07 Feb 01:33
-
 Kinhime Dragon favorited Wicked Jewelry Box
06 Dec 14:47
Kinhime Dragon favorited Wicked Jewelry Box
06 Dec 14:47
-
chelsea g. favorited Wicked Jewelry Box
24 Aug 07:31
-
 mmotse03 favorited Wicked Jewelry Box
08 Jun 20:23
mmotse03 favorited Wicked Jewelry Box
08 Jun 20:23
-
Evelyn S. favorited Wicked Jewelry Box
04 Jun 04:28
-
 Risa.Hanae (JapZilla) favorited Wicked Jewelry Box
06 Nov 04:10
Risa.Hanae (JapZilla) favorited Wicked Jewelry Box
06 Nov 04:10
-
aimee p. added Wicked Jewelry Box to upcoming projects
21 Sep 19:21
-
 Hotpinksunnies favorited Wicked Jewelry Box
10 Sep 05:02
Hotpinksunnies favorited Wicked Jewelry Box
10 Sep 05:02
You Will Need
-
 Step 1
I got this chest at the local thrift store. A boring white shelf base.
-
 Step 2
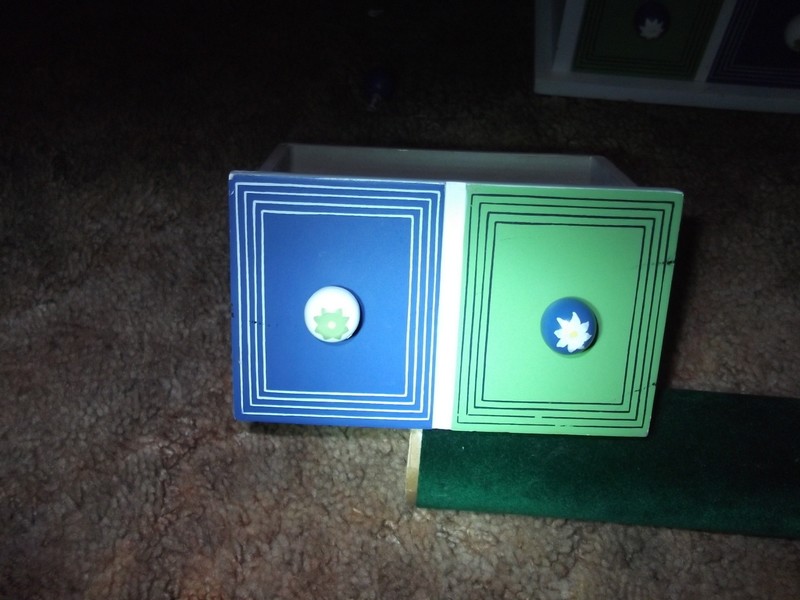
And boring blue green drawers.
-
 Step 3
First I had to remove the velvet drawer liner. I carefully pealed all five sides out without to much tearing. I'll need them later.
-
 Step 4
I used a paint scraper to scrape all the glue residue from the insides. After that, I sanded everything down to give me a nice clean base.
-
 Step 5
After making sure everything was sanded down, I got out the spray paint. First I taped up the bottom, which has a velvet liner on the base. I started out with the flat black.
Then I taped off the top, front, parts of the sides, and the inside spaces of the drawers with the painters tape.
-
Step 6
After taping everything, I sprayed the open areas with even coats of glossy Emerald green. I would have preferred to use flat paint instead of gloss, but I intended to go over with a matte spray to seal everything anyway.
I made sure to peel the tape off before the paint had fully dried. I didn't want to risk the tape pulling the paint fully off when it was completely dried.
-
 Step 7
After it's all dried, this is what I got. Loving it so far. I went and did a few paint touch ups where the green leeched under the paint tape or the black peeled up.
-
 Step 8
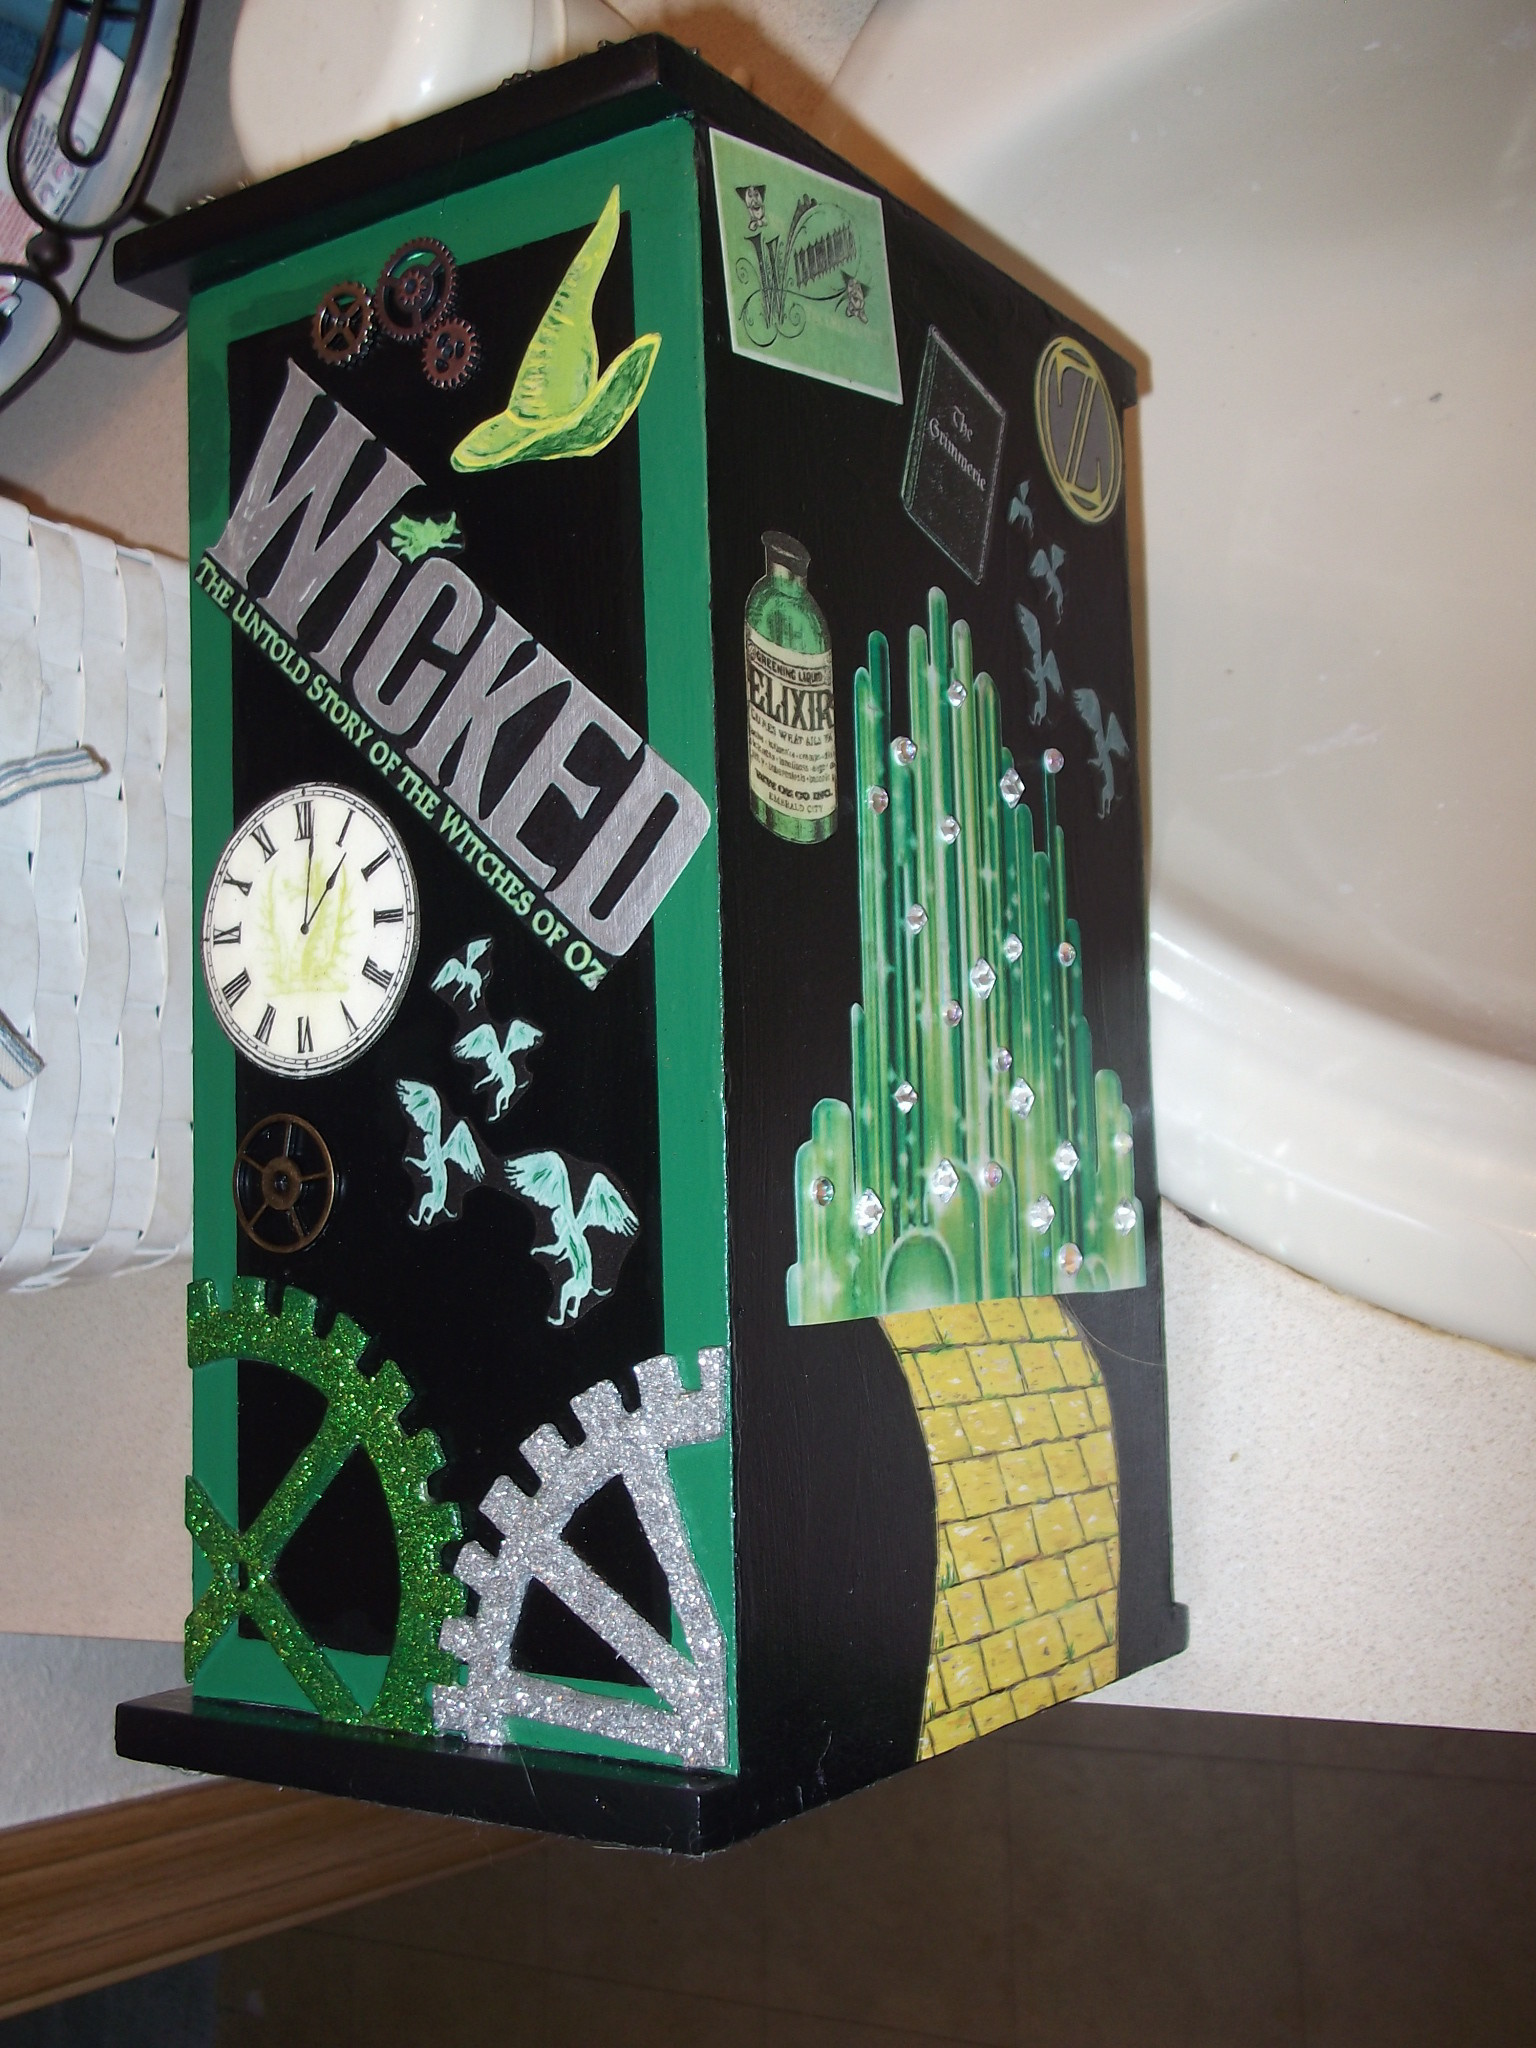
First set of photos to modge podge. I got these off the web. The 'Ozdust Boutique' I actually got off the Wicked Broadway musical web store. The online store is called the 'Ozdust Boutique'. I knew I needed to put that on the top.
-
 Step 9
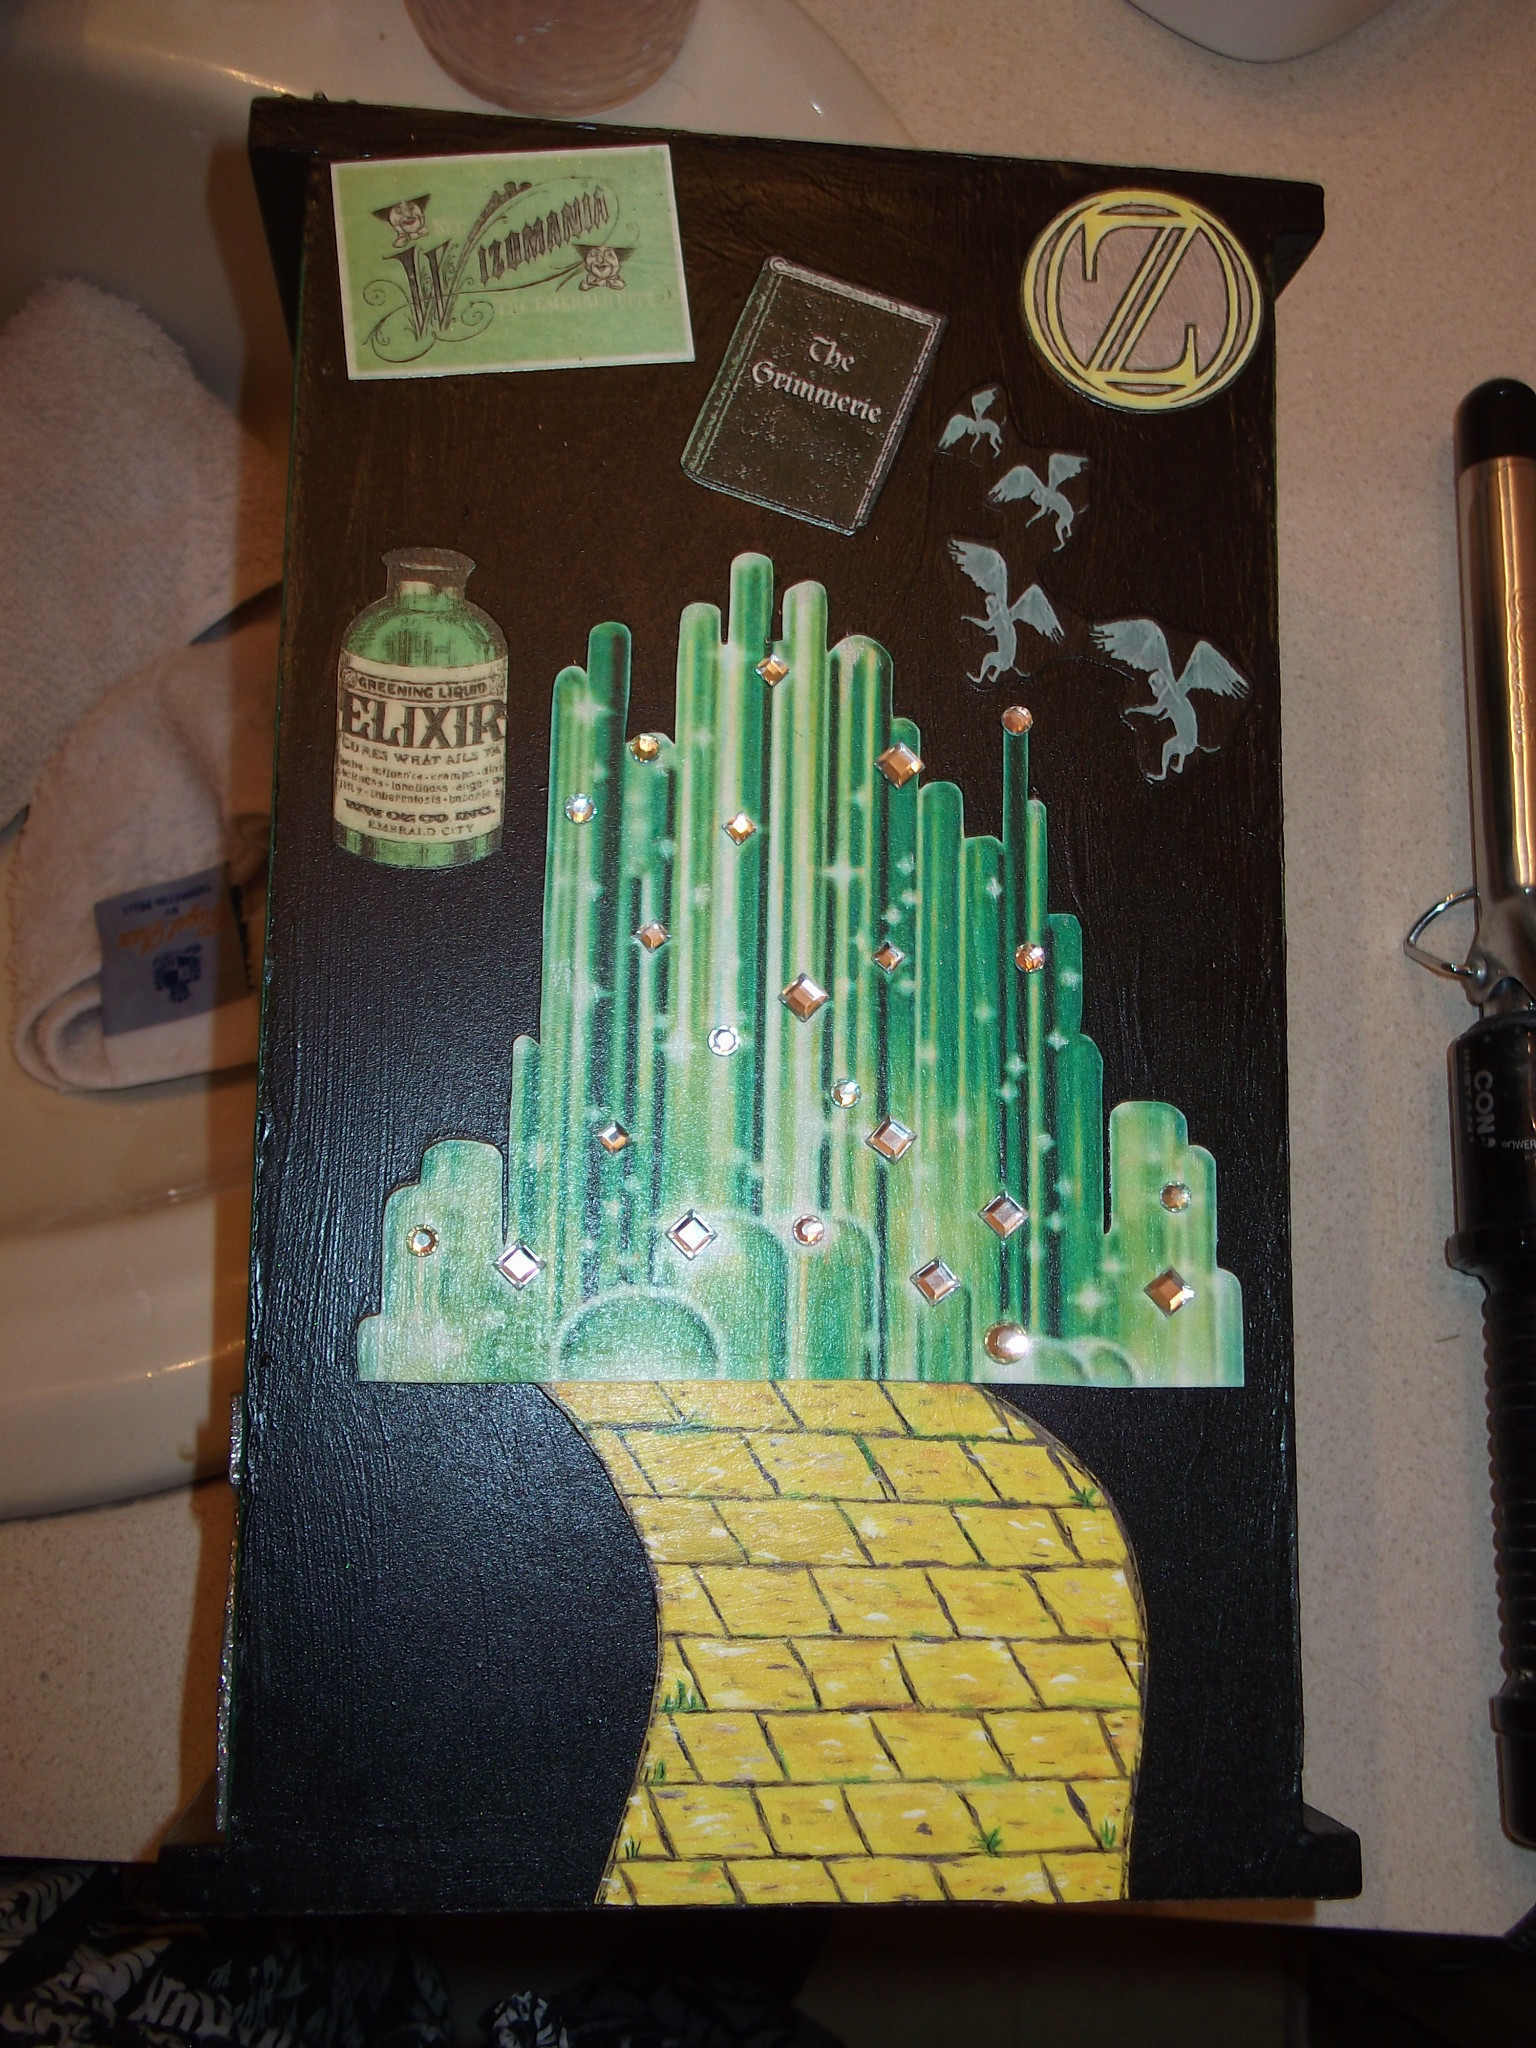
And the second set. I got most of these from the 'Wicked - The Grimmerie' book that I have. The Emerald City came from a 'Wizard of Oz' image. Now that the pictures are all printed out, time for sticking them down.
-
 Step 10
First I modge podge the poster down.
-
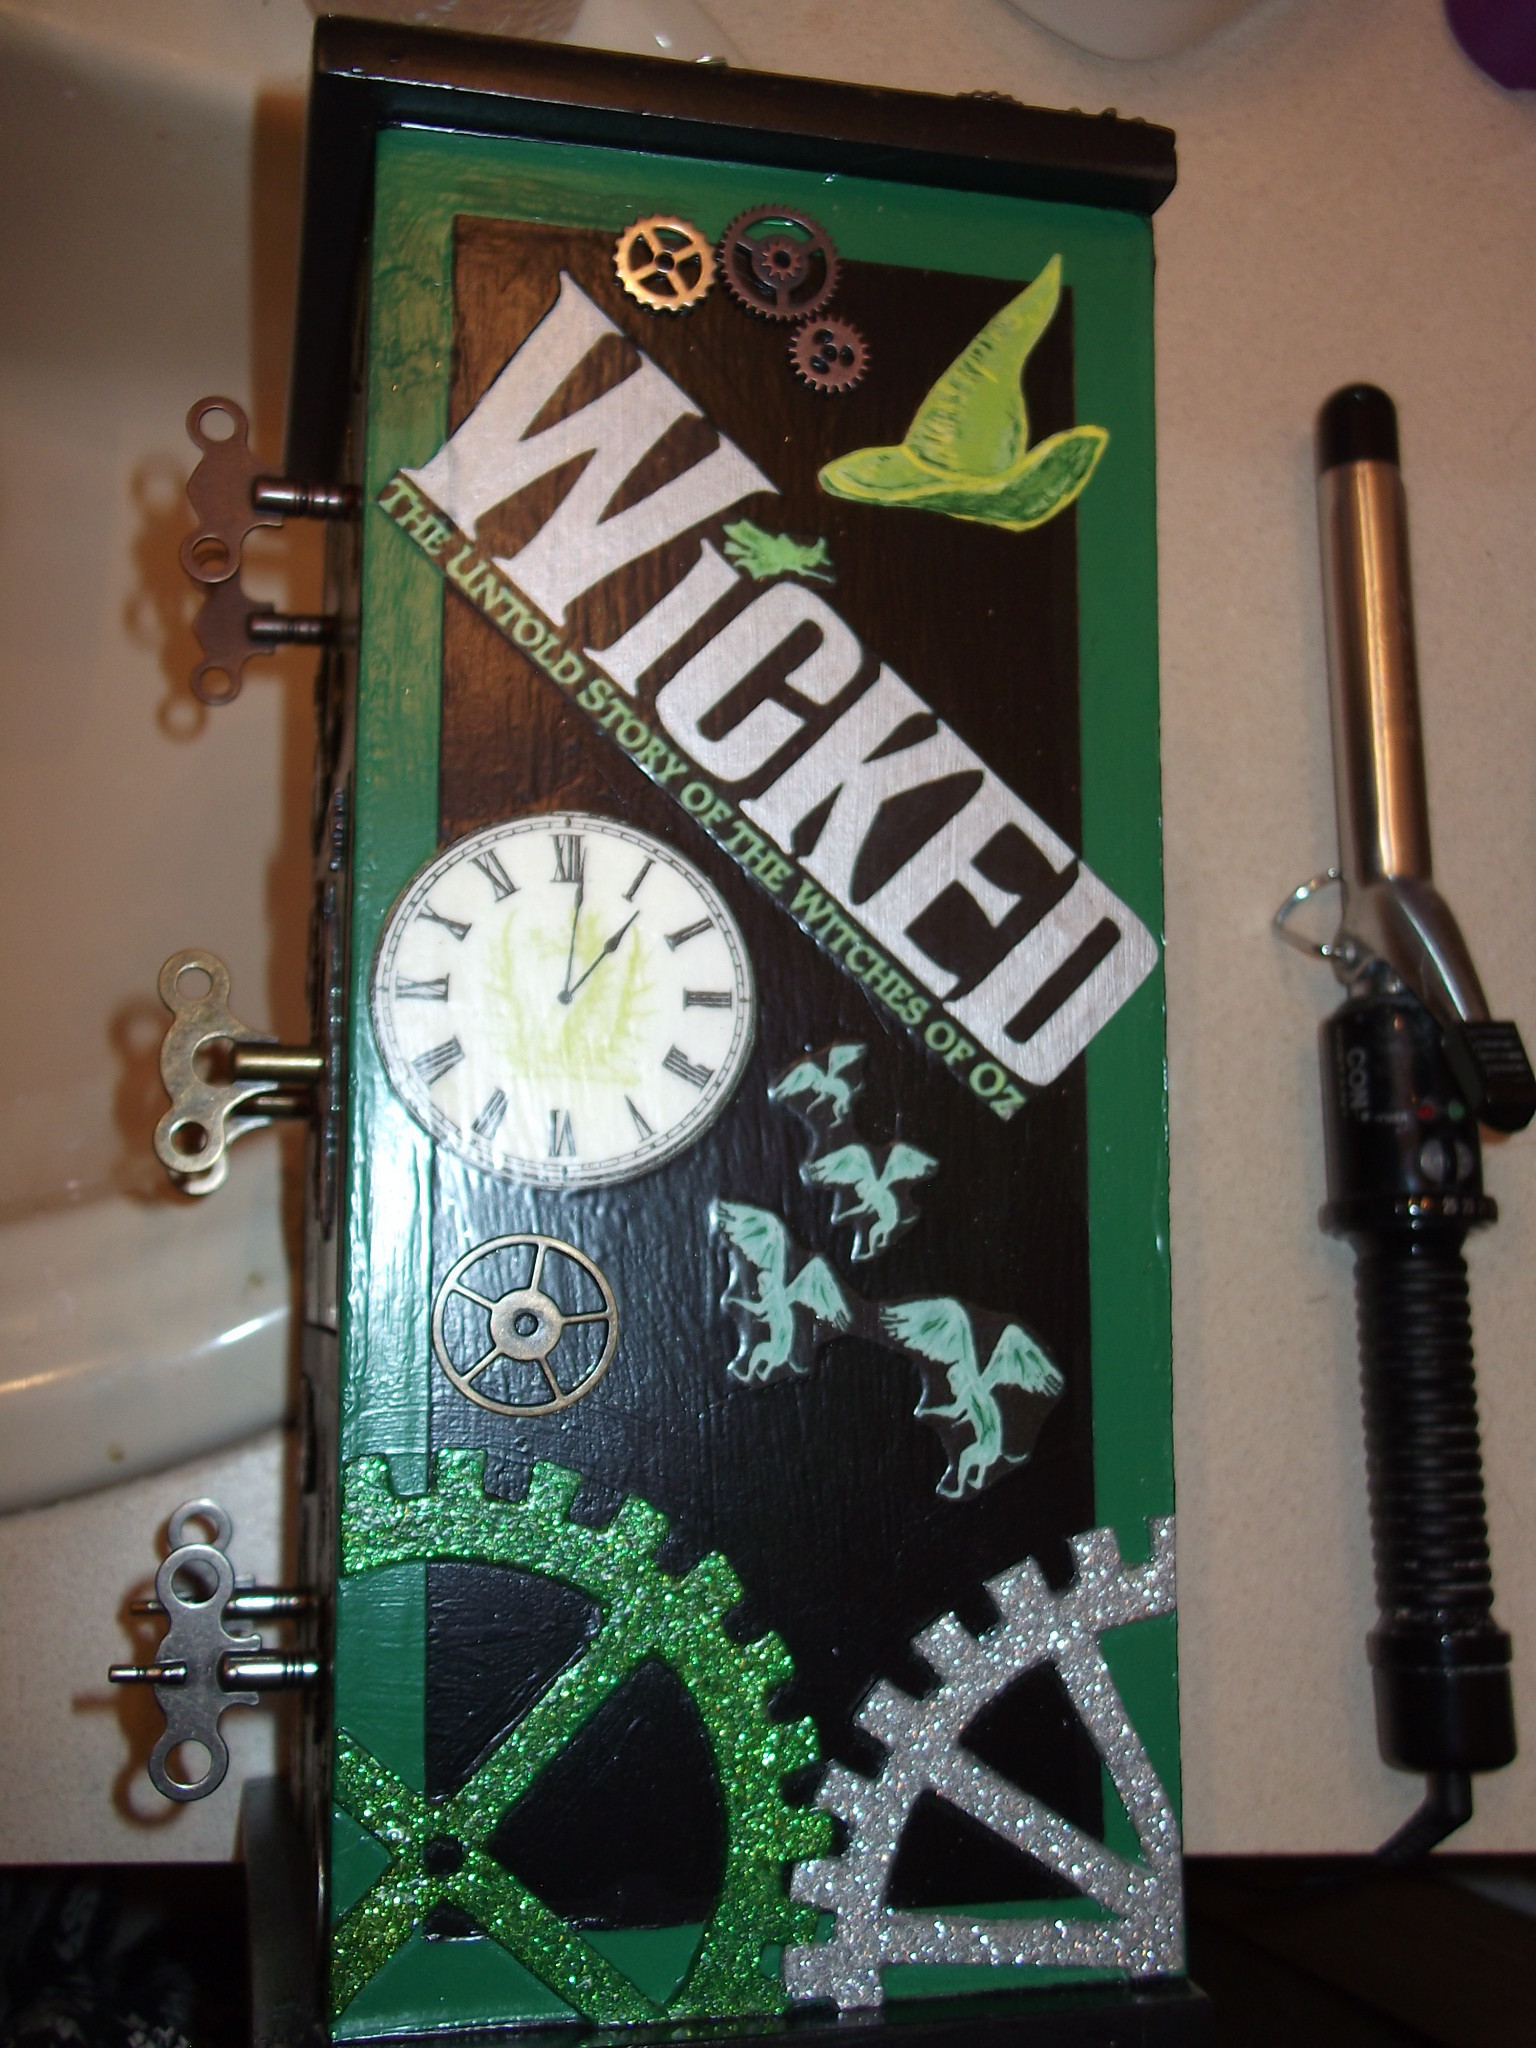
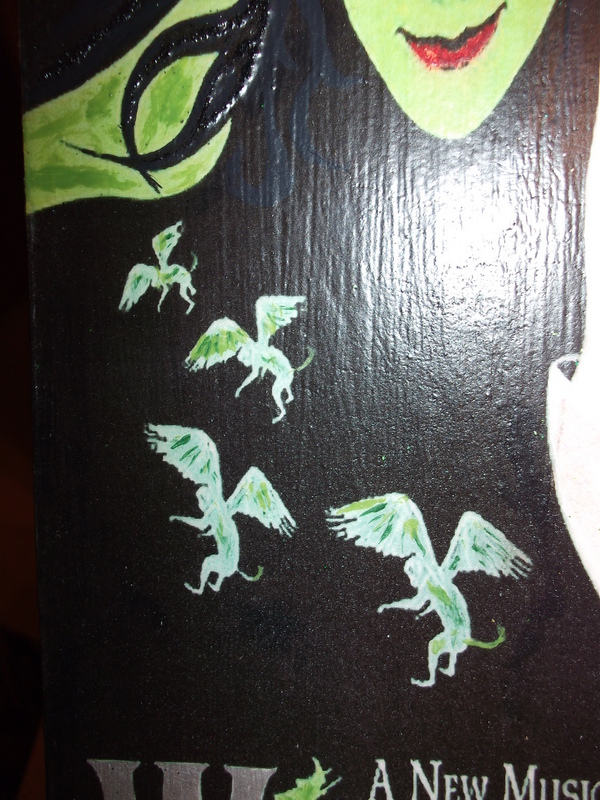
 Step 11
Then the Wicked logo goes down. I added the flying monkeys as an after thought. It looked a little empty, and the flying monkeys are a pretty big part.
-
 Step 12
The Oz Dust Boutique was a little harder. After cutting them out, I went over the words with some modge podge. The cut outs didn't come out very good. A woe of not having a very sharp exacto knife. But the silver glitter will hide the flaws.
-
 Step 13
And the back. I couldn't find a very good image of the yellow brick road. So I decided to just paint one. I realized after I glued it down that the point of view is wrong. But it's on the back that I mostly won't even see, so I'm not gonna fret over it. I might go back over it later and add "The Emerald City" over the road. Maybe add some poppy flowers.
-
 Step 14
For the wand, I started with a stick. I cut this one, and the one from my broom, off a tree in my yard. I first sanded it down till it was super soft and very thin. Then I painted it with some silver paint.
-
 Step 15
I drew out what I kinda wanted the basic shape of the wand to look like. Glinda's wand isn't very symmetrical, and I didn't want it to look to big compared to the broom.
-
 Step 16
I got a hard piece of clear plastic and taped it over my sketch. Using a pair of tweezers, I carefully peeled the rhinestones sticker backs off, and placed them on the plastic over the drawing. This took a long time and was very tedious. I mixed the square and circle stones up as I went.
-
 Step 17
After getting all the rhinestones put down, I made sure they were all even and that none of them were crooked looking. Then I took a pair of scissors and sniped out the plastic between the stones.
-
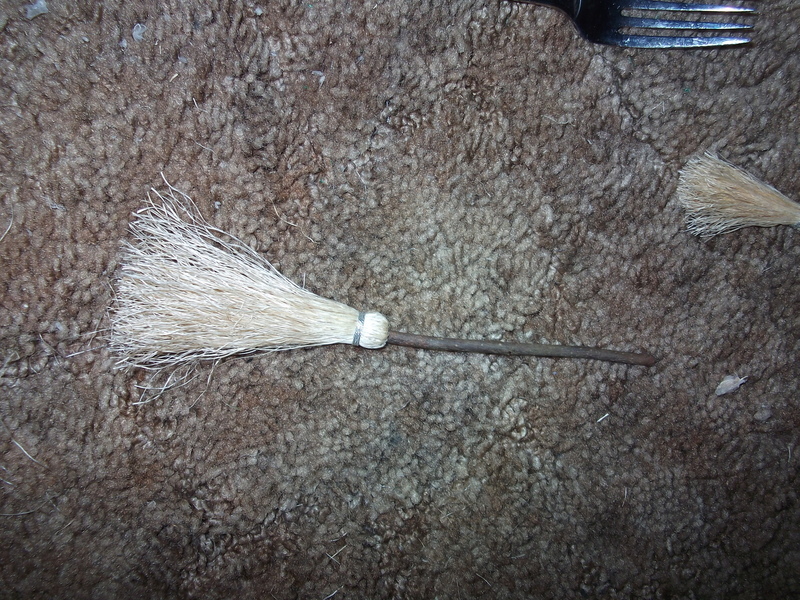
 Step 18
For the broom, I used a chunk of rope, some string, a stick, and glue.
-
 Step 19
I tied a ruined shoelace to the top of the rope and carefully uncoiled it. This gets a little messy. I used a fork to help untangle the twine.
-
 Step 20
After getting the rope uncoiled I soaked it in some hot water to soften the twine and loosen the kinks out. I let it soak for about 15 minutes.
-
 Step 21
After the rope stands were dried and straighten out, again using the fork, I separated the rope into four sections. Then holding the section in a flat line I put glue in a line at the top of the twine. I did this for all four sections.
-
 Step 22
I cut the tops of the twine lowest to the glue. I also cut some from the bottoms to help cut down on the tangles in the twine.
-
 Step 23
I shaved down the end of the stick so the build up of glue and twine wouldn't make the end look to bulky looking.
-
 Step 24
I then glue the first section down at the lowest point covering my stick. I added the other sections below the first all the way to the end of the stick.
-
 Step 25
Then I folded the strands over the end of the stick, where I first glued, and glued them down. It should look more like a broom now.
-
 Step 26
Then I tied a string around the top of the folded rope and glued it.
-
 Step 27
Then you just trim the ends of the rope threads, and you have a little broom.
-
 Step 28
For the Ozdust Boutique I went over the words in silver paint. Then I modge podge over that and added the silver glitter over it. It took several layers of glue and glitter to get the words fully and evenly coated. I added the green glitter swirls to cover some of the green paint touch ups that didn't color match.
-
 Step 29
It might be a little hard to see in the pic, but I went over the Wicked in silver paint. I added glitter to both witches hair, hats, and clothes. I also went in with paint to touch the colors up. Modge podge sometimes smears and muddies some colors up.
-
 Step 30
I added a bit to the monkeys wings on all sides of the box.
-
 Step 31
Wicked in silver and some added shadows and highlights to the hat.
-
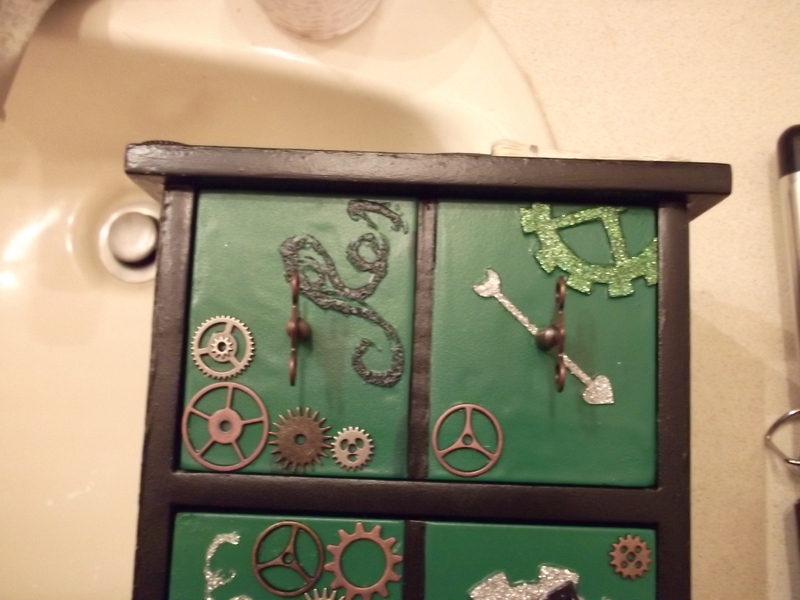
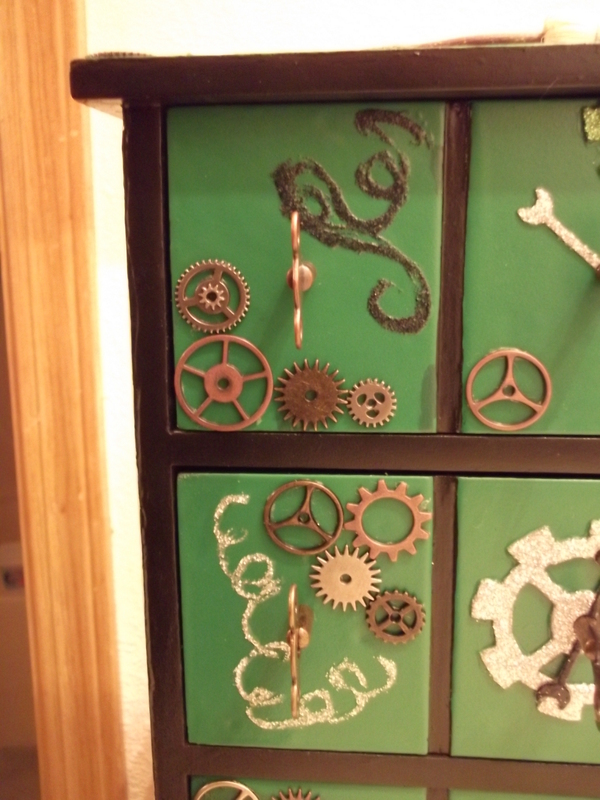
 Step 32
I then cut out two large gears out of cardboard and painted them green and silver. I modge podge them, then coated them in glitter, then added another coat of podge. Once dried, I glued them to the side of the box, then added a layer of podge to seal them down.
-
 Step 33
I did the same with the gears and clock hands for the drawers.
-
 Step 34
I then added some black and silver glitter swirls to the drawers to look somewhat like Glinda's bubbles, and the smoke from Elphaba's broom. The smoke is more from the Wizard of Oz when she writes out "Surrender Dorothy"
-
Step 35
Then I sprayed over the whole thing with a clear satin finish spray to seal over all the paint, glitter and glue. I left the broom, wand, metal gears, and the keys for after the spray sealer. I didn't want the spray to gum everything up.
-
 Step 36
I used some of the left over rhinestones on the Emerald City to add a little sparkle.
-
 Step 37
Then I glued down the wand and broom.
-
 Step 38
Then I glued down all the metal gears to the drawers, top, and side. The gears are from the Tim Holtz collection. It's a line of steam punk style scrap booking/craft supplies.
-
 Step 39
Then I added the clock keys for the drawer pulls. I had to get new screws for the keys, the ones they came with were too short. The keys are also from the Tim Holtz collection. I got them and the gears from Joann's.
-
 Step 40
Then I took the velvet liners I pealed out and traced them onto a sheet of paper. Then I labeled and cut them out.
-
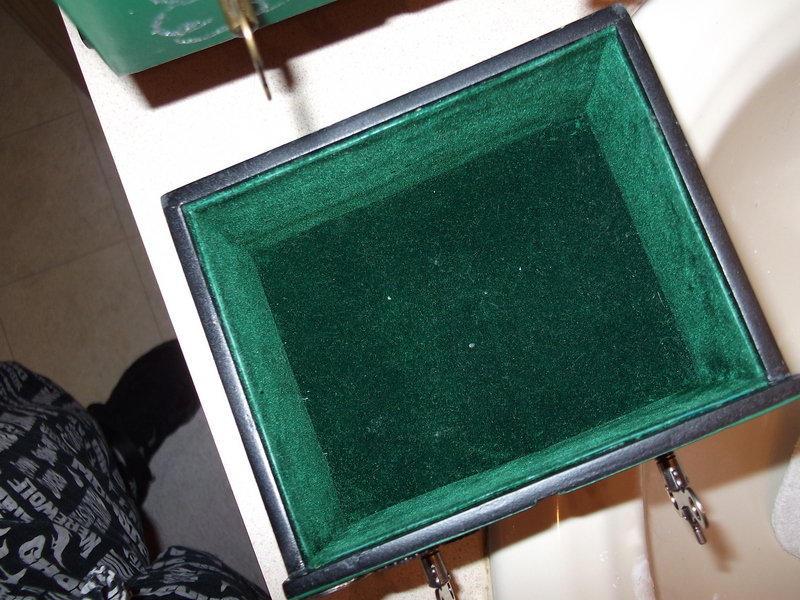
 Step 41
Then I traced the patterns onto this dark green velvet contact paper I had. I had to cut out five pieces for each drawer. 4 sides and a bottom piece.
-
 Step 42
After making sure all the drawer liner pieces fit, it's time to peel the stickers off and stick them down. If they were just a little too long, I tucked the longer edge behind the edge of another side.
-
 Step 43
And she's all done! I love it!


Comments

