About
3D Star
This star is perfect for Christmas or July 4th!
-
 Stella Luna favorited Star Ornament
11 Mar 15:16
Stella Luna favorited Star Ornament
11 Mar 15:16
-
 Rebecca M. favorited Star Ornament
13 Jun 20:55
Rebecca M. favorited Star Ornament
13 Jun 20:55
-
 jacoba b. favorited Star Ornament
10 Apr 22:46
jacoba b. favorited Star Ornament
10 Apr 22:46
-
 Hello Sweet Taco added Star Ornament to Wonder Woman
09 Mar 11:10
Hello Sweet Taco added Star Ornament to Wonder Woman
09 Mar 11:10
-
 Lori H. published her project Star Ornament
21 Mar 06:00
Lori H. published her project Star Ornament
21 Mar 06:00
You Will Need
-
 Step 1
I printed the stripe paper on 110lb paper double sided. I'll tell you why a bit later. To do the star - the way I made it - you will need two striped stars. One will be the back. You want the stripes to go horizontal across the star. Also, I think fat stars make the best 3D stars. Not really skinny points. You can use a die or draw them yourself. My star file is from Silhouette.
-
 Step 2
First you will need to score your stars. I marked my score board with a silver sharpie so it would be easy to line up a point with its corresponding intersection. Score all five points.
-
 Step 3
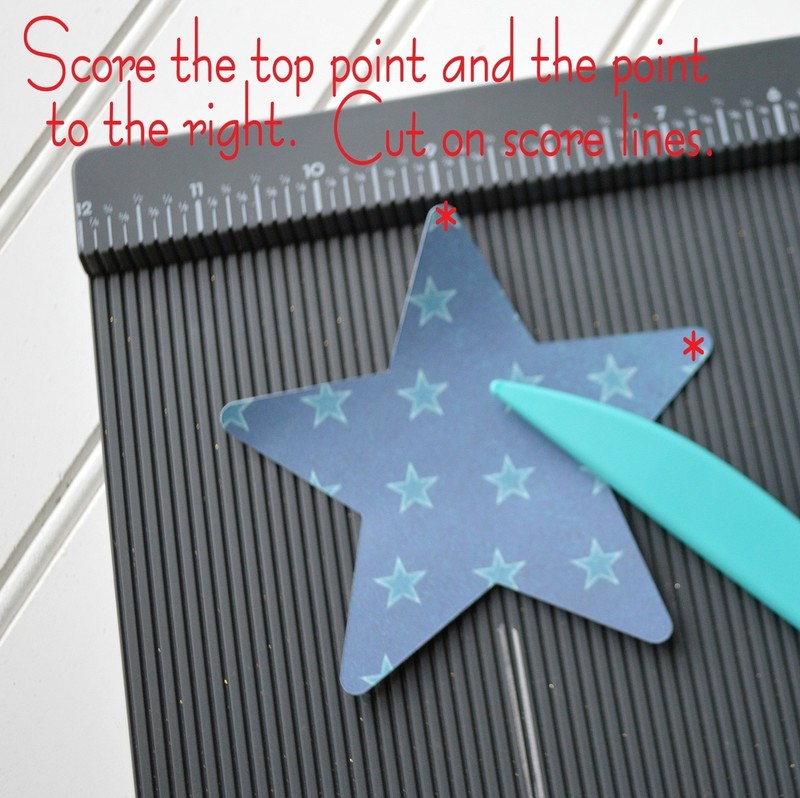
On the blue star, only score the points marked with an asterisk. Then cut the blue star on the vertical score line. See next instruction for the horizontal score line. You won't need this star unless your making a flag star.
-
 Step 4
When you cut the blue star, it will be slightly off. You just need to trim it so that you get a nice edge that lines up with a stripe. Each star may be slightly different depending on how the stripes fall. Glue blue piece on top of red striped star. You may want to score again the lines that run across the blue paper.
-
 Step 5
Now you are ready for the 3D effect: fold on all score lines. Isn't that cool?
-
 Step 6
For this star, score another striped star and slip it into the back of the first star. Don't glue it in. Punch the holes far enough from the edge, that you don't have to worry about pulling through them with the wire hanger. Then take the back out and set aside.
-
 Step 7
You could probably glue the sequins on, but with those tiny tiny seed beads, I thought the only way to go was to sew them on. So that's why you need a back - to cover the thread knots. Also, it makes the star nice and thick. I printed the star paper on both sides so that when I slip the back into the front there isn't any white showing. It is really hard to get the two stars folded exactly the same, so it really helps to have the stripes on the other side as well!
-
 Step 8
Once you've finished sewing on the sequins and beads, you are ready to add the hanger. The wire I used is 20 gauge. I added a bit of distress ink on the edges and scores. And glitter, of course! These make wonderful 4th of July decorations or you could clip them to a sack of sparklers or a treat.