


About
A darling little number!!
This is a darling little number. I can't wait for the weather to get warm enough for me to wear it.
It is inspired by vintage bed jackets. The bed jacket was popularized in 1930s Hollywood films featuring glamorous settings and glamorous stars lounging languorously in their silken bedrooms. Ostrich feather tips, swan’s down, pleated tulle and shirred lace were just a few examples of the extravagant materials that could be used in creating these confections.
-
 Ghost C. favorited Ruffle Cardi From Old Tee
22 Jan 21:30
Ghost C. favorited Ruffle Cardi From Old Tee
22 Jan 21:30
-
 cristinakilljoyway favorited Ruffle Cardi From Old Tee
03 Jan 15:33
cristinakilljoyway favorited Ruffle Cardi From Old Tee
03 Jan 15:33
-
comradebunny favorited Ruffle Cardi From Old Tee
17 Sep 00:42
-
arune e. favorited Ruffle Cardi From Old Tee
08 Jul 18:22
-
 Modesty Fashions entered her project Ruffle Cardi From Old Tee to Sweater Surgery Contest
21 Apr 16:44
Modesty Fashions entered her project Ruffle Cardi From Old Tee to Sweater Surgery Contest
21 Apr 16:44
-
 Step 1
Try the T-shirt on and mark the length of the cardigan. Be sure to use a t-shirt that has a good length on it. My shirt came down to my bum. (You will need at least 6 inches of fabric for the ruffles.) Another shirt or scrap fabric can be used if necessary. Remember the ruffles will add a little length onto the cardigan. Cut. Set aside
-
Step 2
Remove the collar of the shirt (forgot to take a picture of that step)
-
 Step 3
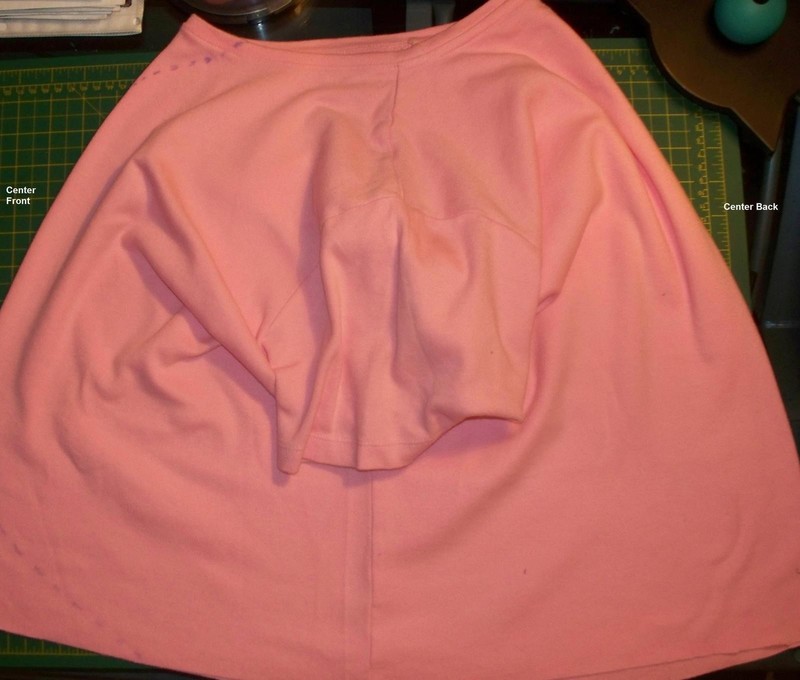
Put the side seams of your shirt together and lay it flat as illustrated. The left side of the picture is the center front of the shirt, the right side is the center back.
-
 Step 4
With a fabric pen, round off the bottom of the shirt so that the curve blends with the straight edge
-
 Step 5
Do the same with the top.
-
 Step 6
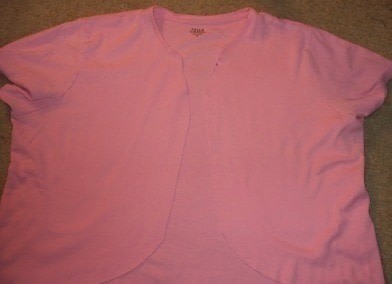
Lay the shirt completely flat and cut straight down the center front of the shirt. Your shirt(now a jacket) should look like the picture at the left. Clean up the front by rounding it off if needed and set it aside.
-
 Step 7
Grab the strip you cut off earlier...
Open or completely remove the hem from the bottom piece. Then, cut that piece in half length wise.
-
 Step 8
Sew the strips together end to end to form one long strip.
Sew a wide (baste) stitch down the entire strip. You want a little less than 1/4 seam allowance.
-
 Step 9
Pin the strip to the jacket right sides together. Gather it as you pin. Make sure you have equal ruffle distribution. (This part was a little tricky for me so take your time)
-
 Step 10
Sew the ruffles onto the jacket. (1/4" seam allowance)
-
 Step 11
When you are finished, you should have ruffles all the way around the jacket as illustrated to the left.
-
 Step 12
Press the seam allowance in toward the body of the jacket. Top stitch it down so the ruffles won't fold back.
-
 Step 13
It should look like this.
-
 Step 14
For the lettuced look:
Set your machine to a small zig zag stitch. Zig zag stitch around the edge of the ruffles. (As if your are serging it) As you stitch, pull the fabric toward you just enough to stretch the fabric. The more you pull, the more "lettucey" it will be.
Do this on the cuffs of the sleeves as well.
-
 Step 15
Hang up your cardigan, take pictures of it, post your version on the site, and think about all of the cute things you will wear this with when the weather warms up!
-
Step 16


Comments

