Recycled Drum Kit
Extract from Mini Makers • By Laura Minter and Tia Williams • Published by GMC Publications


About
Mini Makers
This drum kit is made from reused tins, tubs and lids and is a fantastic way to make something great from rubbish. Have a rummage through your recycling and select the pots, tins and lids that you’d like to use. Large tins for paint or formula milk are great for drums, and yogurt pots or soft cheese tubs add different tones to the kit. Give them a little tap with a chopstick to see what they sound like before shortlisting them for your kit! The drums are covered in masking tape, which is then removed to create a relief effect when painted.
Let’s play!
Playing a beat game with children is a good way for them to learn about rhythm and improve their memory. Tap out a simple beat on the drum kit for your child to copy. Start with only two taps and add another beat each time – see how many you can both get to. You could even add to the beat with a shake of a paper-plate tambourine.
Let’s make!
If your little ones love to make a noise, you could recycle an old cake tin and turn it into a marching drum. Clean and paint your tin and lid, then drill holes in either side. Attach a ribbon or cotton tape as a strap using a nut and bolt or rivets. Add dried pulses, lentils or rice into the tin and glue the lid on. You can either use chopsticks or pieces of dowel for the drumsticks.
-
 GMC Group published her project Recycled Drum Kit
05 Sep 09:00
GMC Group published her project Recycled Drum Kit
05 Sep 09:00
You Will Need
-
 Step 1
Be careful with sharp edges when opening and using the tins. You can sand these down with a metal file if necessary. Lay all the tins, tubs, pots and lids out to get an idea of how you might arrange them. Test the sound with a tap of a chopstick. For this kit, we’ve used:
1 x large paint tin
2 x small tins
1 x small tub
1 x large tub
1 x jam-jar lid
1 x larger plastic lid -
 Step 2
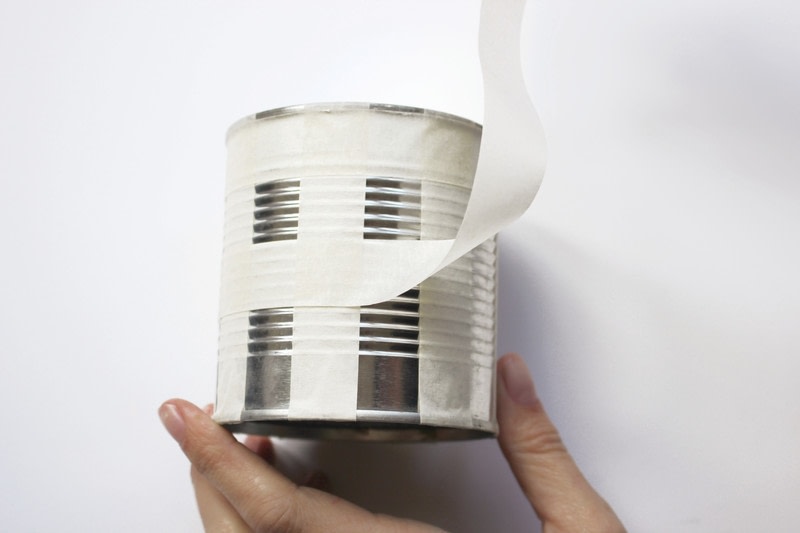
Put the small tins to one side then paint the large tin and both tubs white, and the lids silver. Spray paint is best for this as it will stick to the metal and plastic on the pots well. Leave them to dry completely. Next, create patterns on the drums using masking tape in any shape you like. Vertical strips of tape will make stripes, vertical and horizontal ones for squares or diagonal strips to create triangles.
-
 Step 3
Spray paint the tins different colours and leave to dry once more. Put the large tin open side up before spray painting so that the bottom doesn’t get any paint on it – this will become the skin of your drum. When they are dry, peel away the masking tape to reveal your pattern.
-
 Step 4
For the skins on the two smaller tins, cut a balloon in half across the width and discard the tube end. Stretch the balloons over the open side of the tin, then wrap a strip of decorative duct tape around the sides to secure.
-
 Step 5
To make the cymbal, use the silver jam-jar lid. Put a little decorative tape around the wide end of a chopstick and place it into a vice, tape side up. Use a hammer to carefully nail the lid onto the chopstick. If you don’t have a vice, you could also glue the chopstick to the end of the dowel using extra-strong glue. Bear in mind that it may not withstand as much bashing! Turn the larger tub upside down and pierce a hole with a pencil through the bottom, at the back, and insert the cymbal.
-
 Step 6
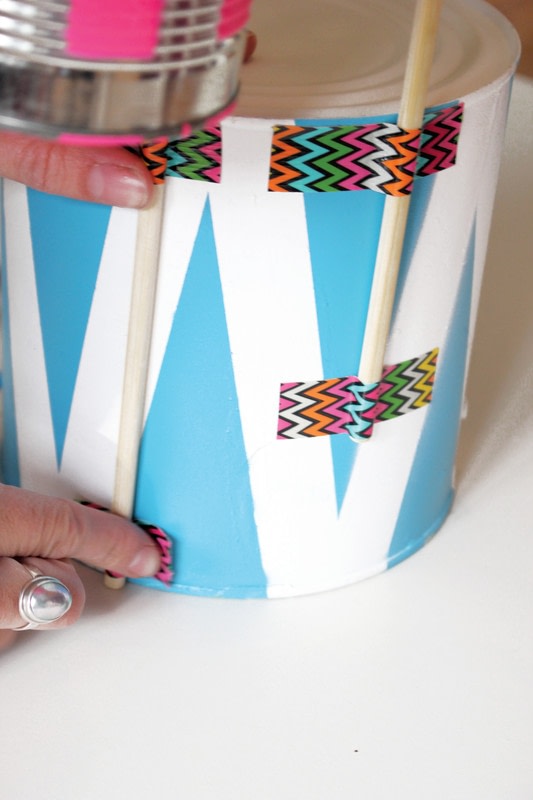
Place a chopstick onto the side of one of the smaller tins, with the wide end aligning with the bottom of the tin and tape in place. Repeat for the other tin.
-
 Step 7
Use more duct tape to attach the chopsticks onto the back of the larger tin so that one is slightly higher than the other.
-
 Step 8
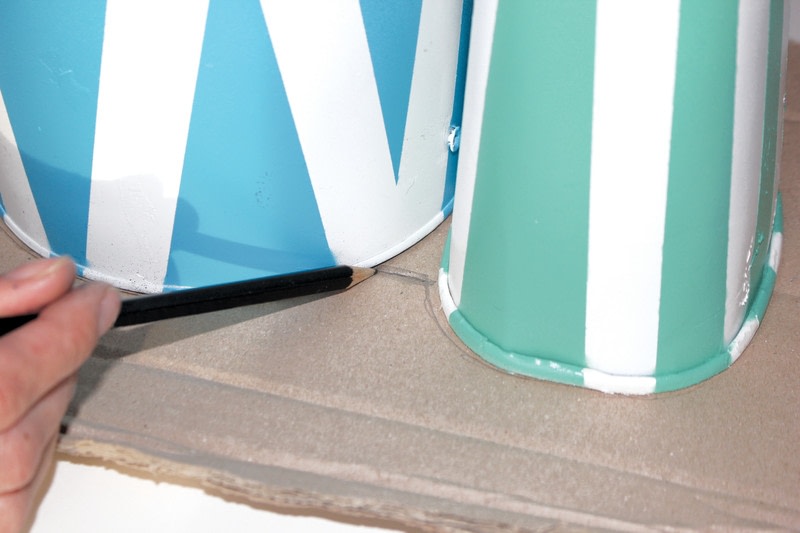
Arrange the drum kit on top of a piece of cardboard. Draw around the outline of the tins. Cut out the shape on the cardboard, paint it blue and use strong glue to stick the drum-kit pieces onto i
-
 Step 9
For the drumsticks, add decorative tape to the top of each remaining chopstick.