


About
inexpensive, eco-friendly favors and gifts
When it comes to treating your guests to something to remember your special day, why not consider something that will flourish and last long after the wedding? Assuming that no black thumbs are involved, that is! Take a peek at our eco-friendly, plantable wedding favors inspiration today – your guests will thank you.
Tags
-
 Harmonees.creations favorited Plantable Party Favors
10 Apr 20:09
Harmonees.creations favorited Plantable Party Favors
10 Apr 20:09
-
Harmonees.creations added Plantable Party Favors to Gardening Fun
10 Apr 20:09
-
 JadeSucksAtLife favorited Plantable Party Favors
20 Feb 07:12
JadeSucksAtLife favorited Plantable Party Favors
20 Feb 07:12
-
 Crafterella featured Plantable Party Favors
08 Feb 23:00
Crafterella featured Plantable Party Favors
08 Feb 23:00
-
 Jennifer P. favorited her project Plantable Party Favors
30 Jan 19:55
Jennifer P. favorited her project Plantable Party Favors
30 Jan 19:55
-
Jennifer P. published her project Plantable Party Favors
29 Jan 09:00
You Will Need
-
 Step 1
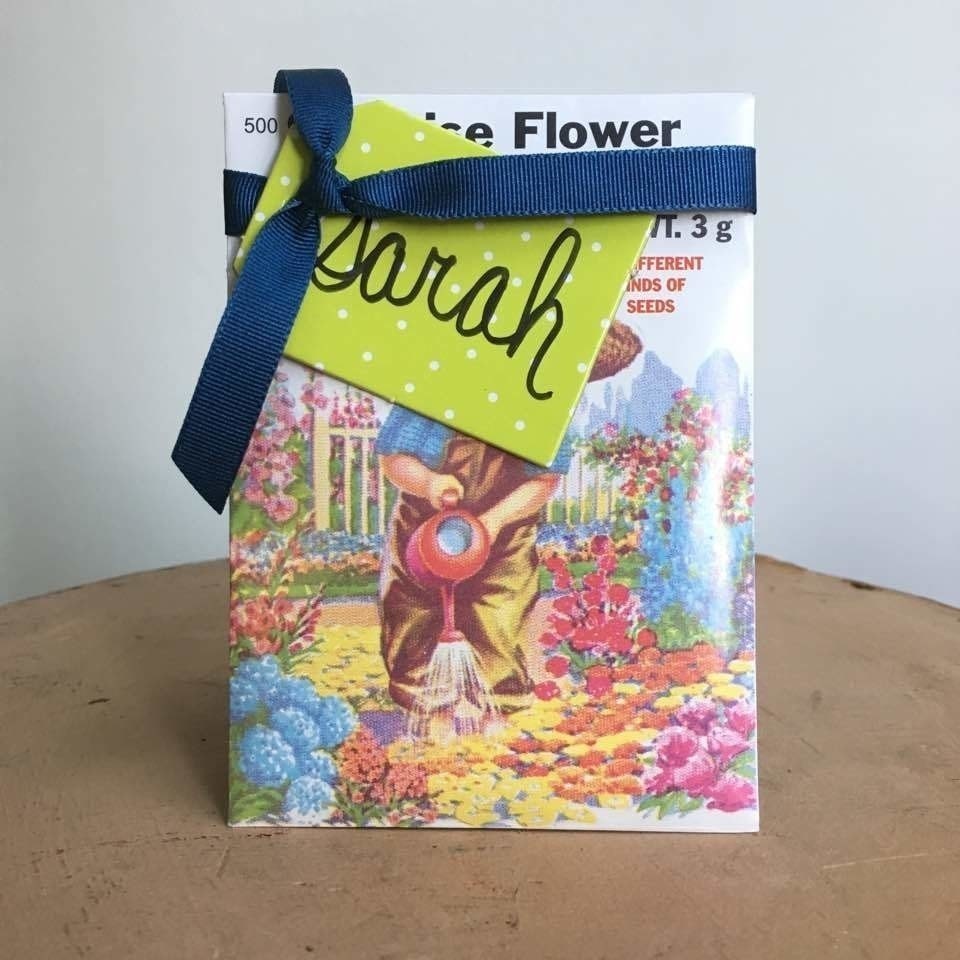
Like a play on words? Survey all of the seed packets to come up with something catchy. Here, I chose “Sweet Peas” and wrote “‘peas’ accept our ‘sweet’ thanks” along with the initials of the couple.
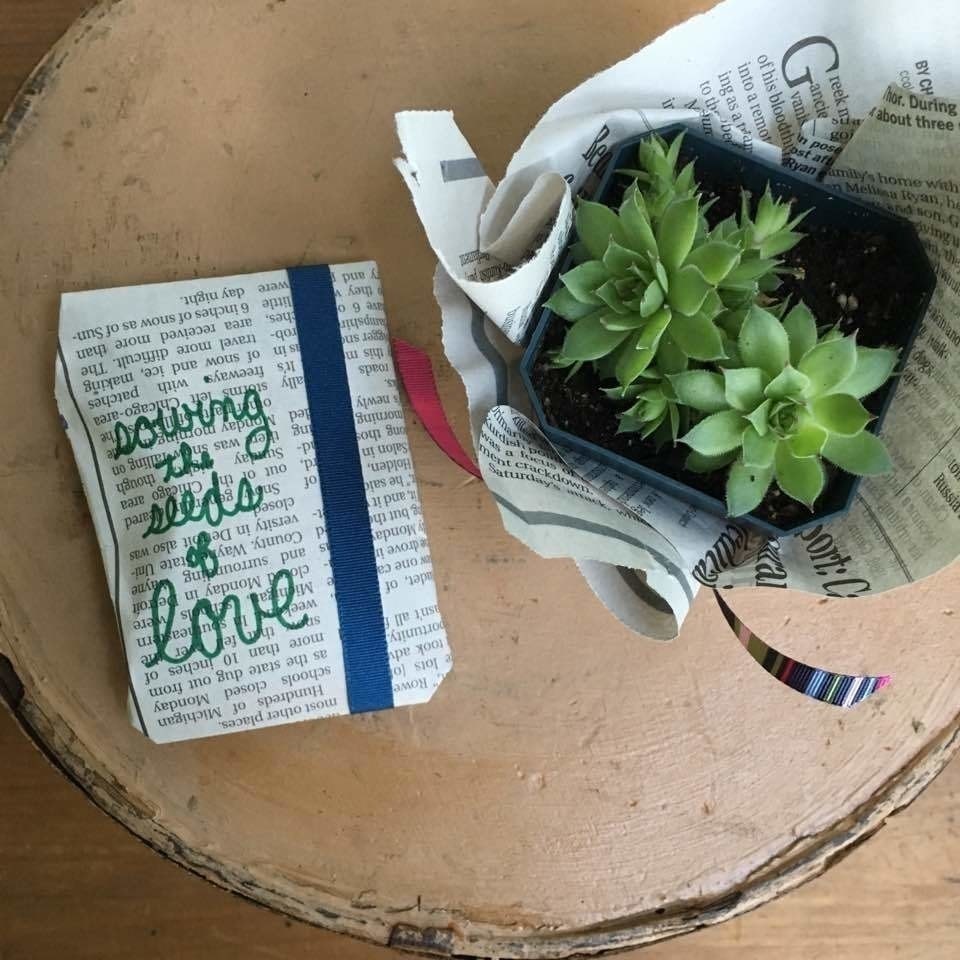
Our local store sells seeds that are store packaged. I wrapped the seed packet in newspaper, gave it a ribbon and put the sentiment “sowing the seeds of love” which is so cute.
Last – but not least – I adore it when something can do double duty. The seed packet has a sweet, vintage scene, and I utilized it as a place card by writing the guest’s name on it.
-
 Step 2
Again, you will see the seed packet name card.
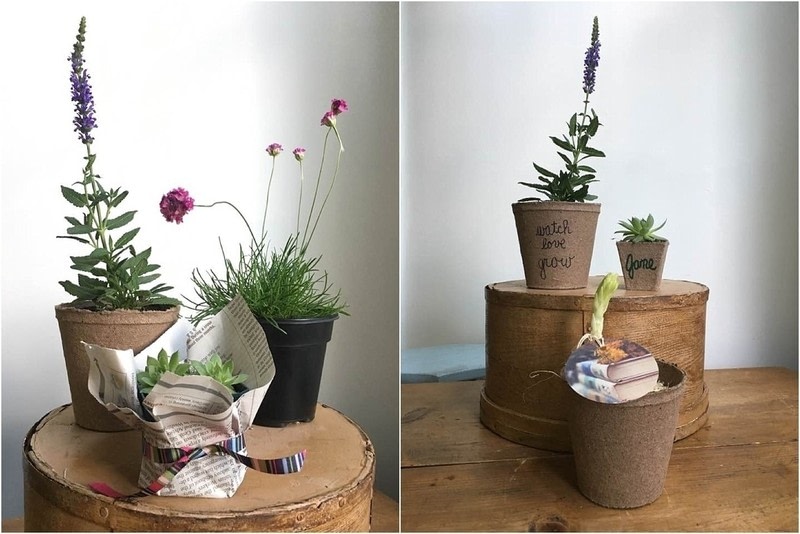
Succulents are also very en vogue, so why not use them as place cards also? I took this little guy out of his pot, and purchased tiny peat pots for a cost of under $2.00 each. Writing the name on with a steady hand before planting the succulent was easy peasy. Do NOT water the succulent afterwards or your text will run.
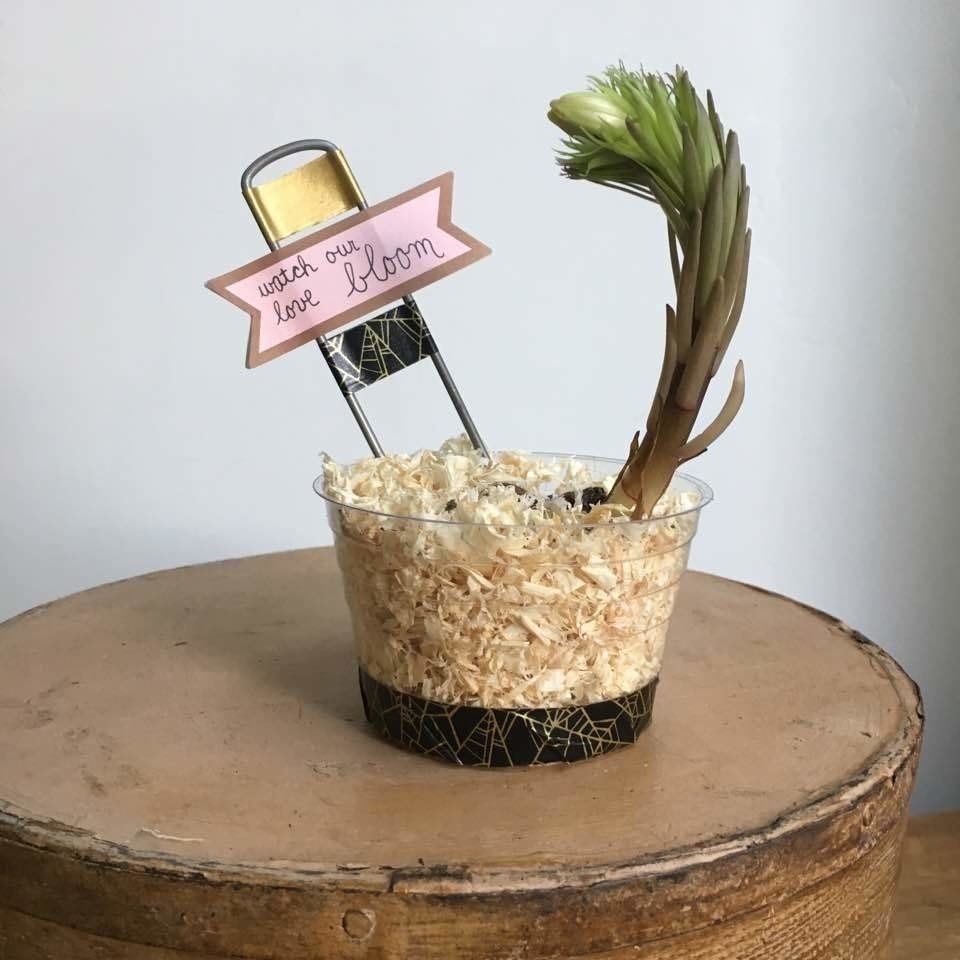
The ultimate plantable wedding favor just might be a bulb. I purchased a clear pot to stabilize everything. My stellar idea, truly, is the name tag. I was so proud of myself for this one. Ha! The metal stake is actually what you use to pin sod down into the ground, but I added washi tape and a fancy post it note (two so it was double sided) to use it as a place card. Love it! Oh, and the sawdust is what the bulb was resting in at the store, so I used that for decor also. This project was under $3.00.
-
 Step 3
Newspaper adds a cute element, so I left the succulent in it’s tiny pot from the store and surrounded it with newspaper and a ribbon.
I’m also slightly obsessed with the look of these peat pots. They are SUPER inexpensive – anywhere from 10 to 30 cents each, and they are so convenient because you can just pop them into the ground with the plant in them. They degrade into the soil and actually provide some nutrients for the growing plant.
-
 Step 4
Our store also had black pots, which I thought would be fun for a chalkboard sign effect. I wrote “thank you” and planted the super cutest flowers in them. I adore how the bottom looks like grass and the top is flowy and free. ONE important point: be sure to include the plant tag and/or instructions with each of these. I cut off the bottom of the instruction tag that came with the plant and tucked it inside so that the recipient could see it, yet it wouldn’t be obtrusive or detract from the favor itself.
-
 Step 5
Last, but certainly not least, is a tomato plant. The tag for the plant and its original (unattractive) 4 pack container – split in two – is all hidden and covered by quaint newspaper wrapping and a fun ribbon. Our store had plant markers, so I wrote a quick “love grows” on it to coordinate with the theme of weddings. This was under $2.00.