


About
Pencil Case
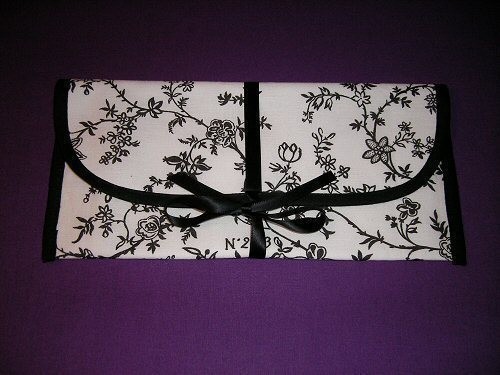
Cute pencil cases that don't take much time. The only difficult part might be the bias tape, which needs to be sewn on quite exactly.
The pencil case can be closed with ribbon or 1-2 buttons.
-
 Denise M. favorited Pencil Case
30 May 22:01
Denise M. favorited Pencil Case
30 May 22:01
-
 Nankita favorited Pencil Case
01 Sep 23:16
Nankita favorited Pencil Case
01 Sep 23:16
-
 mel M. favorited Pencil Case
19 Aug 23:30
mel M. favorited Pencil Case
19 Aug 23:30
-
 Ashley G. favorited Pencil Case
01 Dec 08:03
Ashley G. favorited Pencil Case
01 Dec 08:03
-
 mimissis favorited Pencil Case
05 Jul 10:27
mimissis favorited Pencil Case
05 Jul 10:27
-
 Kathleen H. favorited Pencil Case
23 Jun 15:59
Kathleen H. favorited Pencil Case
23 Jun 15:59
- Geni Greenhill favorited Pencil Case 30 May 11:24
-
 Miss_Fit added Pencil Case to Next Steps
17 May 23:21
Miss_Fit added Pencil Case to Next Steps
17 May 23:21
-
Miss_Fit added Pencil Case to Purses, Bags, and Wallets
08 May 01:48
-
 Millie H. added Pencil Case to Make
25 Mar 23:34
Millie H. added Pencil Case to Make
25 Mar 23:34
-
Step 1
Gather your material. Usually I use light cotton fabric, denim for the lining and if the color of the denim doesn't match I put another layer of matching cotton fabric aboved it.
Decide which kind of fastening you want. For the ribbon fastening you need ribbon (lol), ~65cm.
For the other one you need 1-2 buttons and you have to be able to hand-stitch button holes or have a nice sewing machine that can make them for you ^^ -
 Step 2
Cut 2 or 3 (if you have another layer of lining) rectangles measuring 26x33cm out of your fabrics. Two corners need to be rounded a bit. The bigger the rounding is, the easier it will be to sew on your bias tape later. In my picture they're actually a bit too small.
[click the picture to see the actual step ^^]
-
Step 3
Lay the fabrics exactly on top of each other, right sides facing.
In the following pictures the outer fabric is always green, while the lining is orange.
Iron the fabrics and sew around the borders with a zigzag stitch. -
 Step 4
Sew bias tape to the straight edge (shown in pink)
[click the picture to see the actual step ^^]
-
 Step 5
Fold like shown in the picture. The space between the fold and your bias tape edge should be 11cm.
fix the sides of the pencil case with pins, you can also sew the sides if you want. -
 Step 6
If you want a ribbon fastening:
Fold your ribbon, one end should be longer than the other one. Sew on the edge of your pencil case like shown in the picture. -
 Step 7
Sew bias tape around the remaining edge. This is probably the hardest part because it has to look neat from both sides.
I usually sew the unfolded bias tape on, then cut the edges about 1mm smaller, fold the bias tape around the edges and fix it with a lot of pins before sewing.If you use the ribbon fastening your pencil case is now finished!
-
 Step 8
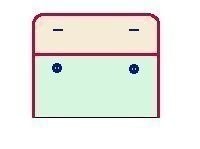
If you want to use buttons:
Place the buttons and button holes like shown in the picture. You can also use one button, but I chose to use two.


CO + K User
It actuaqlly does take some practice to get the bias tape right and it doesn't always turn out super neat, but for me it's usually ok ^^