
About
Scrappy tassel bookmarks
I love reading and I love a good scrap busting project and here I've (sort of) combined the two. Scrappy bookmarks with a tassel detail. If you're a sewer, you probably have a bunch of scraps you can use for this.
-
 Rebecca favorited Patchwork Tassel Bookmark
15 May 06:00
Rebecca favorited Patchwork Tassel Bookmark
15 May 06:00
-
 Jeanne M. added Patchwork Tassel Bookmark to Home and away
18 Jul 08:30
Jeanne M. added Patchwork Tassel Bookmark to Home and away
18 Jul 08:30
-
 Crafterella featured Patchwork Tassel Bookmark
28 Jun 23:00
Crafterella featured Patchwork Tassel Bookmark
28 Jun 23:00
-
 Key West Witch favorited Patchwork Tassel Bookmark
26 Jun 23:36
Key West Witch favorited Patchwork Tassel Bookmark
26 Jun 23:36
-
 Carina published her project Patchwork Tassel Bookmark
14 Jun 09:00
Carina published her project Patchwork Tassel Bookmark
14 Jun 09:00
-
 Step 1
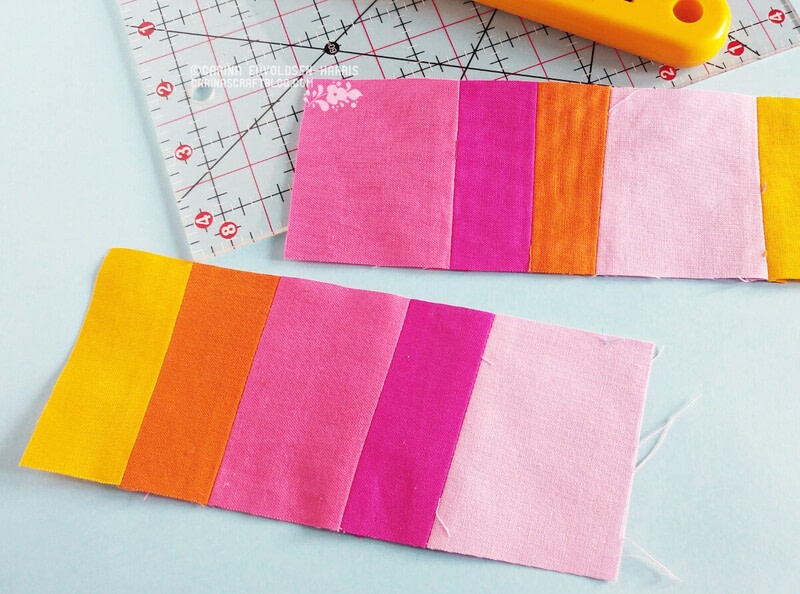
Cut scraps of fabric to a width of approx. 3″, the height of each scrap is up to you. I don’t worry too much about the height, I want it to look wonky.
Lay out the scraps in the sequence you want them. Completely at random or rainbow colour or whatever you fancy. You will need as many scraps as will make up the size of your bookmark. Mix up your strips with narrow and wider ones. Remember to take seam allowance (1/4″) into account. Each strip will shrink by 1/2″ once sewn together.
-
 Step 2
Cut your sewn together strips to size. And cut the back to the same size.
-
 Step 3
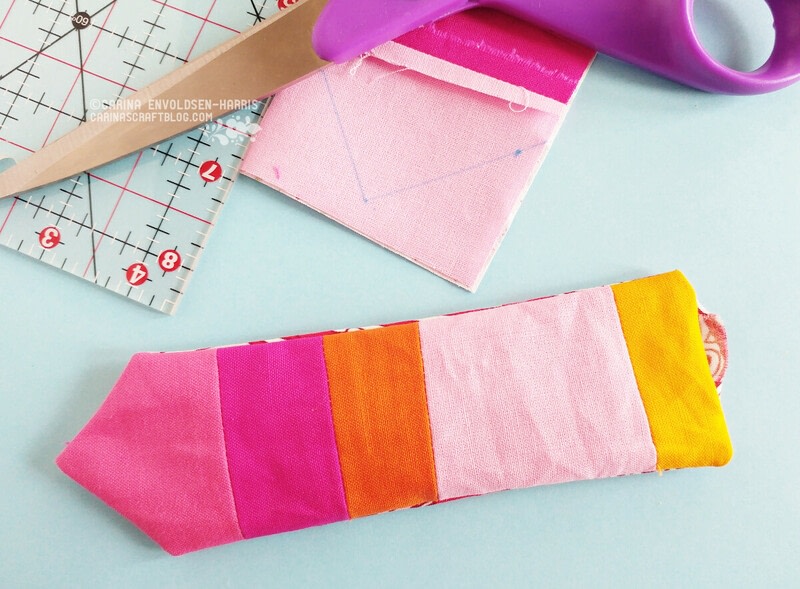
To create the pointy end, draw a guide on one end.
Sew the front and back together, with right sides facing each other. Remember to leave a turning gap at the non-pointy end. Cut away fabric at the corners so they will be nice and sharp when turned right side out.
-
 Step 4
Turn the bookmark right side out and push out the corners and the pointy end. Press the bookmark well. If you have trouble getting the edges nice and even, use the eraser end of a pencil to push them out.
-
 Step 5
Sew the turning gap closed. You can do it by hand so it is nice and hidden, or by machine if you just want some bookmarks in a hurry. :-)
-
 Step 6
Remove the label(s) from the embroidery skein and open out the skein. It should be a big loop of thread. Cut the loop at both ends so you have two bunches of thread.
You don't have to use the 'good' embroidery floss for this, it's fine to use the floss from a craft pack.
-
 Step 7
Pull one thread from each bunch and split into two lots of three strands.
-
 Step 8
Tie three strands at the top each bunch.
Fold the bunch in half and tie together with the other three strands to create the tassel.
-
 Step 9
Thread one half of the thread at top of the tassel through the point of the bookmark.
-
 Step 10
Thread one half of the thread at top of the tassel through the point of the bookmark.
-
 Step 11
Tie a sturdy knot on the back of the bookmark and snip off the ends of the thread.
-
 Step 12
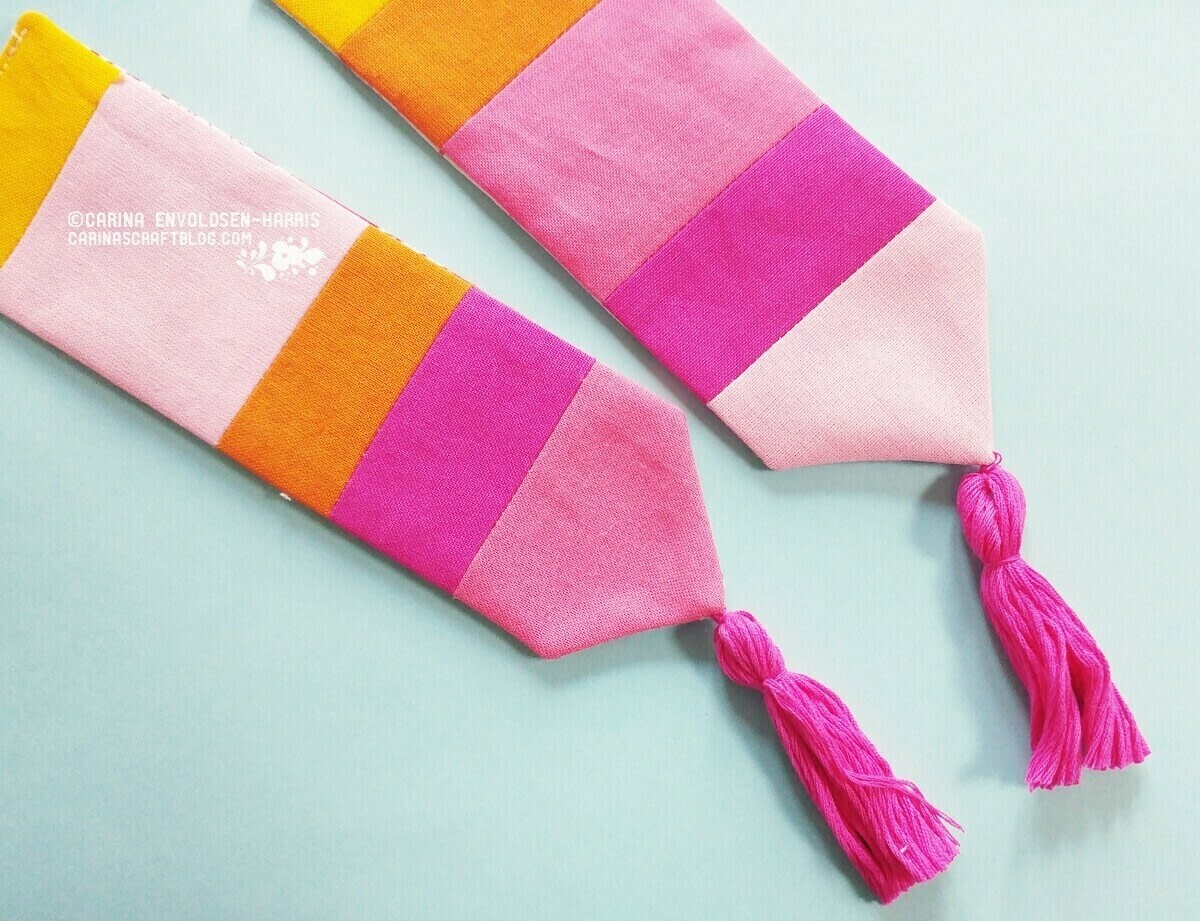
Trim the edges of the tassels if you want. And the bookmark is finished!
The back of my bookmarks. I used some random scraps that would go with the front colours. You could skip the “sew strips together to make the front” and just make the bookmark front from a single piece of fabric. There are lots of possibilities. :-)