


About
Give a quirky recycled look to your living room…
Create a 3D modern light shade out of the simplest things that you can buy online or in your nearest supermarket and homewares store. It’s a trend called up-cycling. We’ve used a simple white paper ball light shade and some waxed catering paper cups. It will only take you minutes using your Dremel Glue Gun. Simply follow our step-by-step guide and use our avante-garde images to inspire you!
You can check out more fantastic projects on the Dremel website.
-
 Oh B. commented on Paper Cup Pendant Light Shade
16 Jan 19:20
Oh B. commented on Paper Cup Pendant Light Shade
16 Jan 19:20
-
Oh B. commented on Paper Cup Pendant Light Shade
16 Jan 19:14
-
Oh B. commented on Paper Cup Pendant Light Shade
16 Jan 19:14
-
 Rebecca B. favorited Paper Cup Pendant Light Shade
02 May 12:10
Rebecca B. favorited Paper Cup Pendant Light Shade
02 May 12:10
-
 Kerry and Andy B. added Paper Cup Pendant Light Shade to DIY the Room: Orla Kiely
13 Oct 12:48
Kerry and Andy B. added Paper Cup Pendant Light Shade to DIY the Room: Orla Kiely
13 Oct 12:48
-
Anna B. commented on Paper Cup Pendant Light Shade
13 Aug 06:31
-
 James A. commented on Paper Cup Pendant Light Shade
12 Aug 11:13
James A. commented on Paper Cup Pendant Light Shade
12 Aug 11:13
-
 BarryBelcher commented on Paper Cup Pendant Light Shade
21 Jul 17:25
BarryBelcher commented on Paper Cup Pendant Light Shade
21 Jul 17:25
-
BarryBelcher favorited Paper Cup Pendant Light Shade
21 Jul 17:24
-
 Esteph H. commented on Paper Cup Pendant Light Shade
13 Jul 07:04
Esteph H. commented on Paper Cup Pendant Light Shade
13 Jul 07:04
-
 Step 1
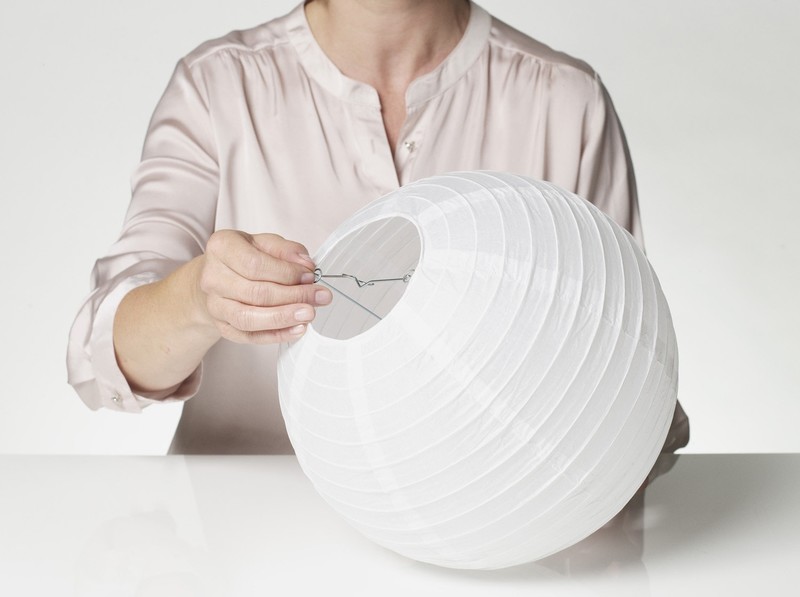
Buy and assemble a paper light shade into a globe by inserting the metal frame, following the instructions provided in the pack.
-
 Step 2
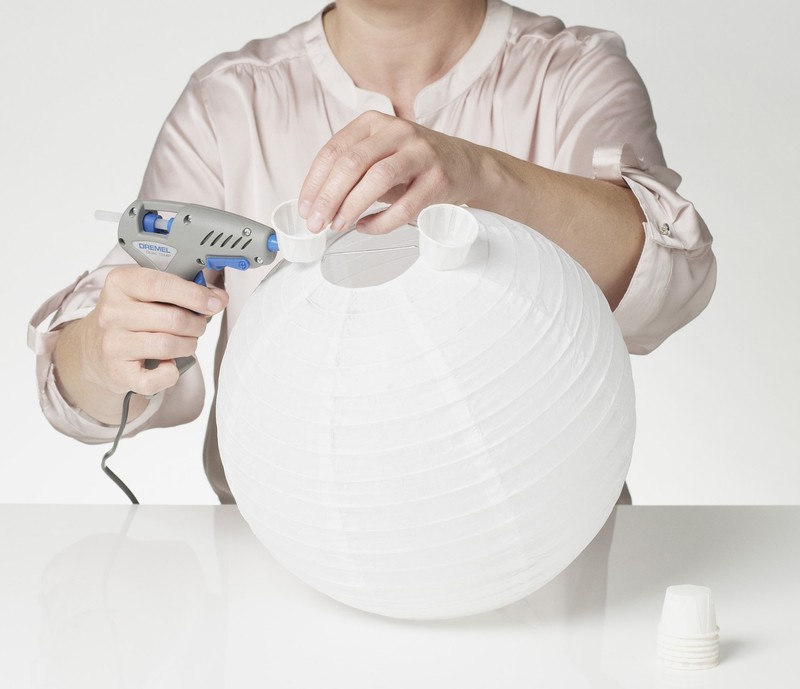
With your Dremel Glue Gun switched to the cool setting, apply glue around the edge of the base of one of the paper cups. Starting at the base of the light shade, press the glue to the surface of the shade so that the edge of the paper cup sits against the lower edge of the shade. Repeat with a second paper cup, gluing it against the opposite lower edge of the shade.
-
 Step 3
Complete the first circle by using your Dremel Glue Gun to glue more paper cups around the lower edge of the shade, positioning each one adjacent to the previous one and then gluing its opposite number in place. This technique will help you to glue them evenly around the opening at the base of the shade. This paper shade has a 7cm hole in the base, which requires ten paper cups to surround it, but do check your shade and work out the positioning before you start gluing the cups on.
-
 Step 4
Form the second circle by using your Dremel Glue Gun to glue the cups in-between those in row one.
-
 Step 5
Continue to use your Dremel Glue Gun to glue the cups for rows three and four in-between those of the previous rows, building up circles of alternately placed cups.
-
 Step 6
From row four, use your Dremel Glue Gun to glue cups in vertical lines, positioning them directly above the cup in the previous circle, rather than in-between. The diameter of the globe will be increasing as you approach the centre line, which means that larger gaps will appear between the cups, but arranging them in lines around the bulk of the shade results in a clear and ordered arrangement. For best effect, try hard to ensure the rows remain vertical and the cups evenly spaced. Keep on gluing more cups in place, working in circles and towards the top of the shade.
-
 Step 7
As you approach the top edge of the shade the diameter will decrease and the lines of cups will naturally merge, so that you are once more gluing cups in-between those of the row before, as you were at the base of the shade. Finish with a final row of cups glued adjacent to the opening at the top of the shade, then hang your light shade following the instructions provided in the pack.
TIP: If necessary, stabilise the lampshade while you are working on it by resting the globe on a dish or mixing bowl.


Thanks!