


About
Makeup/ Makeup Brush Roll - Great for travel or hanging at home
This is a makeup/ makeup brush holder that rolls up and can also be hung.
It's great for travel and having your stuff handy on the go.
It's also awesome for organizing your brushes or makeup if you have limited space.
I made it out of one piece of fabric, so the lining is the same as the outside, but you can use two different types if you prefer.
I've put in quite a few steps for guidance, but most of them are fairly obvious.
I hope you enjoy this!
-
 Alma added Makeup/Makeup Brush Roll to Bags, Wallets...
18 Jun 20:06
Alma added Makeup/Makeup Brush Roll to Bags, Wallets...
18 Jun 20:06
-
 Debra Anne S. favorited Makeup/Makeup Brush Roll
05 May 05:03
Debra Anne S. favorited Makeup/Makeup Brush Roll
05 May 05:03
-
chante l. added Makeup/Makeup Brush Roll to sewing
06 Oct 03:19
-
 silentband favorited Makeup/Makeup Brush Roll
24 Jul 22:18
silentband favorited Makeup/Makeup Brush Roll
24 Jul 22:18
-
 Miss_Fit added Makeup/Makeup Brush Roll to Purses, Bags, and Wallets
31 Mar 02:08
Miss_Fit added Makeup/Makeup Brush Roll to Purses, Bags, and Wallets
31 Mar 02:08
-
 Sandra W. favorited Makeup/Makeup Brush Roll
23 Dec 11:52
Sandra W. favorited Makeup/Makeup Brush Roll
23 Dec 11:52
-
 nmt73 added Makeup/Makeup Brush Roll to Sew
04 Nov 12:25
nmt73 added Makeup/Makeup Brush Roll to Sew
04 Nov 12:25
-
nmt73 favorited Makeup/Makeup Brush Roll
04 Nov 12:25
-
 Griselda C. favorited Makeup/Makeup Brush Roll
01 Jul 00:20
Griselda C. favorited Makeup/Makeup Brush Roll
01 Jul 00:20
-
 Kurenai favorited Makeup/Makeup Brush Roll
24 Jun 11:03
Kurenai favorited Makeup/Makeup Brush Roll
24 Jun 11:03
-
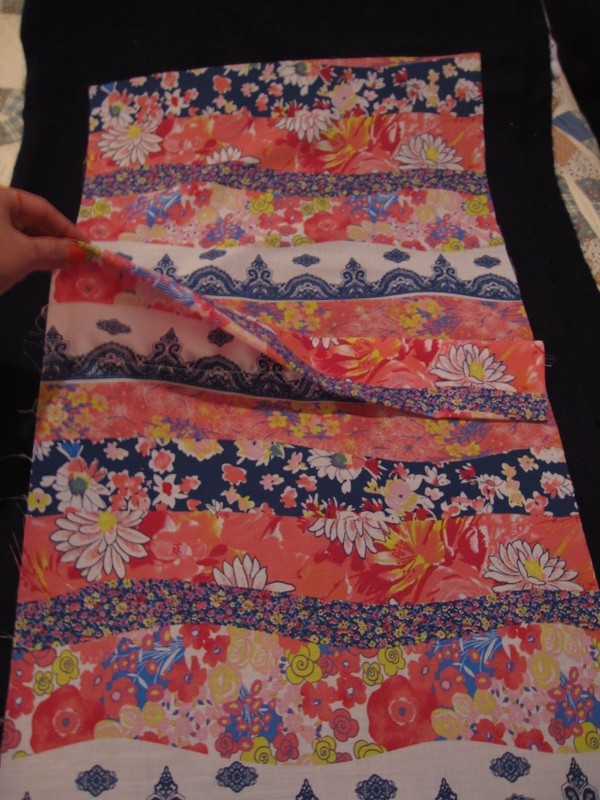
 Step 1
Cut a rectangular piece of fabric. I used cotton,but you can go for something sturdier if you like.
These are the dimensions I used:
40 x 75 cm (metric) or 16 x 30 inchesThis depends on the amount and size of items you want to store. I went for 5 large pockets and 10 small ones. If you just want to store a few brushes or eyeliners you can make it a lot smaller.
I find it's better to have more - you'll always be able to fill the spaces instead of running out.
-
 Step 2
Fold fabric in half with the fold on the bottom side.
Fold the bottom (where the first fold is) upwards. This will be the part that holds the brushes.
I went for an 11 cm or 4.5 inch fold. Test on your brushes or makeup to decide your length.
You can use an iron to make the creases stand out. I find it helps me keep the fabric in place.
-
 Step 3
Sew at the bottom of the second crease you made. (shown at the very bottom of the picture in the previous step)
Open the fabric. You will have a sewn fold in the middle. This is the part that will hold the brushes.
You do this in order to prevent the stitching of the pockets going through to the back of the brush roll. It looks a lot nicer this way.
-
 Step 4
Figure out the size of your pockets by trying it out with the products you're going to store in it. Mark the spaces with pins and make sure everything fits nicely.
-
 Step 5
Sew the pockets making sure to attach them to just the top side of the fabric.
The other side (which should be at the bottom) will be the backing. (Refer to step 3 if you have any doubts).
I added a few extra stitches to the top of each pocket in order to make sure they wouldn't slip.
-
 Step 6
Fold your project in half so you have the pockets on one side and the backing on the other. It should look something like this.
Make and hem a couple of strips to create the ties. (That's them on the right). You can use ribbon instead and skip this step.
-
 Step 7
Hem the sides and attach the ties. It's a good idea to use pins to keep all the pieces in place. You can also iron the folds to make your job easier.
Pay attention to your tie placement.
They are placed relatively low because the top part folds to cover the brushes, so the ties area actually in the middle of the roll.
-
 Step 8
It's a good idea to reinforce the stitching on the ties, especially if you're going to hang it.
-
 Step 9
Finish by closing the seams at the top.
Good news! You're done!
-
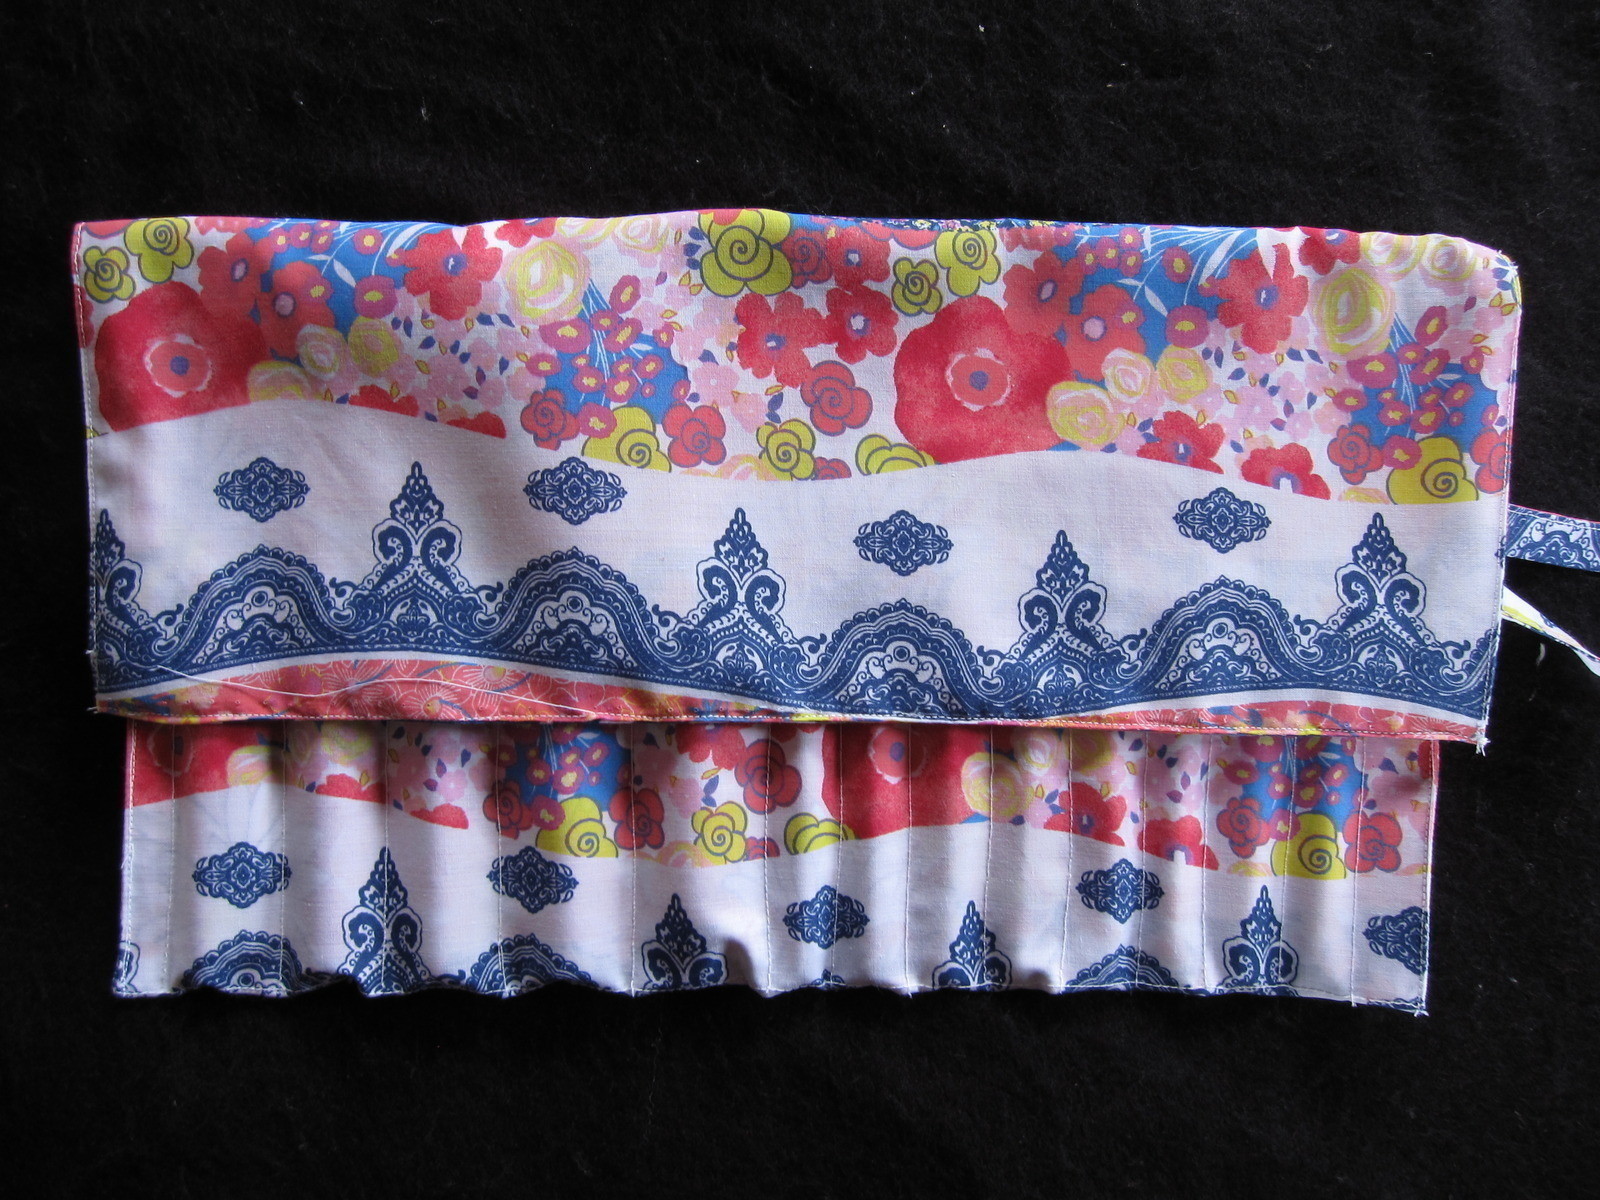
 Step 10
Hang it by making a bow with the ties.
Fold the backing out of the way. You can pin it back if you like.
This is a great way to keep brushes, mascara or eye/lip liners organized, as you can pick one at a glance.
-
 Step 11
You can also fold the backing and roll it up, using the ties to make a bow and hold it together.
This is a great way to make a brush stand, especially if you are on the go. It only takes a few seconds to switch from travel roll to brush stand.