


About
Origami envelopes all dressed up
I used pages from a fairly large magazine (Elle Decor).
YES you can mail these! Even though they're small, if you still have an address and a stamp, they'll be sent. =)
There are a few steps but it's really easy to do and to remember, especially if you send a lot of things!
**It takes about mins to do, +10 for drying/pressing!
-
 Key West Witch favorited Magazine Envelopes
12 May 16:35
Key West Witch favorited Magazine Envelopes
12 May 16:35
-
 lynn.wagner.501 added Magazine Envelopes to My projects
09 Jun 01:37
lynn.wagner.501 added Magazine Envelopes to My projects
09 Jun 01:37
-
lynn.wagner.501 favorited Magazine Envelopes
09 Jun 01:37
-
 lia c. favorited Magazine Envelopes
28 Mar 03:05
lia c. favorited Magazine Envelopes
28 Mar 03:05
-
 robin w. favorited Magazine Envelopes
30 Nov 08:23
robin w. favorited Magazine Envelopes
30 Nov 08:23
-
 Emma H. favorited Magazine Envelopes
16 Feb 16:12
Emma H. favorited Magazine Envelopes
16 Feb 16:12
-
Amanda P. added Magazine Envelopes to DIY tomorrow
19 Jan 07:37
-
 autumn rae entered their project Magazine Envelopes to Doxie Flip Contest
09 May 04:07
autumn rae entered their project Magazine Envelopes to Doxie Flip Contest
09 May 04:07
-
 viancethomas.pabayo commented on Magazine Envelopes
08 May 15:59
viancethomas.pabayo commented on Magazine Envelopes
08 May 15:59
-
 AuntBetty favorited Magazine Envelopes
21 Feb 03:33
AuntBetty favorited Magazine Envelopes
21 Feb 03:33
-
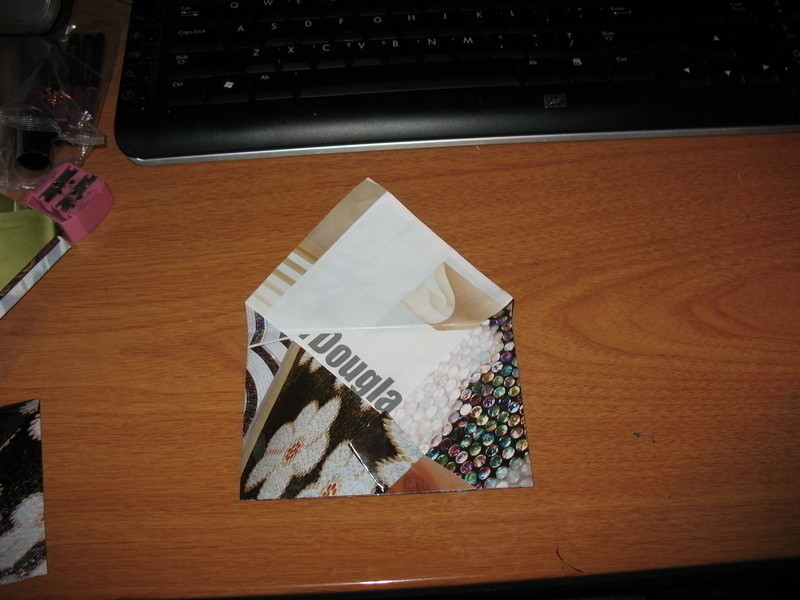
 Step 1
Choose the paper you like!
-
 Step 2
Turn the side you want to use FACE-DOWN and then fold it over to make a triangle.
-
 Step 3
Cut off the excess strip. You can go ahead and throw it away, or save it if you want to use it for another project! You won't need it for anything here. =)
-
 Step 4
Pick the side you want to use for the addresses/stamp. Turn it face-down. On the side facing you, fold down the middle of the triangle to make a new, upside-down triangle, like in the picture.
-
 Step 5
Fold the right side so that it makes a side-ways triangle. It should be about 1/3 of the way across, but if you want the envelope to be wider, put it closer to the center (to make the envelope more square-like, fold it toward the left side as far as you like).
-
 Step 6
Repeat for the left side. Only this time you have to make sure that the sides on the top are EVEN. One side cannot be taller than the other or the envelope will be crooked!
-
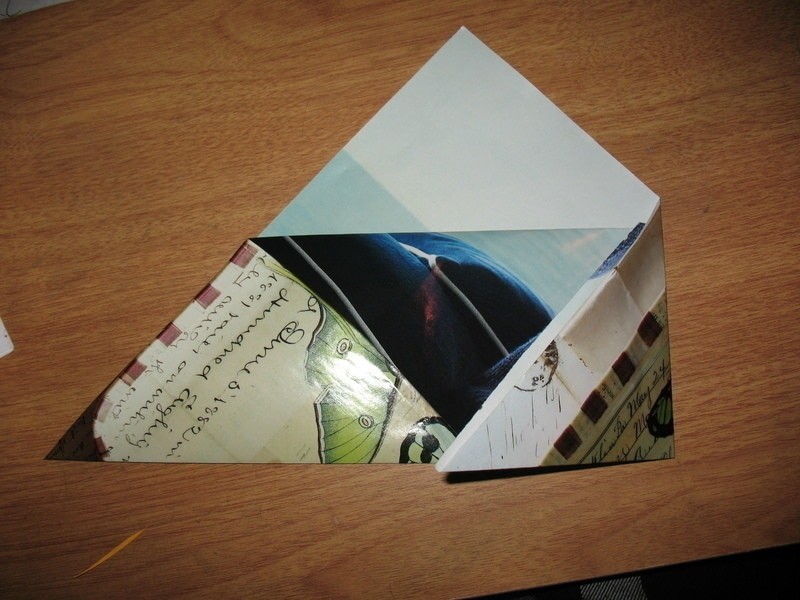
 Step 7
Take the tip of the last part you folded down and tuck your finger inside it to raise it up a bit so it isn't just flat anymore.
-
 Step 8
Press it down to make a diamond. This will be where you tuck the top of the envelope in.
-
 Step 9
Fold down the top triangle on the envelope so the fold touches the top of the very first triangle you folded.
MAKE SURE when you fold it you don't go down pass the diamond or bottom of the envelope!
-
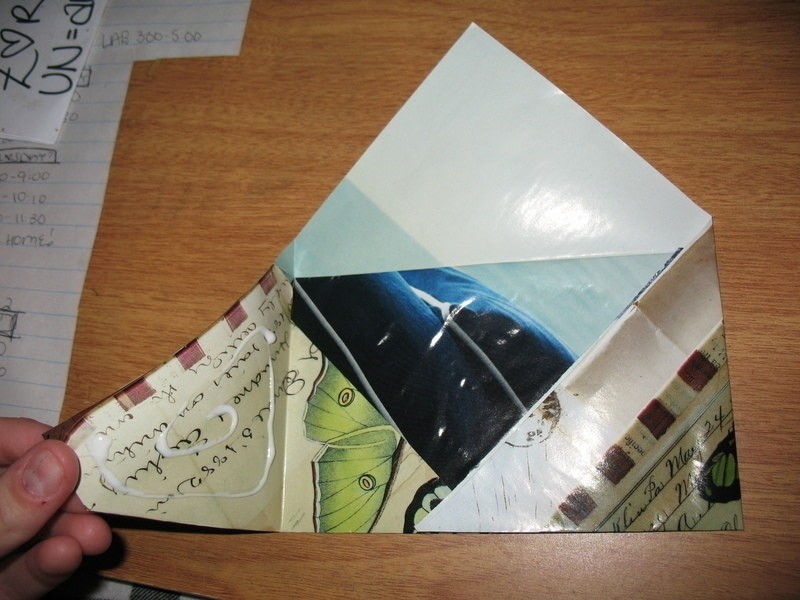
 Step 10
Unfold a few things, glue what you think needs to be glued, press under a heavy book for about 10 minutes or until it's dry, and you have yourself a fancy envelope!
Before you send your letter, you'll have to seal it up with tape or a sticker. I like using stickers, myself. =)


I'm going to look for some nice magazine pages right now!!