


About
A pretty for the pretties.
So I was at the mall with my sister, and I was looking at these cute little jewelry holders that looked like mini vintage mannequins. I've seen them all over, and they range in price anywhere from $15 to $30 dollars. And I noticed that all it really was a torso, wire and a cute little dress. I knew I had some old Barbies kicking around my garage. So I thought I would try my hand at making one. I'm so in love with it! The purple one I made for a friend.
Tags
-
 Kinhime Dragon added Jewelry Mannequin to things to make
30 Nov 20:24
Kinhime Dragon added Jewelry Mannequin to things to make
30 Nov 20:24
-
Kinhime Dragon favorited Jewelry Mannequin
30 Nov 20:24
-
Kinhime Dragon commented on Jewelry Mannequin
14 Oct 12:46
-
 Key West Witch favorited Jewelry Mannequin
28 Sep 00:35
Key West Witch favorited Jewelry Mannequin
28 Sep 00:35
-
 Carol H. added Jewelry Mannequin to Barbie tutorial
13 Jul 08:32
Carol H. added Jewelry Mannequin to Barbie tutorial
13 Jul 08:32
-
 Sherrilynne K. favorited Jewelry Mannequin
22 Sep 14:25
Sherrilynne K. favorited Jewelry Mannequin
22 Sep 14:25
-
 C G. favorited Jewelry Mannequin
04 Apr 19:23
C G. favorited Jewelry Mannequin
04 Apr 19:23
-
 nina.b added Jewelry Mannequin to Will try
18 Oct 12:49
nina.b added Jewelry Mannequin to Will try
18 Oct 12:49
-
T R. favorited Jewelry Mannequin
18 Aug 02:55
- JaydeyLikesMac&Cheese favorited Jewelry Mannequin 04 Jun 17:10
-
 Step 1
First, and this is the hardest part, pull your Barbies head off. No joke, it's really hard. It took me like five minutes. You might have a piece of plastic sticking out after, that's okay. You can cut it off later.
Now comes the legs. I ended up using a little hack saw and just sawed through the plastic joint in the hips. The arms, depending on how old your Barbie is, will have to be sawed off, then you have to dig out the plastic. The arm socket needs to be hollow.
Now you should have a fully dismembered Barbie.
-
 Step 2
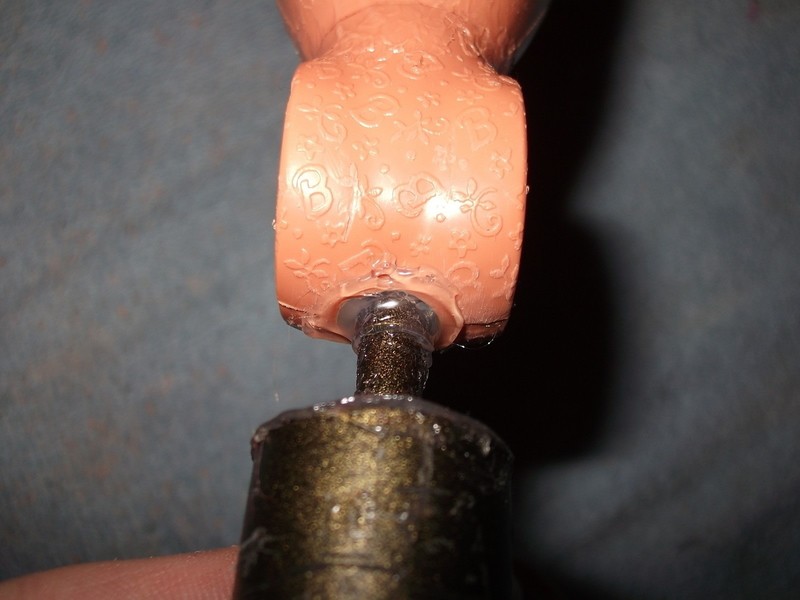
Now take a drill bit and drill a hole into Barbies crotch. It needs to be big enough for the base to fit into.
-
 Step 3
You should have something like this. At this point you can cut that little plastic bit out of the neck. And if needed, you can drill out the arm holes, if you couldn't get all the arm plastic out.
-
 Step 4
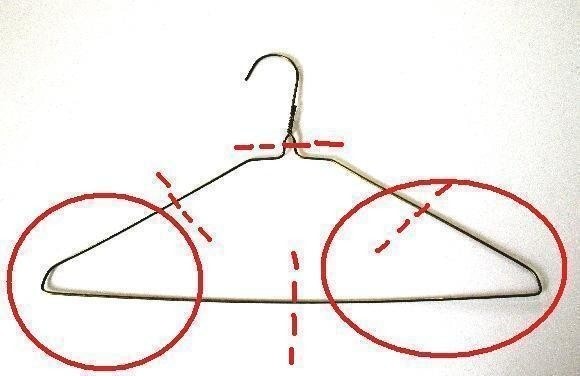
Now for the base. My mom found me these candle holders that had these little angels on it. I took the angels off and broke off the top candle holder part.
But an easier idea would be to use a pair of wire coat hangers. I was going to do it this way, but I only had one hanger. Take two wire hangers, and cut them in half along the dotted lines. You need the parts circled in red.
-
 Step 5
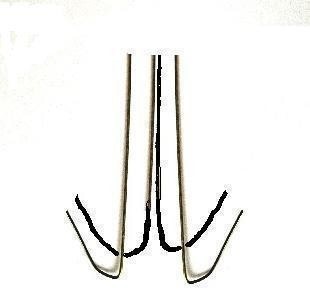
Cut all four pieces so they are even. You should have some thing like this. Now take a pair of pliers and curl the ends into a spiral.
-
 Step 6
You should have something like this. Forgive my crappy paint/photo-shop job.
-
 Step 7
When you have all four ends curled, gather them together, and glue the tops together then wrap a wire around the the bottoms. The green are the back feet, the red are the front feet and the circled area is going into the hole drilled into the Barbie. (And yes, I do realize what my crude photo looks like)
-
Step 8
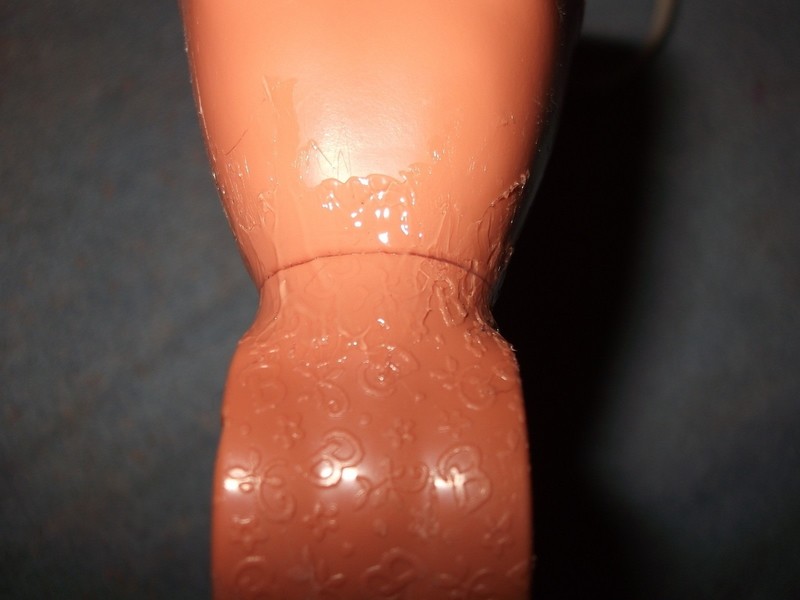
Before you glue the torso to the base, make sure you sand down any rough edges or scratches on the Barbie. You don't have to sand the whole thing, just the parts that will show through the dress the barbie will be wearing.
Make sure that you get the holes of the arms and neck really good. These are part of the main focus, and you want it to look nice. The sanding will also help the paint stick better to the plastic.
-
 Step 9
Now that we've got a torso and base, it's time to glue. I put the nozzle of my glue gun into the hole and kept pouring in the glue till I could feel the heat on the Barbie's lower back.
The Barbie is mostly hollow and since you can't really tell where all the glue is going, you want it to be filled so the base doesn't fall out.
-
 Step 10
Now smear a little glue around the waist of the torso. This will help to keep the hips and chest from twisting around.
-
 Step 11
You should have something like this so far.
-
 Step 12
Now get out your wire. It can be any gauge or color. But don't get a too small gauge, or the wire will bend if you put to much heavy jewelry on it. Your going to need about 9 pieces. 3 for the head and 3 for each arm. The (3) for the head should be about 4 inches long. Then (4) should be 6 inches and the last (2) should be 7 inches. You can always cut the wires shorter later if they end up being to long.
-
 Step 13
Now use a small pair of pliers to curl the end of the wires into a spiral. This will keep your jewelry from falling off. And make some small wave like bends in the middle of the wires. I did mine like this.
I made the (2) 7 inch pieces bend a little differently, so that when I glue them in, they will stick out a little father then the other two wires will.
-
 Step 14
Now it's time to spray paint. I did the torso of mine in a flat white, and the legs and wire parts in a glossy black.
-
 Step 15
Now get your dress, it's time to put it on the torso. The dress I have didn't fit my torso very well, and it kept falling off. So I just glued it on. You don't have to. I found this green dress in with my barbie stuff. I didn't like the whole "Ball Gown" look of it. So out came the scissors.
-
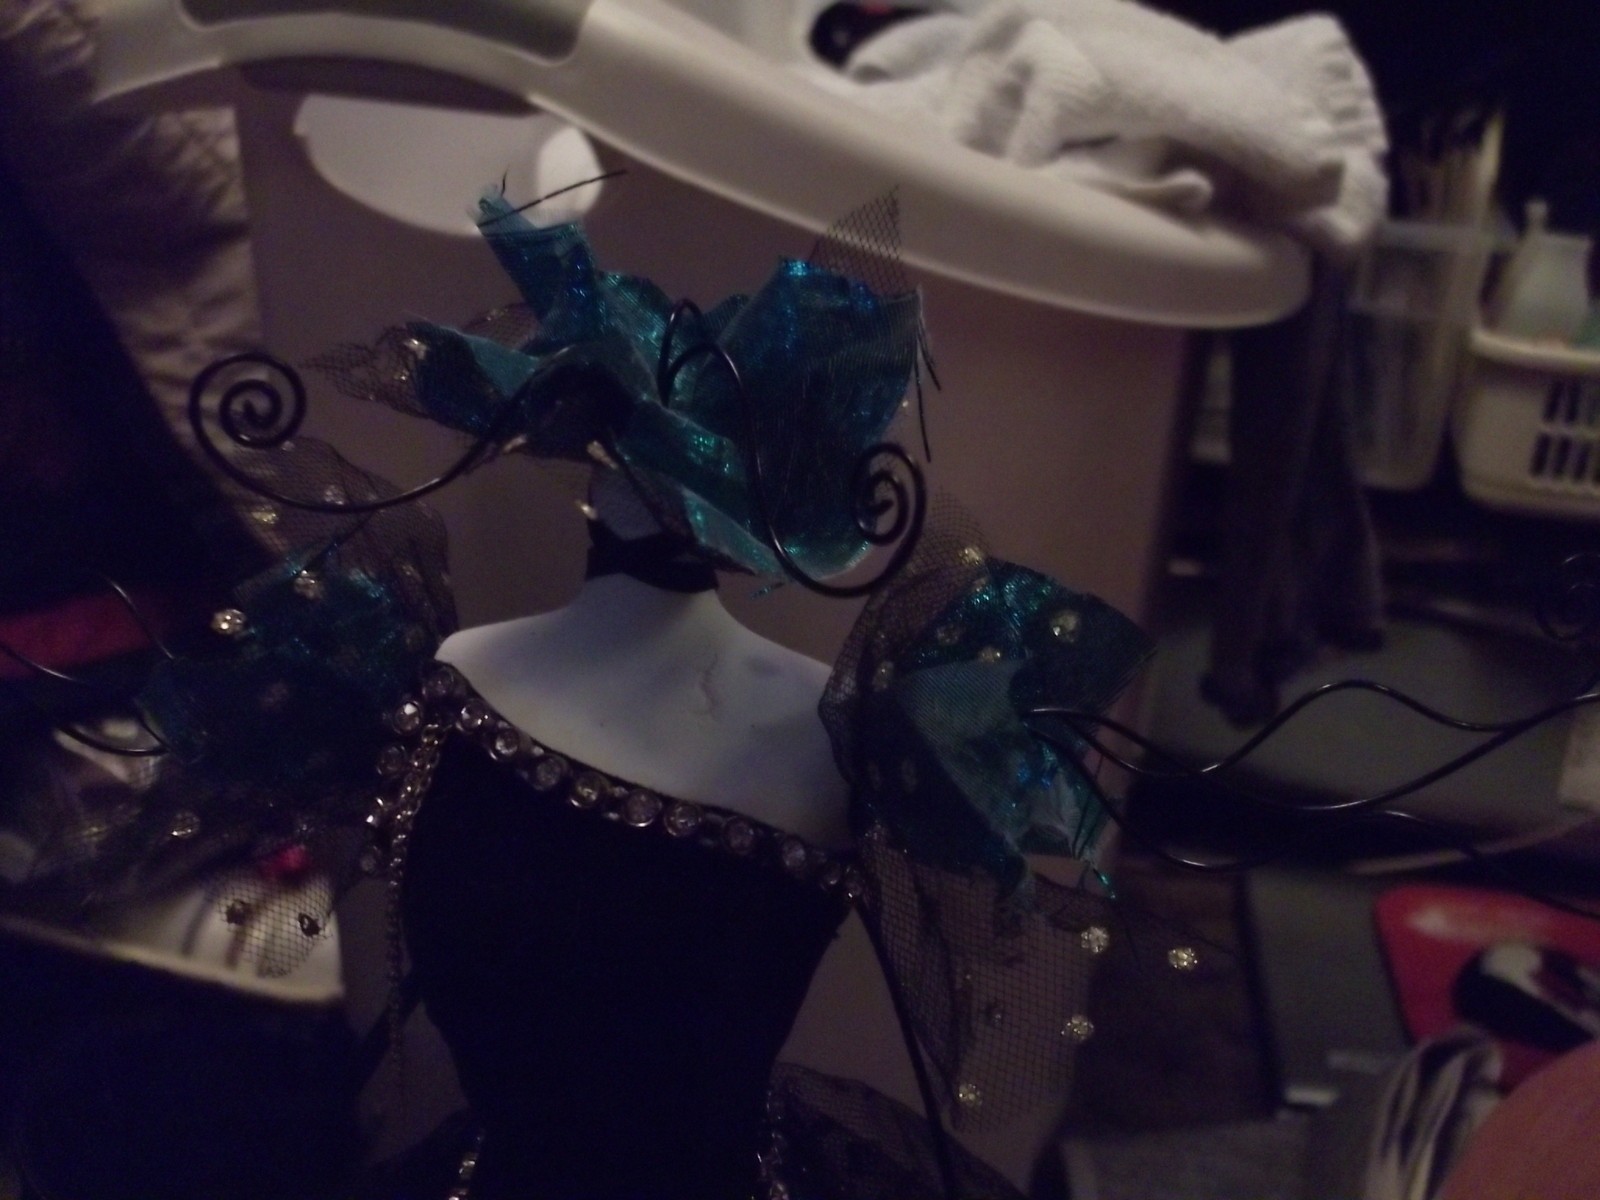
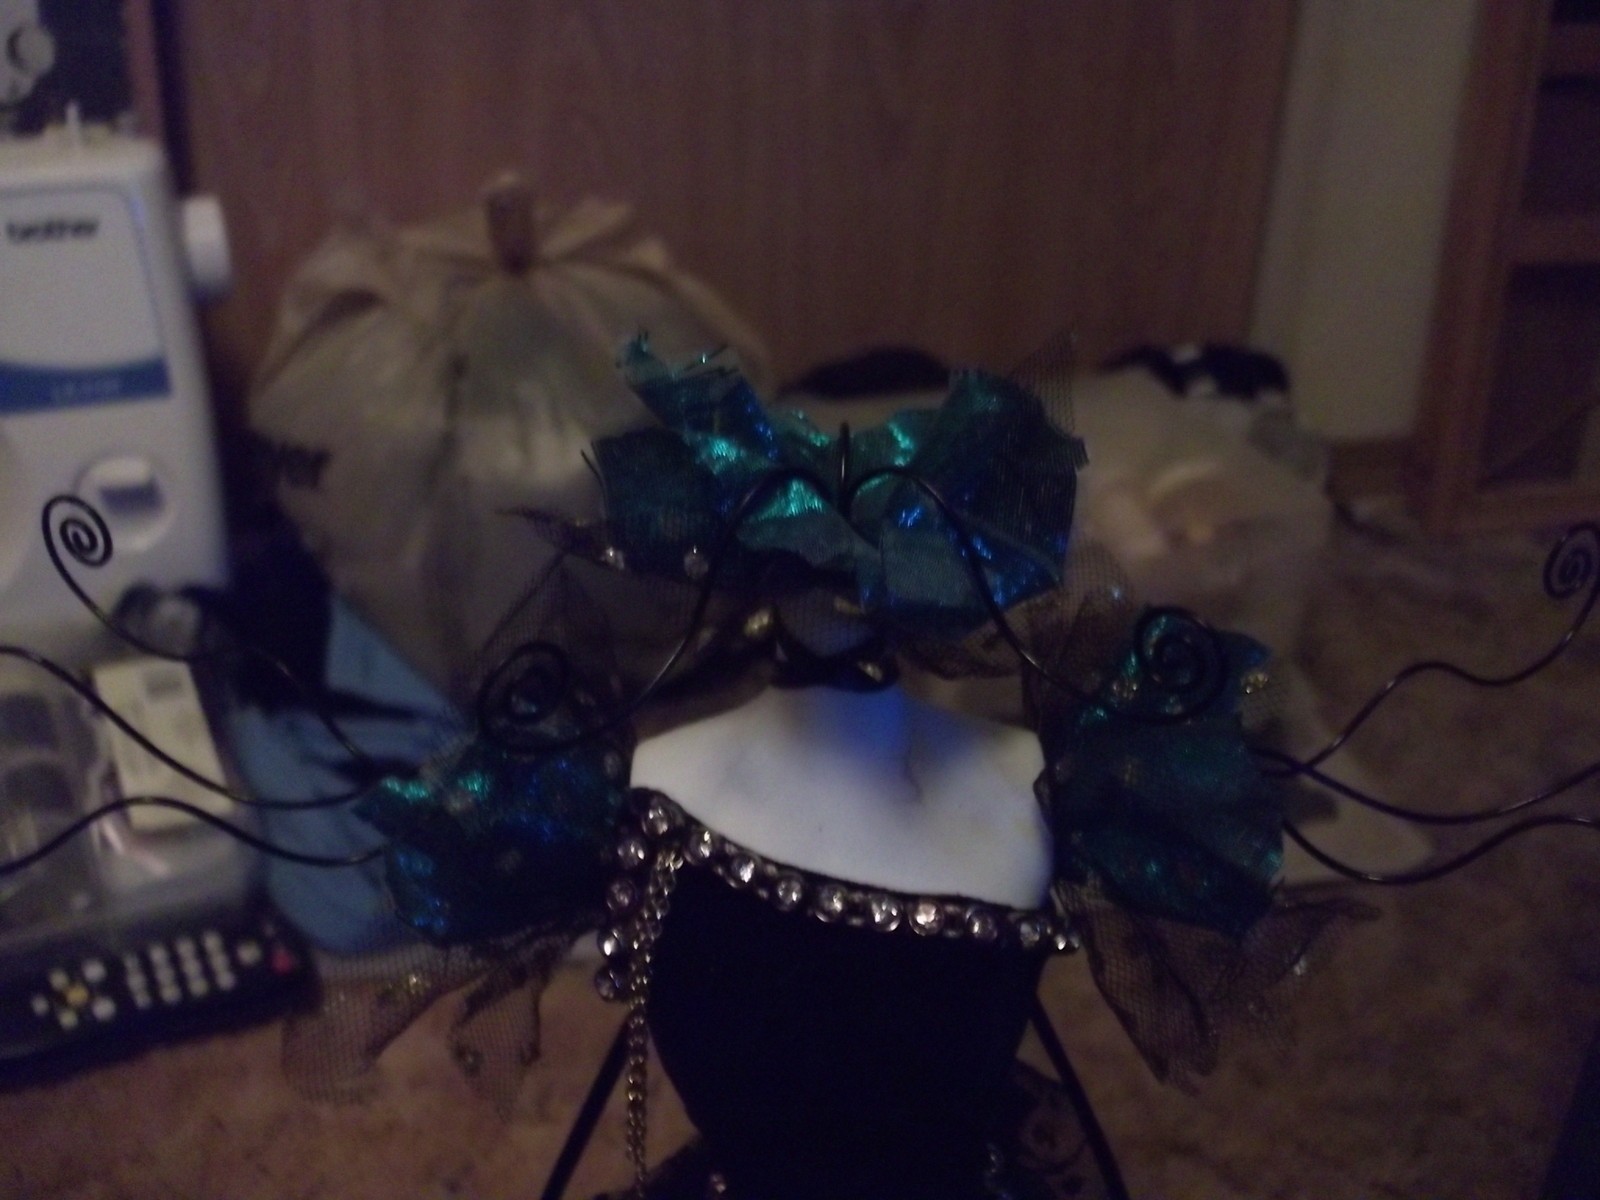
 Step 16
Now that my dress is fixed, it's time to glue the wires into the neck and arm holes. I wrapped the ends of the wires in tulle and then glued them in. That way it made it easier to fill in the holes. Then I gave the mannequin a tiny ribbon choker, and I added a few bits to the dress.
-
 Step 17
And ta'da! Your very own mini mannequin jewelry holder.


Versions

Comments


