From Photograph To Print
Extract from Beginner's Guide to Linocut • By Susan Yeates • Published by Search Press


About
Learn how to turn a photograph into a linocut
This project explores how to translate a linocut print from a photograph by tracing the image onto the lino, and provides you with another chance to practise your fine cutting skills. If you feel less confident about your freehand drawing skills, tracing a photograph and translating it into a linocut is a handy technique to try if you have an image to hand that you think would make a particularly striking linocut print.
-
 Elin H. favorited From Photograph To Print
13 Jul 00:21
Elin H. favorited From Photograph To Print
13 Jul 00:21
-
 Michelle S. favorited From Photograph To Print
07 Feb 01:43
Michelle S. favorited From Photograph To Print
07 Feb 01:43
-
 Emma H. favorited From Photograph To Print
21 Jan 20:06
Emma H. favorited From Photograph To Print
21 Jan 20:06
-
 Kimya J. favorited From Photograph To Print
15 Jan 21:33
Kimya J. favorited From Photograph To Print
15 Jan 21:33
-
 tom w. favorited From Photograph To Print
15 Jan 11:44
tom w. favorited From Photograph To Print
15 Jan 11:44
-
 Crafterella featured From Photograph To Print
09 Jan 23:00
Crafterella featured From Photograph To Print
09 Jan 23:00
-
 Pam favorited From Photograph To Print
08 Jan 16:31
Pam favorited From Photograph To Print
08 Jan 16:31
-
 Search Press published her project From Photograph To Print
06 Jan 09:00
Search Press published her project From Photograph To Print
06 Jan 09:00
You Will Need
-
 Step 1
Cut a piece of lino to the size of your photograph – in this example, the photograph is 15 x 10cm (6 x 4in).
-
 Step 2
Study your photograph and trace its outlines onto tracing paper with a pencil. You may wish to use masking tape to hold the paper in place. Focus on the most important elements of the photograph and simplify the design if there is a lot of detail.
-
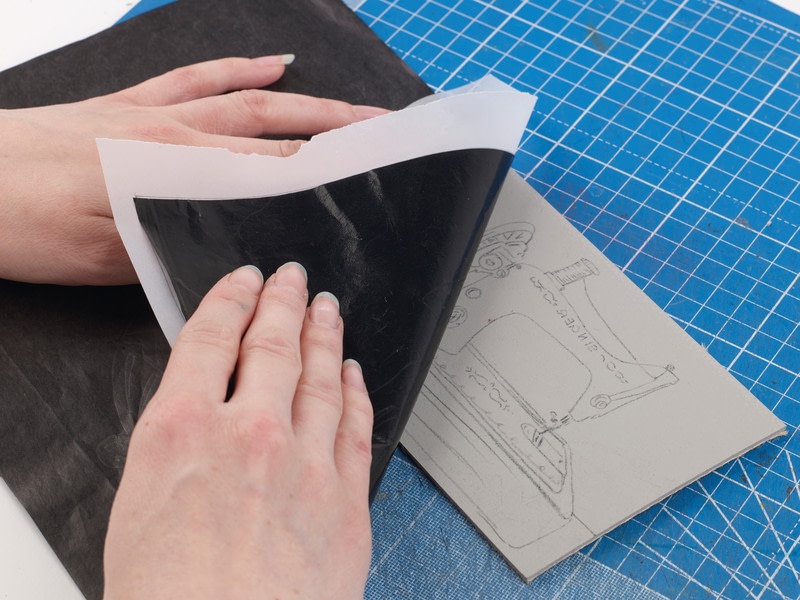
 Step 3
Lay a sheet of carbon paper over your lino block. Flip over your tracing paper and place it on top of the carbon paper so that you will be transferring a mirror image of your print. Draw firmly over your design in pencil so that it transfers onto the lino. Use a hard pencil such as a 2H to ensure that your lines are sharp.
-
 Step 4
Lift off your carbon paper to reveal the design transferred onto the lino block. This will be a mirror image of your original photograph. Use a fine black marker pen to go over your lines if you need to strengthen them before cutting.
-
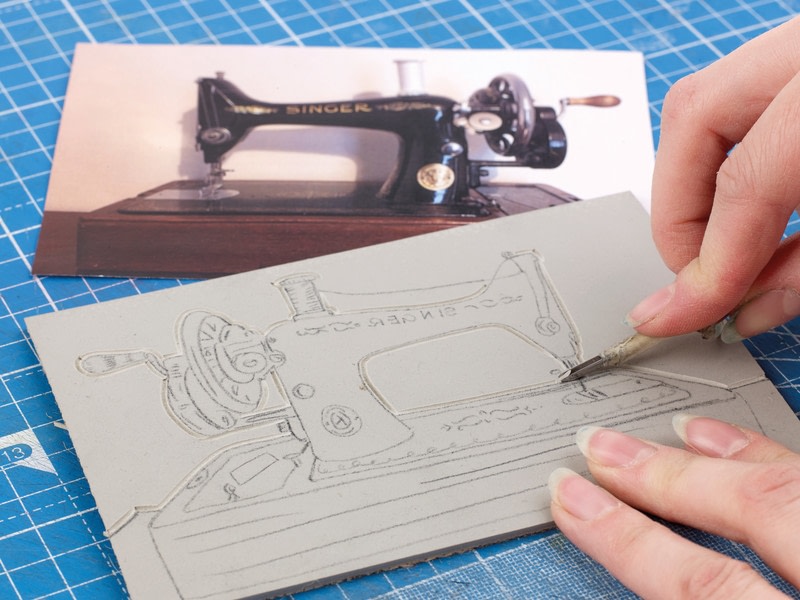
 Step 5
With your original photograph in front of you, cut away all the parts of the design that you don’t want to print – that is, the parts that will be white. Start with the outlines and then work around the rest. Use smaller tools (1mm or 2mm gouge tools) to cut out fine details or marks.
-
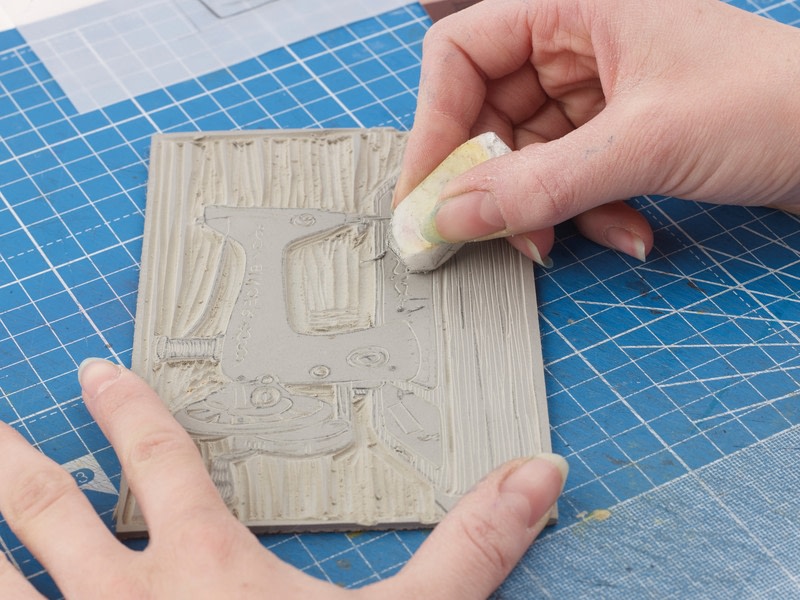
 Step 6
Use larger tools – 4mm or 5mm gouge tools – to clear away blank areas such as the background of the print.
-
 Step 7
Once your cutting is complete, brush away any small pieces of lino and rub away your pencil marks with an eraser so that they do not print.
-
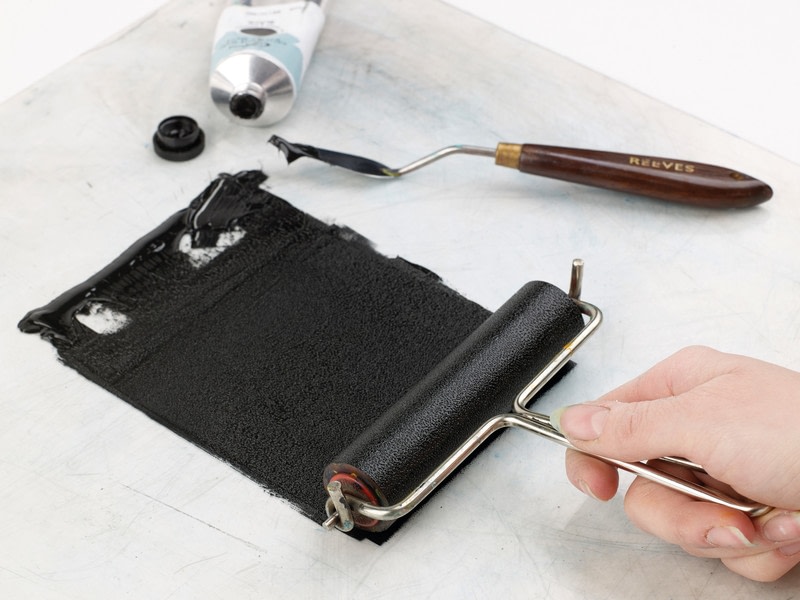
 Step 8
Roll out your relief ink on a large shiny surface such as Perspex or glass, using a roller.
-
 Step 9
Load your roller with ink, and ink up the surface of the block.
-
 Step 10
Lay your block, inked side up, on a sheet of cartridge (backing) paper and lay a sheet of smooth white printing paper on top of the block. Burnish the print onto the paper using the back of a wooden spoon.
-
 Step 11
Lift off the paper carefully to reveal your translated print. Check that you are happy with the finished result – if you need to alter or adjust any elements, wash off the ink with a damp cloth and cut into the lino again.
-
 Step 12
Warning
Work with a photograph that you have taken yourself, rather than the work of another photographer. This is to avoid any potential difficulties with copyright contention.