


About
This is a wired up, button down how to of Bobu's original!
This tutorial is based on Bobu's necklace. Note that Bobu sewed down the buttons whereas I used wire to recreate the look. They are TOTALLY different techniques so please don't think they are the same.
For this tutorial, I have chosen to go with a Rocker Chick look and wanted a more regular shape. The fun thing about this necklace is that you can have fun playing with the shape and colour schemes to even the type of chains used! Feel free to ask any questions!
Note: I am not an expert on wire wrapping as I simply did a trial and error. If anyone has any suggestions to improve this, please do share! :)
-
 Key West Witch favorited Embellished Multi Button & Bead Statement Necklace: Serene T.'S Version
08 Aug 00:14
Key West Witch favorited Embellished Multi Button & Bead Statement Necklace: Serene T.'S Version
08 Aug 00:14
-
Key West Witch added Embellished Multi Button & Bead Statement Necklace: Serene T.'S Version to Jewelry Necklaces
30 Jun 13:12
-
Key West Witch added Embellished Multi Button & Bead Statement Necklace: Serene T.'S Version to Jewelry
30 Jun 01:05
-
 shevans1 added Embellished Multi Button & Bead Statement Necklace: Serene T.'S Version to Jewelry
03 Jun 00:49
shevans1 added Embellished Multi Button & Bead Statement Necklace: Serene T.'S Version to Jewelry
03 Jun 00:49
-
 Kathy S. favorited Embellished Multi Button & Bead Statement Necklace: Serene T.'S Version
06 Oct 05:40
Kathy S. favorited Embellished Multi Button & Bead Statement Necklace: Serene T.'S Version
06 Oct 05:40
-
 Viviana M. added Embellished Multi Button & Bead Statement Necklace: Serene T.'S Version to Try later
26 Aug 04:53
Viviana M. added Embellished Multi Button & Bead Statement Necklace: Serene T.'S Version to Try later
26 Aug 04:53
-
 Step 1
Decide on your colour scheme and pick out your unusual suspects of buttons, pearls etc. Ensure that there is a good variety in terms of shape, type of buttons and shades.
-
 Step 2
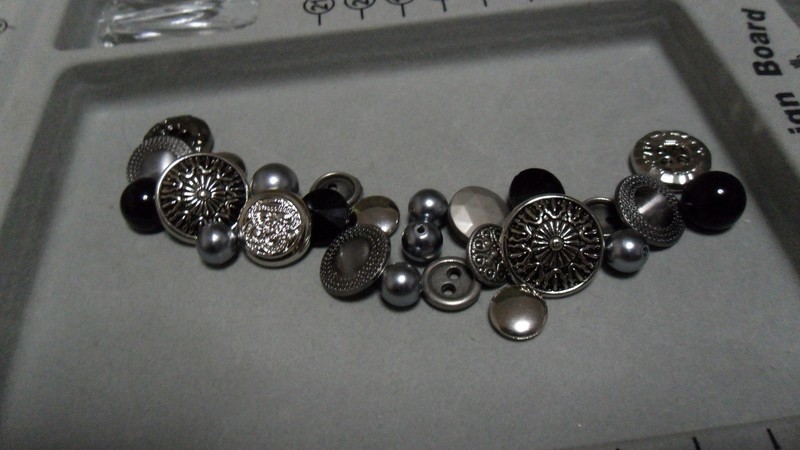
Arrange your mix to form the main part of the necklace.
*If you are forgetful like me, it would help to take a shot of this so you can keep referring back to it. -
 Step 3
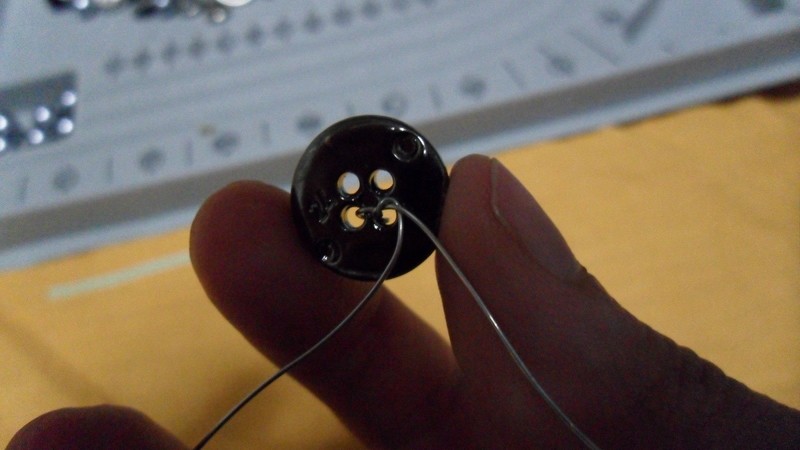
Once happy, start by threading through your wire to your button. Twist, tighten and repeat.
-
 Step 4
The back view will look something like this. Keep on going.
-
 Step 5
Adding pearls are tricky, especially if you want two or more together.
Loop through both ends of your wire through the pearls. Pull and tighten, leaving a slight leeway.
Twist up the leeway you left and push into place.
*Over tightening might cause the pearls to bunch up. -
 Step 6
Single pearls are easier!
-
 Step 7
Once happy with design, twist up the ends and tuck them nicely so you don't get poked.
Pick out your chains next. I chose these slinky ones!
Double them up and wire them to the main button piece. -
 Step 8
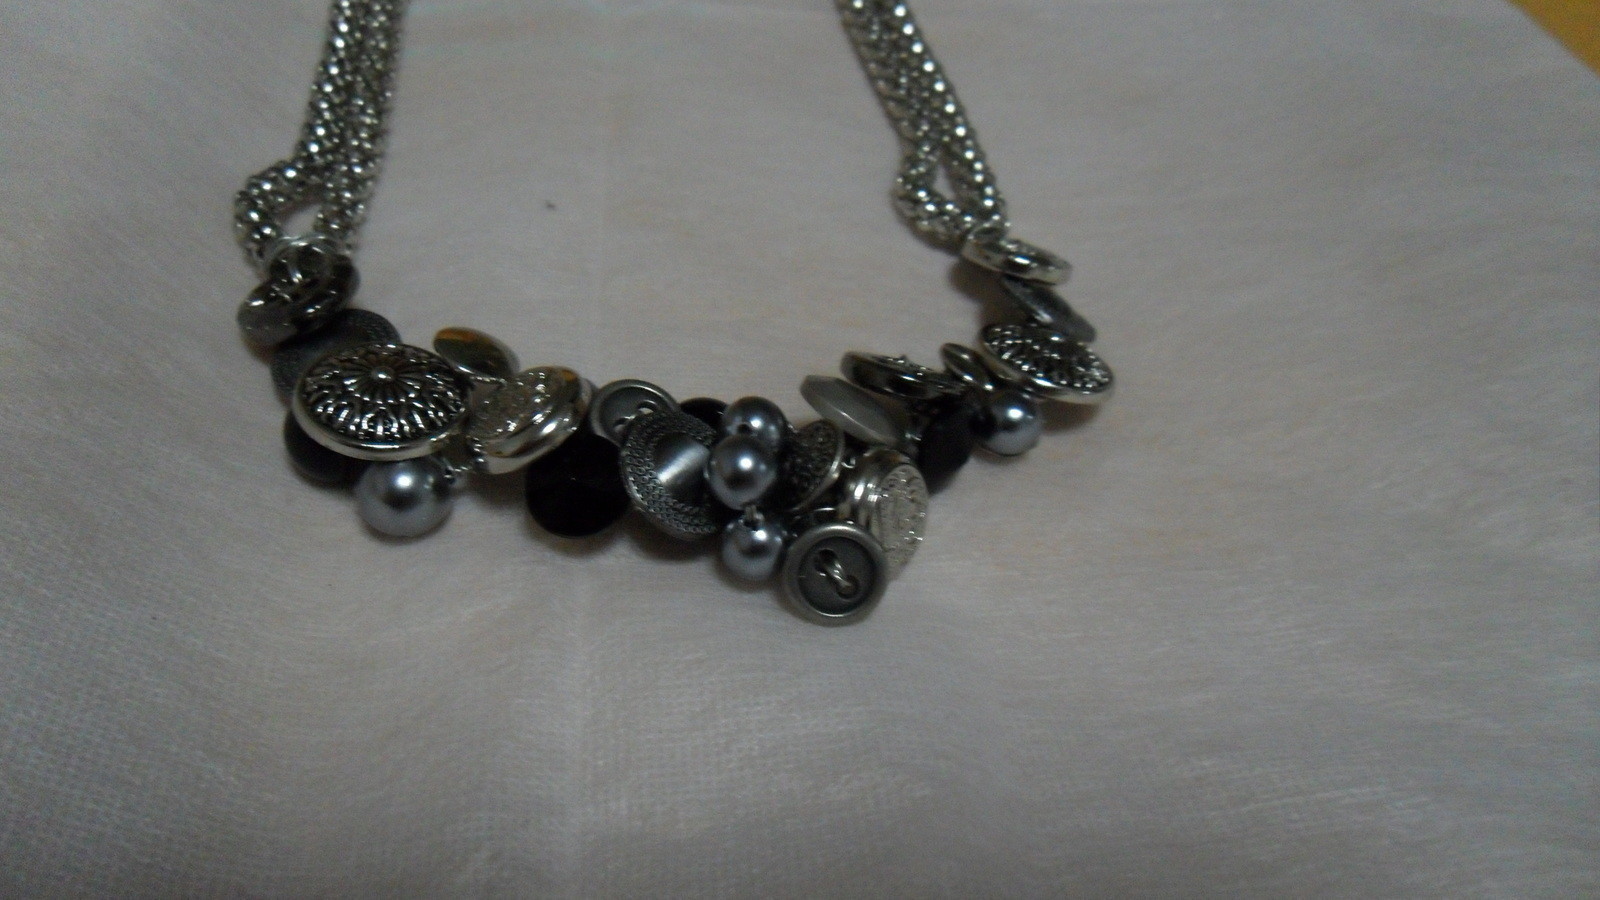
Wire on a toggle clasp and you are done!
Have fun mixing and matching! The shape doesn't have to be regular so experiment!


Comments


