

About
Tinkerlab
Automate your drawings with your very own drawbot—a happy marriage of art and technology for little hands. If electronics take you outside your comfort zone, this simple project is an easy place to begin. I’m much more of an artist than an engineer, and if I can do this, you can too! The core of this simple robot is an offset motor, which is easy to find at any electronics store or online. Not only are these robots hilarious to watch, but the process of making them can empower children to see themselves as builders and engineers.
INVITATION
The technical qualities of this project make it one for an adult and a child to build together. After you follow the steps for building your drawing machine, you can invite your child to change the colors or manipulate the motor and weight to change the direction and speed of the machine.
-
 Alyssa D. favorited Drawing Machine
18 Jan 01:43
Alyssa D. favorited Drawing Machine
18 Jan 01:43
-
Alissa B. favorited Drawing Machine
11 Oct 04:08
-
 Roost Books published her project Drawing Machine
25 Jul 16:42
Roost Books published her project Drawing Machine
25 Jul 16:42
-
Step 1
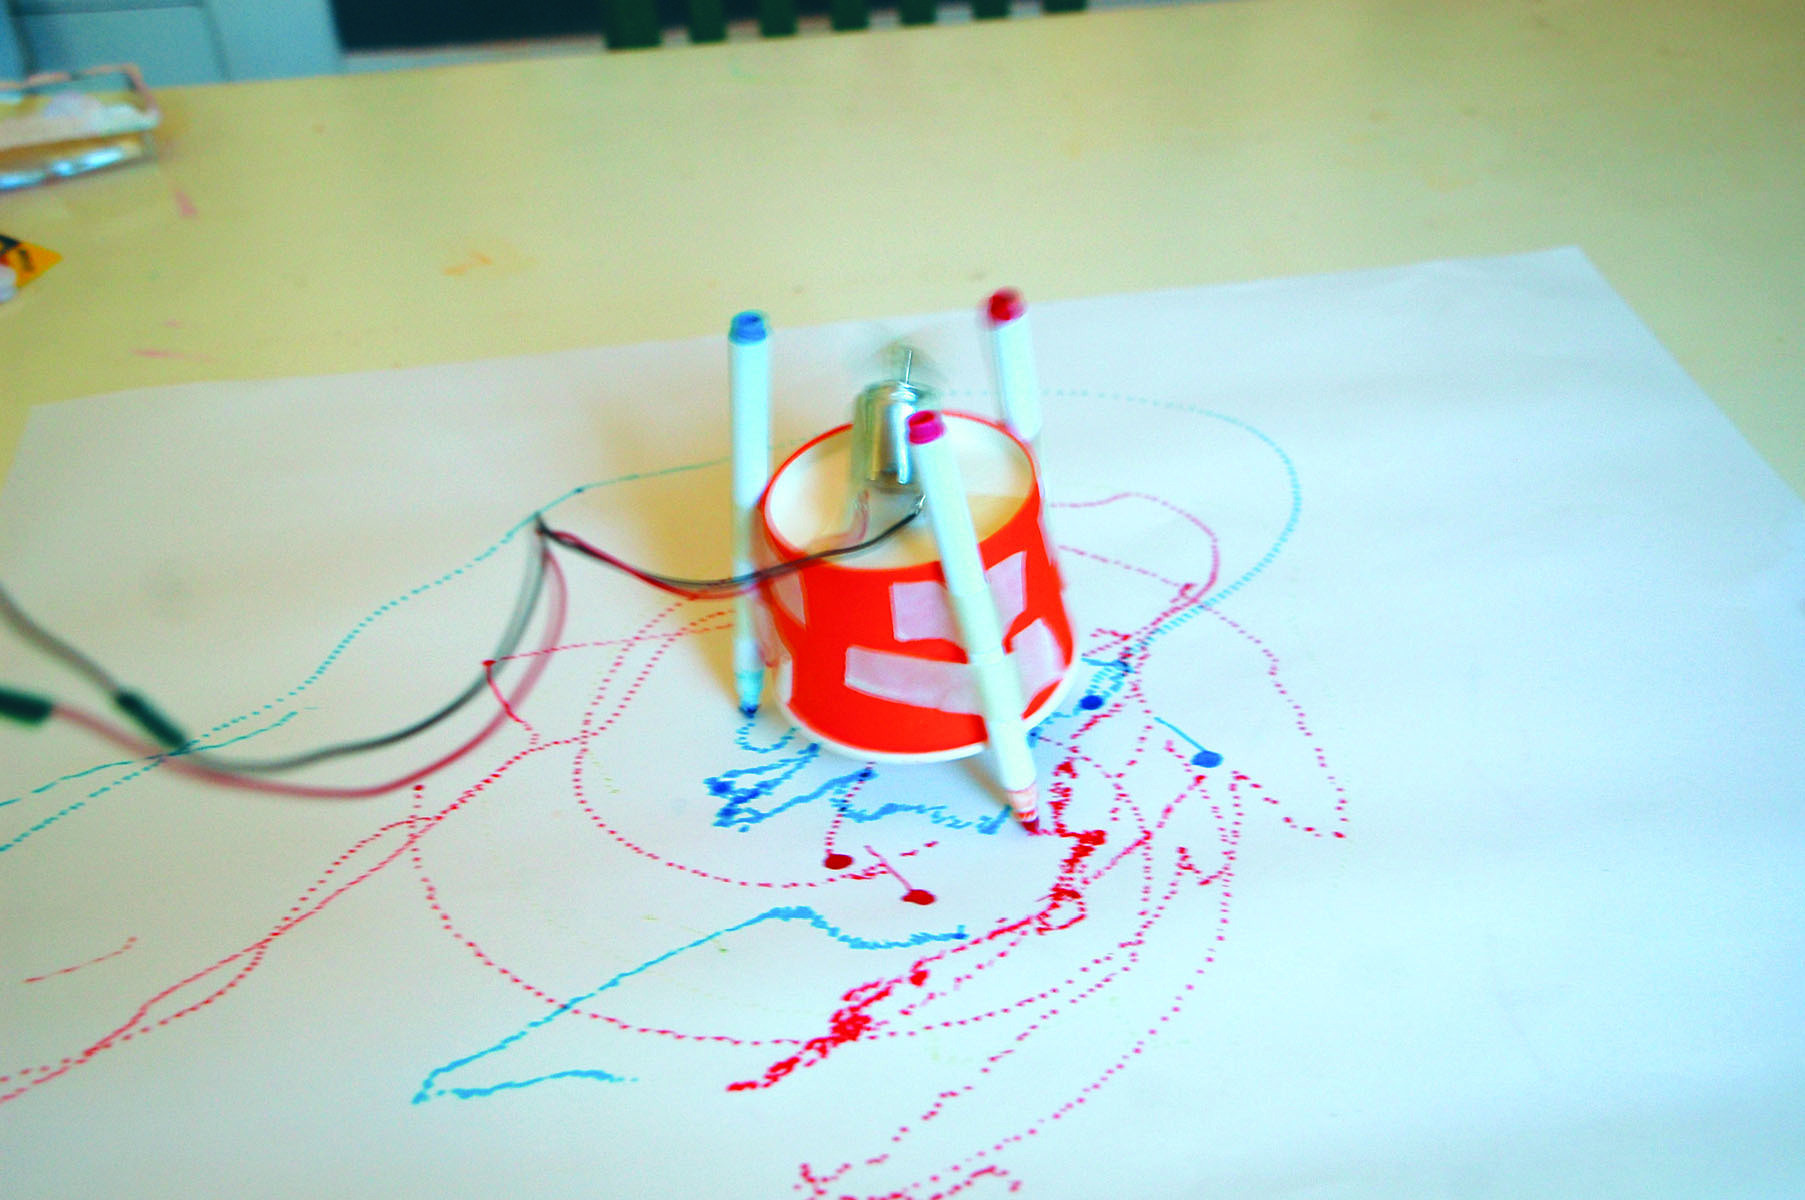
Turn the cup upside down and securely tape three markers to it so that they form a tripod. This will elevate the cup off the table. Keep the pen caps on until your machine is ready to draw.
-
 Step 2
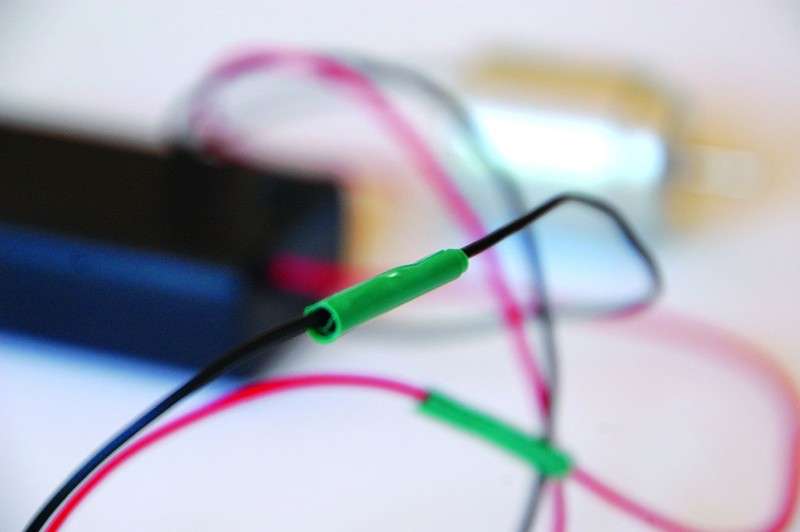
Put the batteries in the battery pack. Twist the wires of the motor to the wires of the battery pack by connecting the red wires to each other and the black wires to each other. It shouldn’t matter if you connect matching wires. If your motor doesn’t have wires, attach the battery pack wires to either of the motor’s connectors. If there isn’t enough exposed wire, use a wire stripper to reveal more. Fasten the wires together with a small piece of electrical tape.
-
 Step 3
With the motor and battery pack now connected, secure them to the top of the cup with masking tape. The placement of the battery pack and motor is a great area for experimentation.
-
Step 4
Now you’re ready to add a counterweight to the motor. This weight will help your Drawbot move. Notice that the motor has a thin cylinder of metal that protrudes from the top. This is the axis. Tape a dime or penny to the top of the axis. Without this added weight, the motor will simply turn like a fan.
-
Step 5
Place your drawing machine on top of a paper-covered table.
-
Step 6
Remove the pen caps and turn on your motor. Be amazed!
-
 Step 7
EXPERIMENT
Try using different weights on the motor axis by removing or adding coins or other small objects.
Discover new drawing patterns by adding more markers.
Build the same type of bot on a different cup or object such as a Lego structure with wheels to see how this affects the look of the drawing. Move the motor to a new spot on the object and see if it changes the way the machine draws.