


About
Fabulous for fall...super easy too
I've been seeing fabulous jackets on the runways this season. So, I wanted to try making one myself. It took me about 3 days to complete it because I played around with the sleeves. Sleeves are a bit tricky so it can be made into a vest instead.
I used a tweed type of material. It also has french seams. I don't have a serger and I wanted it to look as professional as possible. I love the way it turned out and I can't wait to wear it.
I hope you guys enjoy making it as much as I did. I really look forward to seeing your different versions.
Tags
-
 Ghost C. favorited Designer Inspired Jacket
22 Jan 23:58
Ghost C. favorited Designer Inspired Jacket
22 Jan 23:58
-
Rebecca C. favorited Designer Inspired Jacket
24 Jul 01:56
-
Amanda V. favorited Designer Inspired Jacket
11 Aug 07:39
-
Alex2:a L. favorited Designer Inspired Jacket
28 Jul 15:35
-
 Roughwaters44 favorited Designer Inspired Jacket
08 Jul 03:26
Roughwaters44 favorited Designer Inspired Jacket
08 Jul 03:26
-
 Christa D. favorited Designer Inspired Jacket
13 Apr 06:54
Christa D. favorited Designer Inspired Jacket
13 Apr 06:54
-
 Shelynn T. added Designer Inspired Jacket to Things I`ll Make Eventually
14 Jan 22:35
Shelynn T. added Designer Inspired Jacket to Things I`ll Make Eventually
14 Jan 22:35
-
Shelynn T. favorited Designer Inspired Jacket
14 Jan 22:35
-
 rouge s. favorited Designer Inspired Jacket
11 Nov 00:50
rouge s. favorited Designer Inspired Jacket
11 Nov 00:50
-
Debi added Designer Inspired Jacket to tops
30 Oct 04:38
-
 Step 1
-Measure your bust and from your shoulders down to where you want the jacket to stop.
-Cut two pieces of fabric that equal your bust measurement divided by two + 3" by the length of your jacket + seam allowance
For example my bust measurement was 40" and I wanted my jacket to be 25" long so my fabric pieces were
23" X 25 3/4" -
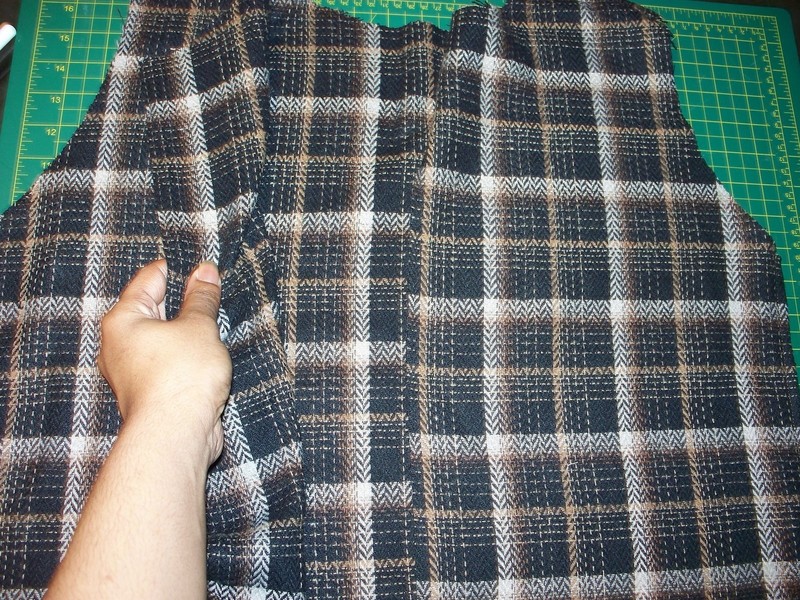
 Step 2
Fold your fabric in half, using a tank, deconstructed tee, or pattern from another top, draw your neck line at the fold, and your armscyes. (Don't forget your seam allowance)
Carefully cut out the neckline and armscyes
These are your bodice pieces -
Step 3
If you want to create french seams here's the process:
Place the two pieces WRONG sides together. Sew using 1/4" smaller seam allowance than normal (so if your normal seam allowance is 1/2" you will sew using a 1/4" seam allowance)
Now, fold the pieces back so they are RIGHT sides together. Press (if necessary) and sew using your normal seam allowance. -
 Step 4
Pin an sew your bodice pieces together (use step 3 if doing french seams)
-
 Step 5
Lay your jacket out and determine what side will be the front. Cut the front straight up the middle.
-
 Step 6
Place the two side seams together, round the top and bottom of the front (as illustrated).
-
 Step 7
Let's make the ruffles...
Measure around the outside of your jacket and triple that measurement. Cut a strip of fabric that equals this measurement X 6". (You'll probably have to sew several strips together)
Fold the strip in half and press. You should now have a strip that is 3" wide
-
 Step 8
Starting at one of the bottom side seams, pin the strip to the entire outer edge of the jacket.
As you pin, create small pleats about 3" apart. Take your time to make sure you have even fabric distribution around the entire jacket.
Pin and sew them to the jacket.
(I recommend you follow step three for the ruffles as it will give you a more professional finish) -
 Step 9
Press the seam allowance down toward the inside of the jacket and stitch it down.
-
Step 10
Note: If you want a vest, skip the sleeves and hem the armholes or line them with bias tape.
It's time for the sleeves...
If you have a good sleeve pattern, go ahead and use it to create your sleeves. When drawing out your sleeve, draw it a little bigger than usual if you want a puff sleeve(don't attach it to the jacket yet though). If not just make it to your normal size.
If you don't have a sleeve pattern, I came up with an easy way to make one so go on down to the next step ^_^
-
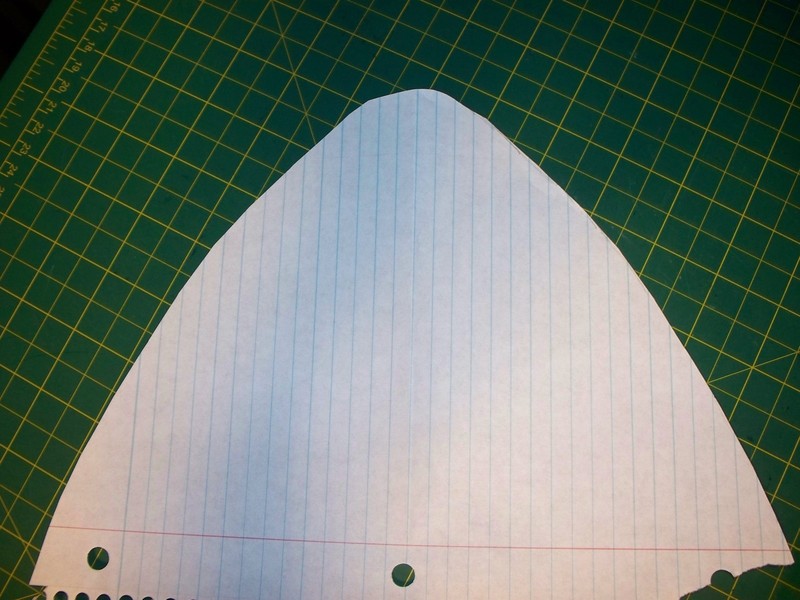
 Step 11
Get a piece of paper (I used notebook paper) and fold it in half top to bottom.
Place the paper under the curve of the armscye with the fold facing out. so it looks like a sleeve (as illustrated)
Trace the curve of the armscye.
-
 Step 12
Cut this out so you have a dome type of shape.
Round it of a bit so the top is not so pointy.
-
Step 13
To get good sleeves, you'll need to measure around your upper arm (add a couple of inches for movement and add your seam allowance.
Next, measure from your shoulder down to where you want the sleeve to stop. My Jacket has short sleeves so I stopped mid way between my elbow and my shoulder. Add an inch + seam allowance.
Cut two pieces equal to the measurements you came up with. -
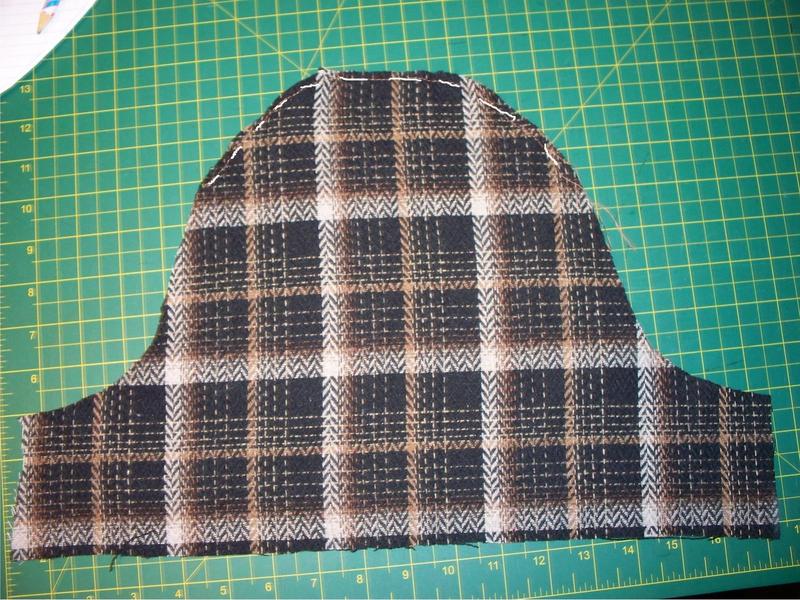
 Step 14
Place the two pieces together and fold them in half.
Place your sleeve pattern on top of the fabric matching the folds and trace the shape onto your fabric.
Once you get to the bottom of the pattern piece, begin to curve out toward the left side of the fabric (as illustrated) continue that line all the way to the edge of the fabric.
Be sure to draw it a little bigger than your pattern as we will create puff sleeves. Mark the top point of the sleeve. This will help you line it up when it's time to sew it onto the jacket.
Cut the sleeves out.
-
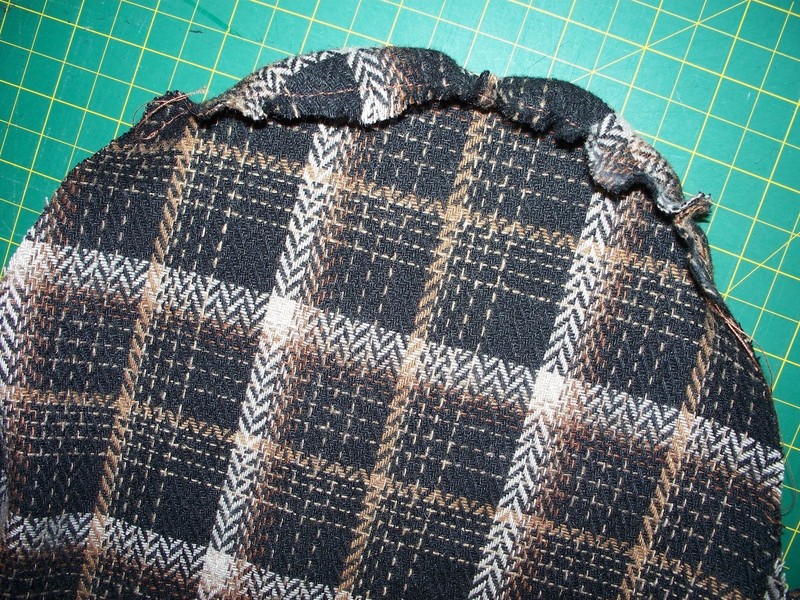
 Step 15
Sew a wide stitch along the top curved edge of the sleeves (as illustrated)
-
 Step 16
Pull the bottom thread to gather the shoulder.
The more you gather the sleeve, the puffier it'll be.
-
 Step 17
Place the two short side of the sleeve together and sew.
-
 Step 18
Place the piece inside the jacket (wrong sides together for french seams, right sides together for regular seams)
Line the mark up with the top shoulder seam and pin it in place. Line the seam on the bottom up with the side seam and pin.
Carefully pin the rest of the sleeve to the jacket working your way back up ti the top.
You may need to ease some of the gathers or gather more so that the sleeve will fit the armscye.
Sew in place (remember follow step 3 for french seams)
Repeat this process for the other sleeve
-
 Step 19
Hem your sleeves and your done.
You can even add ruffles to your sleeves by following steps 7 thru 9.
-
 Step 20
I didn't add a closure to my jacket because I usually leave my jackets open. But, feel free to add buttons or anything else that suits your style
<------ You can even belt it!
-
Step 21
If you have any questions, message me and I'll get back to you ASAP. If you have any suggestions on how I could make this better, send em' my way too. I'm always looking to learn something new.
Don't forget to post your version below with pics...
Now go make that jacket ^_^


Versions


Comments


