
About
Fancy, scented and easy topiary trees
I didn't put quantities on the list because as you can see I made 5 trees, so everything will depend on how many trees you are going to make. I hope you enjoy the tutorial and making these trees as much as I did.
If you make your own please share it with me so that I can see your creations :)
-
 MischievousRaven added Coffee Bean Topiary Trees to Mad hatter - tea room
07 Feb 13:52
MischievousRaven added Coffee Bean Topiary Trees to Mad hatter - tea room
07 Feb 13:52
-
 emmabota73 favorited Coffee Bean Topiary Trees
06 May 01:19
emmabota73 favorited Coffee Bean Topiary Trees
06 May 01:19
-
 Amy D. favorited Coffee Bean Topiary Trees
14 Jan 00:13
Amy D. favorited Coffee Bean Topiary Trees
14 Jan 00:13
-
Emo Chick favorited Coffee Bean Topiary Trees
10 Jan 14:25
-
 Danielle H. favorited Coffee Bean Topiary Trees
06 Nov 03:32
Danielle H. favorited Coffee Bean Topiary Trees
06 Nov 03:32
-
 Nicole L. favorited Coffee Bean Topiary Trees
02 Nov 23:21
Nicole L. favorited Coffee Bean Topiary Trees
02 Nov 23:21
-
 Summer O. favorited Coffee Bean Topiary Trees
28 Oct 20:23
Summer O. favorited Coffee Bean Topiary Trees
28 Oct 20:23
-
 Millie H. favorited Coffee Bean Topiary Trees
27 Oct 22:14
Millie H. favorited Coffee Bean Topiary Trees
27 Oct 22:14
-
 PuddyTat favorited Coffee Bean Topiary Trees
26 Oct 22:44
PuddyTat favorited Coffee Bean Topiary Trees
26 Oct 22:44
-
 Tony Harris favorited Coffee Bean Topiary Trees
16 Oct 11:15
Tony Harris favorited Coffee Bean Topiary Trees
16 Oct 11:15
-
 Step 1
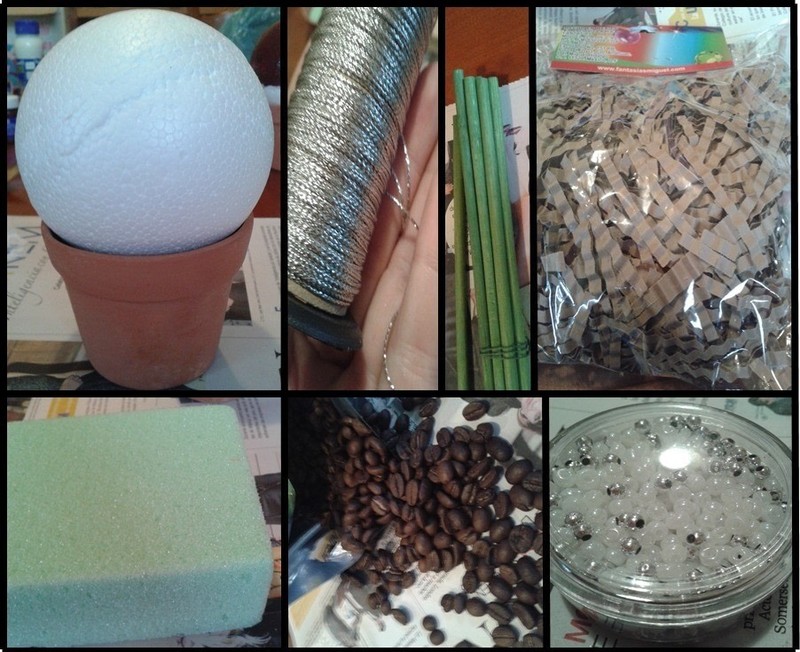
First of all gather all your material.
Make sure the Styrofoam ball and the flowerpot are equally sized. I choose these colors cause they match, but you can choose any colors you want -
 Step 2
Start by painting the Styrofoam balls brown and this is where the toothpicks would come in handy cause you can either wait for one half to dry and then do the other half.
Or once you paint one half you can poke the painted side with a toothpick in order to be able to pain the other half without making a mess, and then let it dry like in the picture -
 Step 3
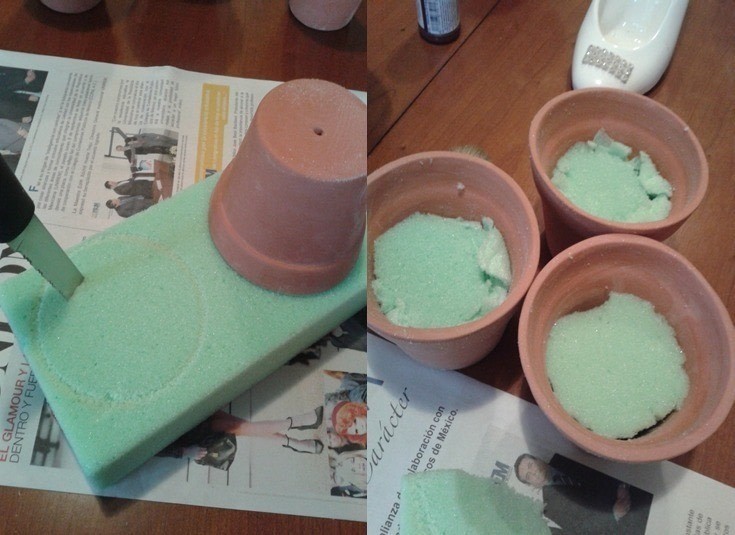
While the balls are drying you can start preparing the flowerpots, grab your foam block and press a flowerpot against it in order to mark the diameter of the pot, then with your knife start cutting, you want to achieve a tight fit in the pot, and also you want to fill it almost to the top (i forgot to take a picture of that, and it doesn´t matter if you use multiple pieces of foam, just make sure that it is really tight)
-
 Step 4
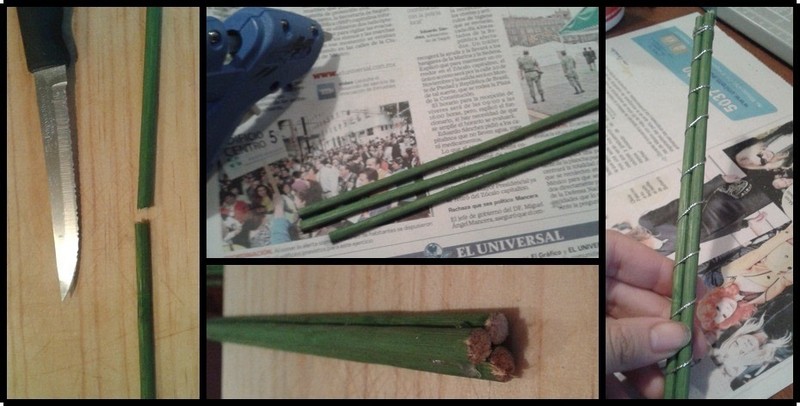
Now the sticks, I used 3 per tree, also mine were really long sticks and i didn't want my trees to be too tall, so i cut them 23cm (11.5 in) long (it doesn't matter if the tips look kind of messy cause no one will ever see that again), then with the hot glue gun i put a dab of hot glue at the top and bottom of the sticks and piled them up as to make a triangle.
When they were nice and firm i wrapped my decorative thread around them securing it wit a dab of hot glue.
-
 Step 5
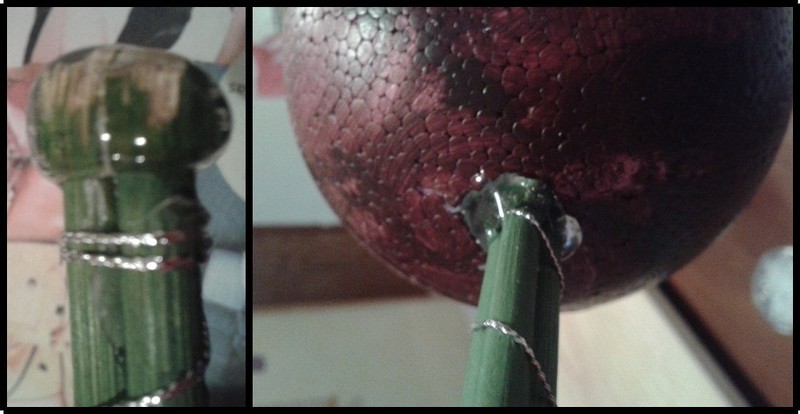
Now the pen comes in handy, where you poked the ball with the tooth pick you can poke a hole with the pen in order to put the sticks in the ball, once you have the hole you need to dab a lot of hot glue on the sticks (like in the picture) and you want to stick it in the ball and push it in for like 2 cm (half an inch)
-
 Step 6
Now the tricky part....
start gluing the coffee beans onto the balls, start from the top of the ball and work your way around and down, paste the beans flat side up and flat side down, alternating frequently, try not to leave too many empty spaces.
I used white glue because it doesn't dull the smell of the coffee.
This step can be really frustrating, but with some work and practice it'll be really easy.Once the beans are in place, and dry you can randomly glue the beads if you want to.
-
 Step 7
And then to put it in the flower pot, just like in step 5 you need to put a lot of hot glue on the sticks and just push it in the foam until the bottom, and then fill the hole up with hot glue.
Now put some hot glue on the foam's surface and start gluing your shredded paper and arrange in a way that you like, put some more hot glue in different places until it is all secure.
-
 Step 8
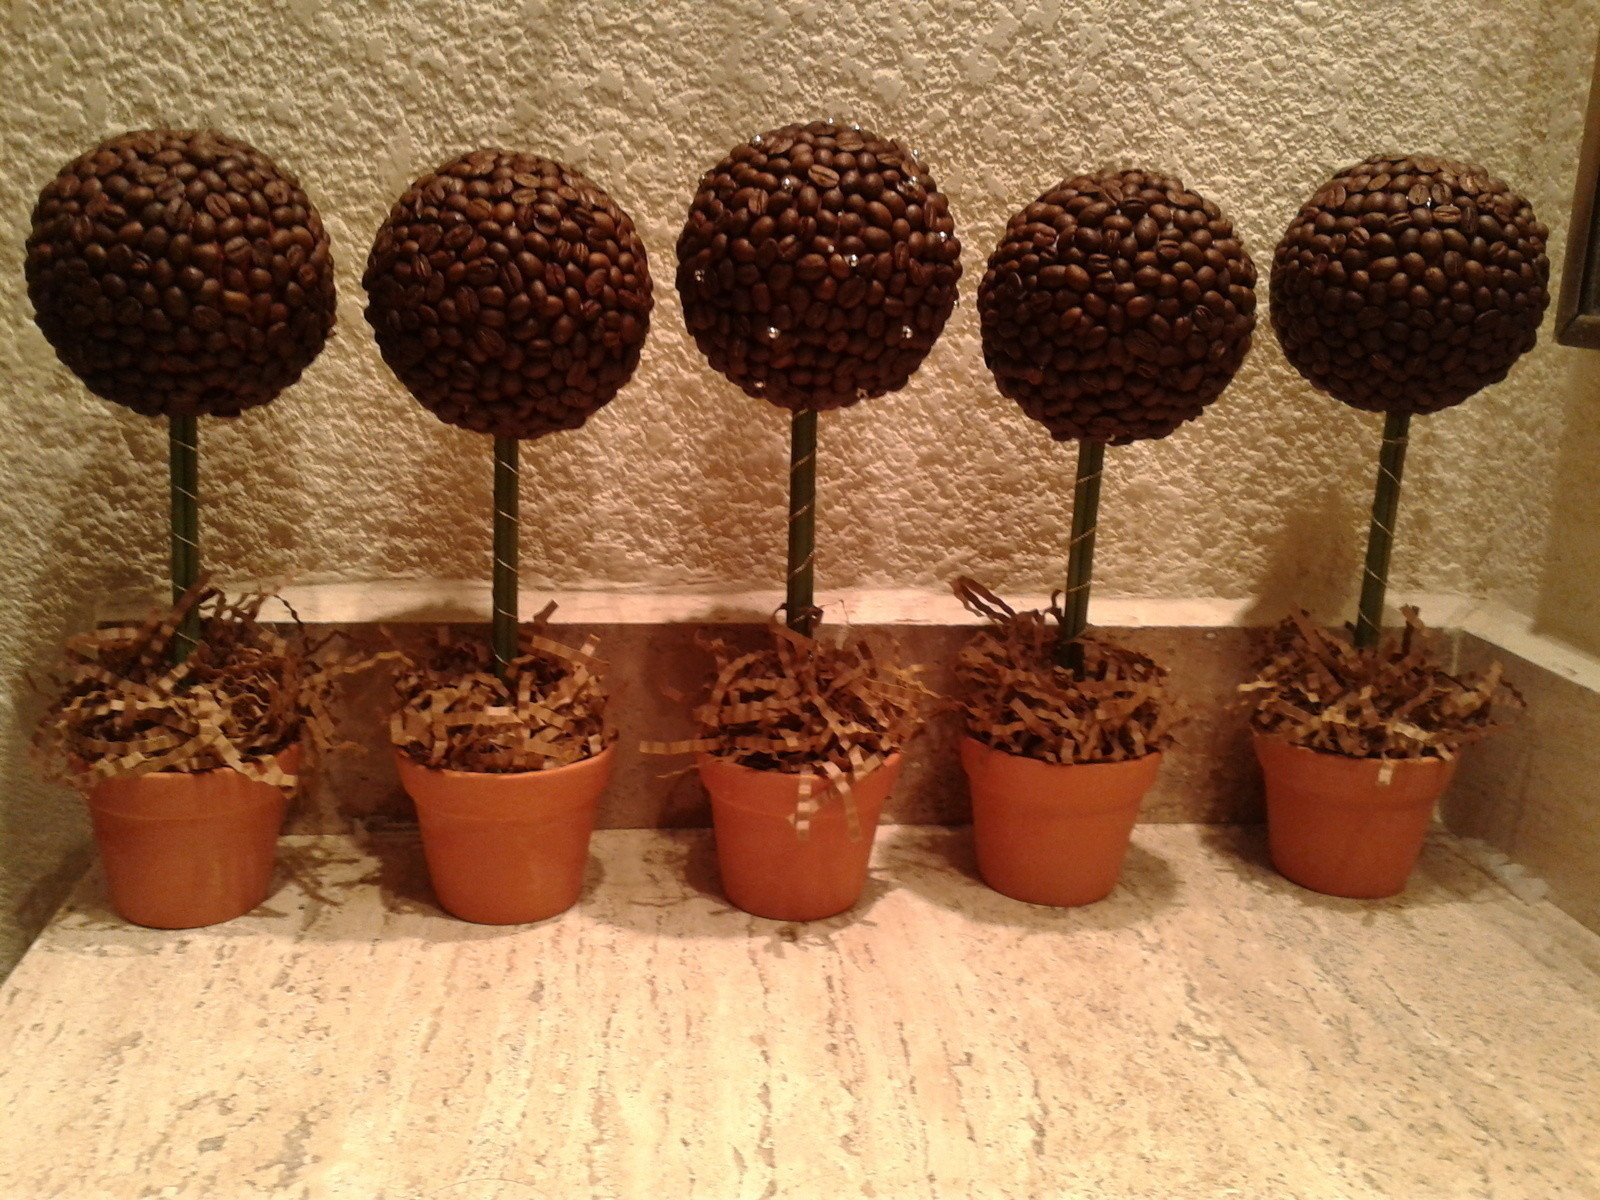
And you're finished!
The topiary tree with beads is the one in the middle, i didn't do anything to the flowerpots but you can make them look prettier with some ribbon or paint them with stencils or anything else.
Also you can make these with popcorn, marshmallows and any other things you can fit on a sphere.
Hope you liked the project :)