

About
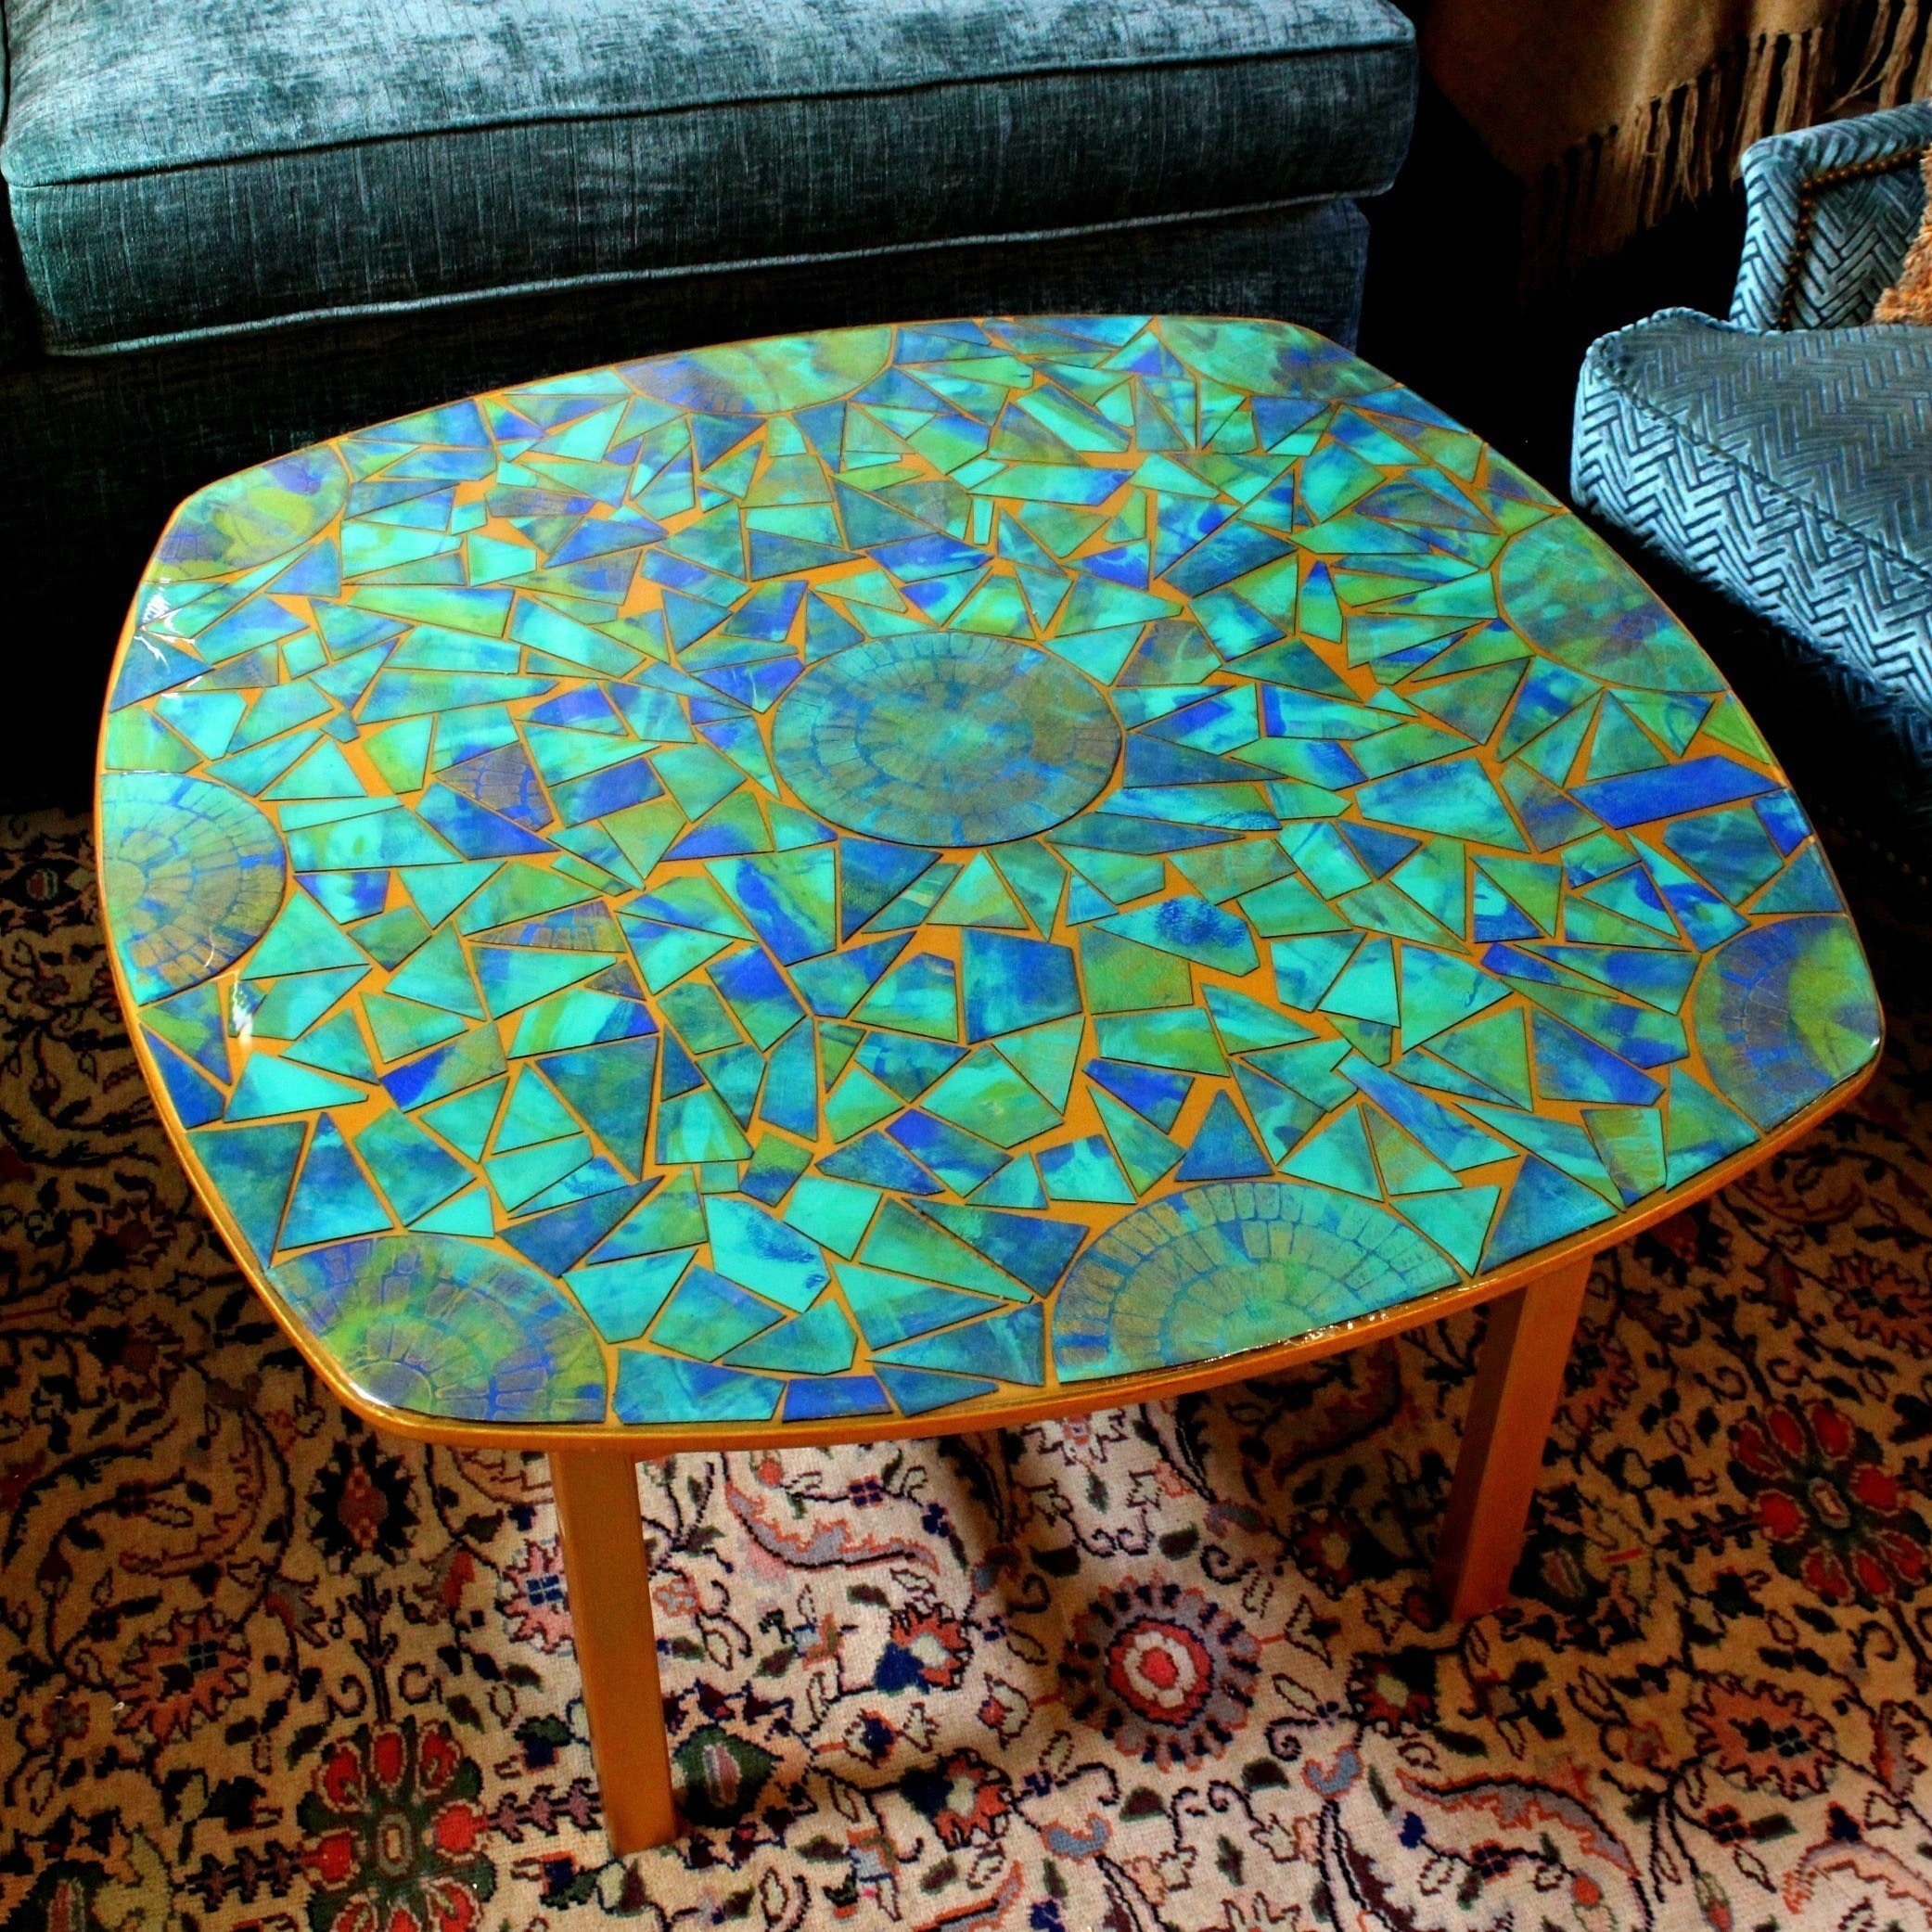
Cardboard Mosaic Table
Turn cardboard and paint into beautiful mosaic tiles with a Gel Press!
-
 Susana F. favorited Cardboard Mosaic Table
20 Jan 17:48
Susana F. favorited Cardboard Mosaic Table
20 Jan 17:48
-
 Kimber C. added Cardboard Mosaic Table to Mosaic art
03 Feb 05:03
Kimber C. added Cardboard Mosaic Table to Mosaic art
03 Feb 05:03
-
Kimber C. favorited Cardboard Mosaic Table
03 Feb 05:03
-
 Melissa M. favorited Cardboard Mosaic Table
31 Jan 21:50
Melissa M. favorited Cardboard Mosaic Table
31 Jan 21:50
-
 Connie M. favorited Cardboard Mosaic Table
28 Jun 17:26
Connie M. favorited Cardboard Mosaic Table
28 Jun 17:26
-
 poochie3572 favorited Cardboard Mosaic Table
20 Jun 01:19
poochie3572 favorited Cardboard Mosaic Table
20 Jun 01:19
-
Amanda P. added Cardboard Mosaic Table to Various Crafts
17 Jun 22:44
-
meildani m. favorited Cardboard Mosaic Table
29 Mar 14:17
-
 JadeSucksAtLife favorited Cardboard Mosaic Table
25 Feb 12:18
JadeSucksAtLife favorited Cardboard Mosaic Table
25 Feb 12:18
-
 Melissa S. favorited Cardboard Mosaic Table
04 Feb 17:53
Melissa S. favorited Cardboard Mosaic Table
04 Feb 17:53
-
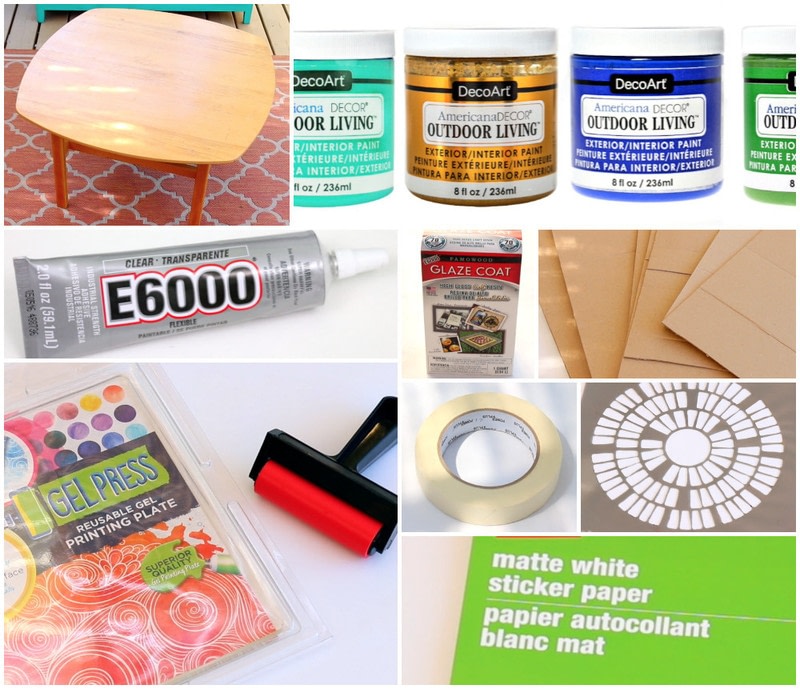
 Step 1
Thrift store table
Americana Decor Outdoor Living paint
E-6000 Glue
Gel Press
Famowood Glaze Coat (2 part epoxy resin)
Cardbaord & Masking tape
DecoArt Tribal stencil
Sticker Paper (I used 11 sheets to cover this table) -
 Step 2
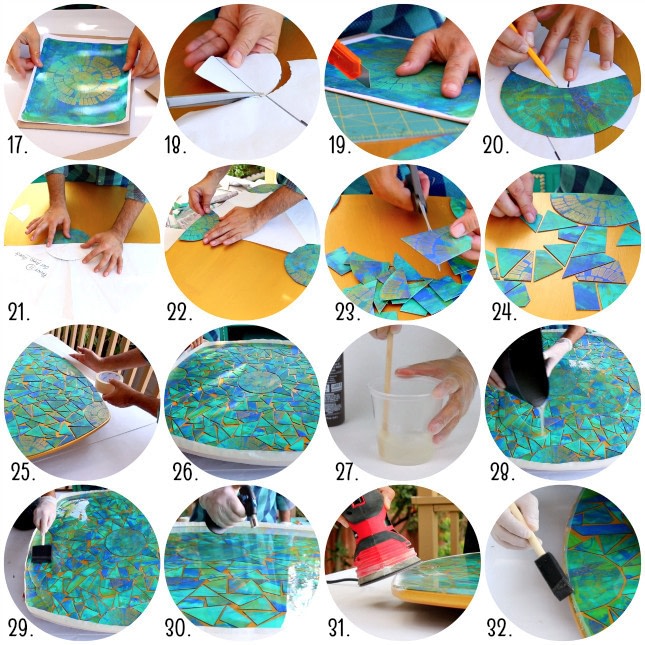
1. - 3. Trace the table top on a large sheet of paper and then fold in half and half again 3 times to create "pie slice" folds
4. Mark out 1/4 of the pattern with a marker
5. & 6. Center and mark the stencil in the middle of the pattern and 1/2 of the stencil around the edges
*This will help with your tile placement later
7. Paint the entire table in Americana Decor Gold and let dry while you work on the tiles
8. Fill squirt bottles with Americana Decor in Adirondack, Gold, Morning Glory and Lily Pad
9. Squirt small amounts of Adirondack, Morning Glory and Lily Pad on your Gel Press and use a brayer to lightly spread the colors
10. - 12. Place the sticker paper on top, bray the back so "print" the paint and then carefully remove the sticker paper to reveal beautiful mottled pages
13. - 16. Place the Tribal stencil on the Gel Press, bray Adirondack and Gold over it, remove the stencil and then Gel Press the stencil on top of the mottled pages -
 Step 3
17. - 20. Stick the pages to cardboard and cut out and 1/2 circles (from your pattern) using a craft knife
21. & 22. Use the pattern to center a full circle tile in the middle of the table and the 1/2 circles evenly around the edges and then glue in place with E-6000 Glue
23. & 24. Cut the rest of the cardboard into "broken" tiles and fill the rest of the table with pieces about 1/8" apart
25. & 26. Create a barrier/lip around the table with two rows of 2" wide masking tape
*Make sure it sticks all the way around
27. & 28. Mix the resin according to directions (I used 2 quarts) and then pour evenly on the tiles
29. & 30. Smooth out the resin with a foam brush and then pop the bubbles with a small torch or long arm lighter
*Cover and cure overnight
31. Once the resin is cured, remove the tape and sand rough edges with a sander or sandpaper
32. Coat the sanded edges with a thin layer of resin and let cure again overnight -
Step 4
Watch how to make it here!