


About
Cable Cozy
Are you fed up off constantly untangling the cables from all your tech? make yourself a handy cable cozy that you can take anywhere.
Downloads
- 106511_2F2015-01-04-143124-Cablecosy.pdf 670 KB [ Download ]
-
 Mary R. favorited Cable Cosy
18 Jul 12:11
Mary R. favorited Cable Cosy
18 Jul 12:11
-
 Jamie Bhajan commented on Cable Cosy
16 Jul 08:44
Jamie Bhajan commented on Cable Cosy
16 Jul 08:44
-
Jamie Bhajan favorited Cable Cosy
16 Jul 08:41
-
 Krystal W. added Cable Cosy to Sewing
19 Mar 04:28
Krystal W. added Cable Cosy to Sewing
19 Mar 04:28
-
 Miss_Fit favorited Cable Cosy
09 Jul 04:33
Miss_Fit favorited Cable Cosy
09 Jul 04:33
-
 Kaitlynn L. favorited Cable Cosy
25 Jan 02:24
Kaitlynn L. favorited Cable Cosy
25 Jan 02:24
- kzk favorited Cable Cosy 28 Nov 17:38
-
 jtrejoargueta favorited Cable Cosy
20 Sep 05:52
jtrejoargueta favorited Cable Cosy
20 Sep 05:52
-
 Harry B. favorited Cable Cosy
17 Sep 05:04
Harry B. favorited Cable Cosy
17 Sep 05:04
-
chelsea g. favorited Cable Cosy
27 Aug 06:16
You Will Need
-
 Step 1
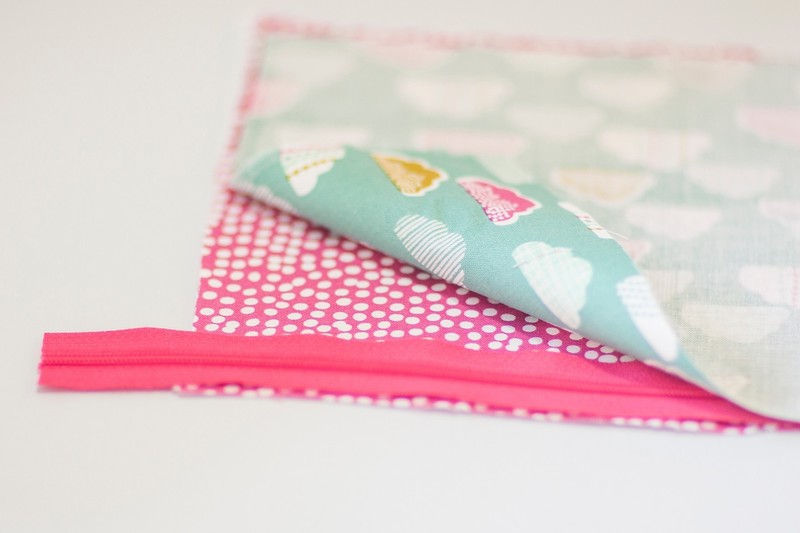
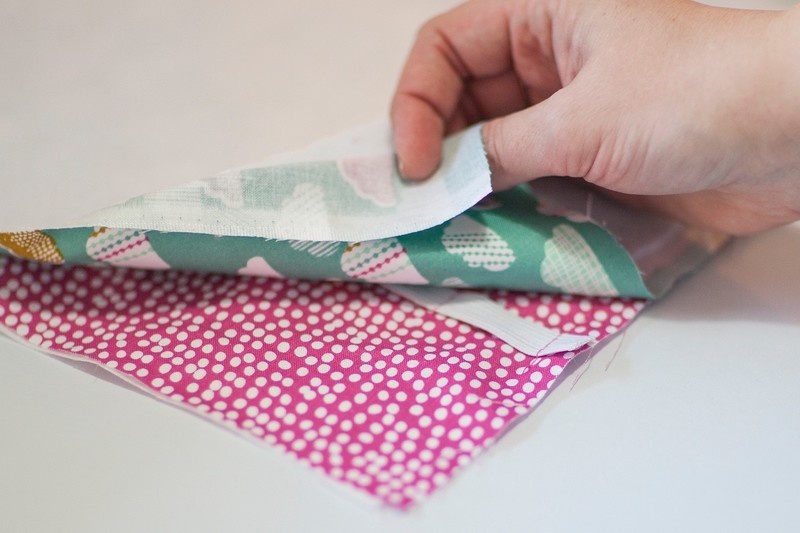
Start by cutting two pieces of each of your fabrics, I cut mine 23cm x15cm. Iron on interfacing to the fabric you want to use for your lining.
-
 Step 2
Then pop your zip in-between the two right-sides of your lining and outside fabric facing up towards the outside fabric.
-
 Step 3
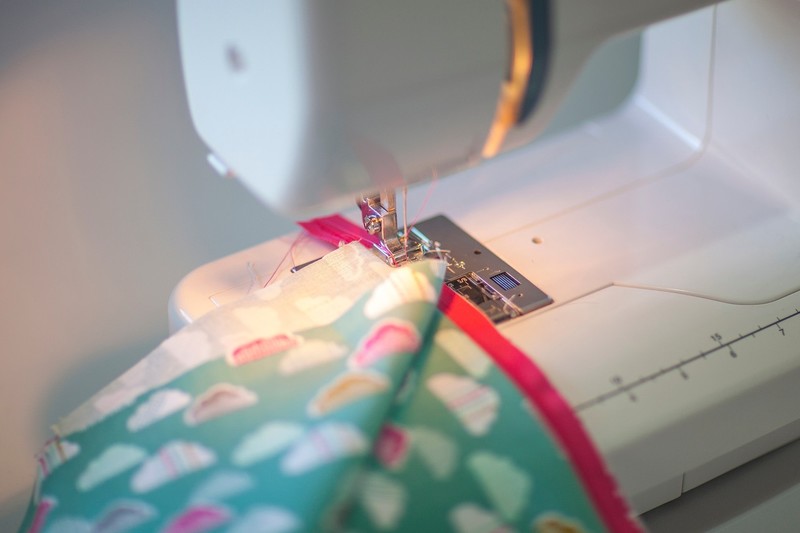
Sew the zip in place. Fold both pieces back and repeat on the other side of the zip.
-
 Step 4
Fold the second lot of pieces back and run a line of top stitching to hold the fabrics away from the zip teeth when the pouch is in use.
-
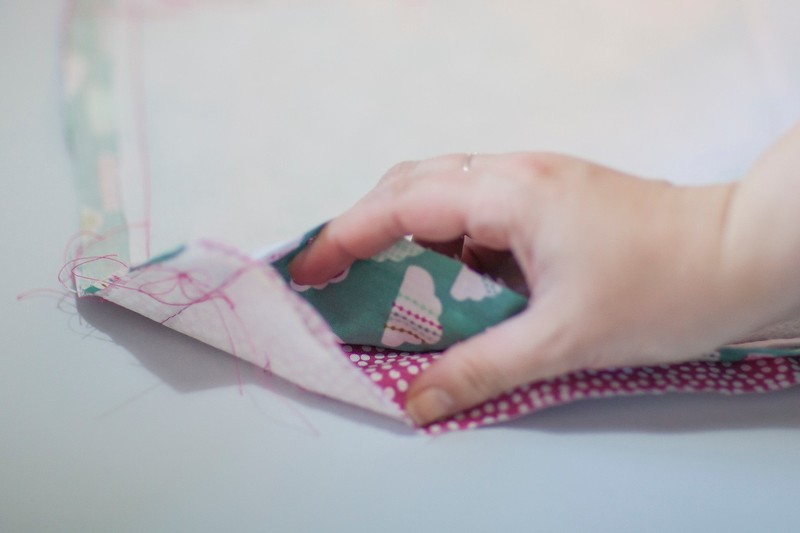
 Step 5
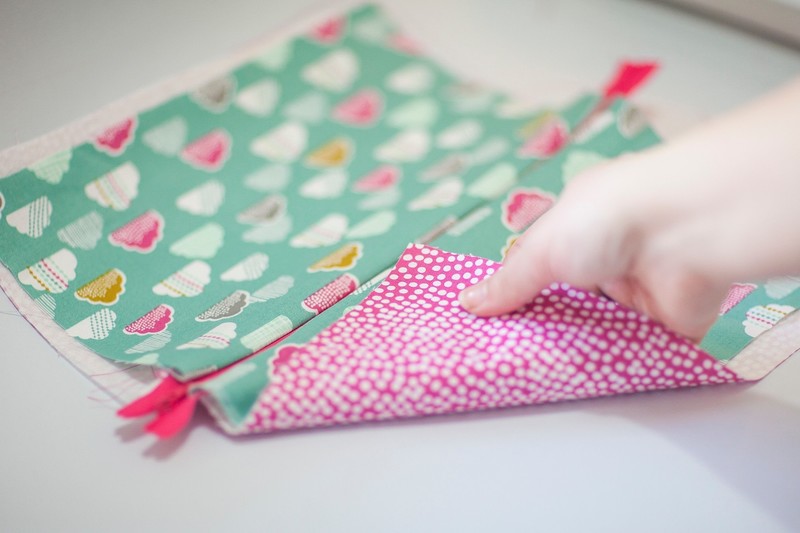
Now undo the zip halfway. Once you have done that, take the two outer pieces and the two lining pieces and pin them together facing each other. Sew all the way around the outside and the lining leaving a small 7cm opening in the lining
-
 Step 6
Turn the whole thing inside out and hand sew up the hole in the lining
-
 Step 7
push the lining inside the pouch.
-
 Step 8
To make the cable tidy part of the cosy, cut two larger pieces of your fabrics 25cm x 45cm and iron on some interfacing to the lining fabric - again to give it a little more body.Then pin two rows of elastic along the longer length, mine were about 7cm apart. Sew the elastic at between 2-3cm spacing all the way down the length, varying the spacing as you go to fit larger and smaller cables, across both rows of elastic.
-
 Step 9
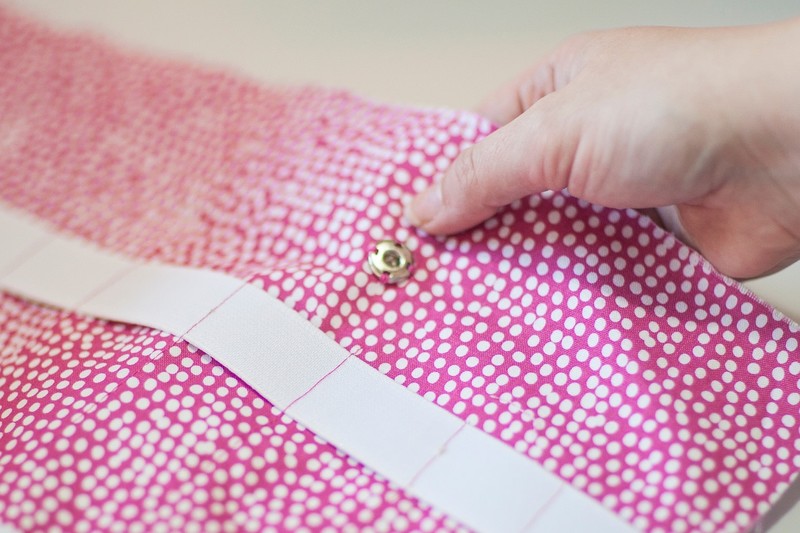
Then sew one side of your popper into place about a third of the way up and about 3cm in.
-
 Step 10
Take a small length of elastic and your belt clasp and loop the clasp onto the elastic then sandwich that at the top edge between your two fabrics right sides facing. I also added a layer of felt to the sandwich to help give a little protection to my cables if I am taking it around with me.
-
 Step 11
Sew all the way around all of the layers, leaving about a 5cm gap at the end.
-
 Step 12
Turn the whole piece inside out then sew all the way around the outside with a neat top stitch.
-
 Step 13
attach the other end of the buckle with some more elastic and attach it on the outside of the cosy.
-
 Step 14
If like me you are using a directional fabric, think about which direction it will be facing when it is folded as well as when it is hung up, I wish I had made mine the other way as you can't really see that it is the right way up when it is hanging and it looks upside down when it is folded up on the outside.
-
 Step 15
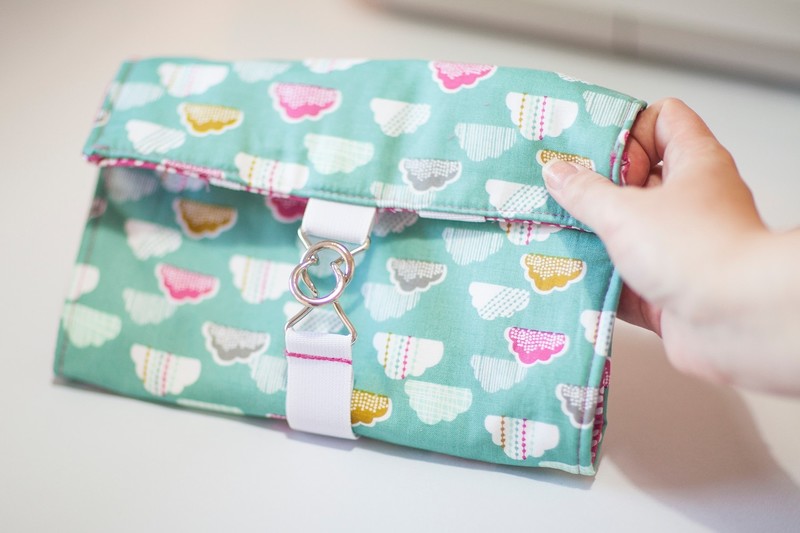
Also don't forget to stitch the poppers onto the zipped pouch so you can attach it when it's hanging or take it off if you need to take it out with you.
-
 Step 16
There you have it, a cable tidy/ gadget accessories cosy that can hang neatly under your desk and come out with you when you need to travel with your tech.


Comments


