

About
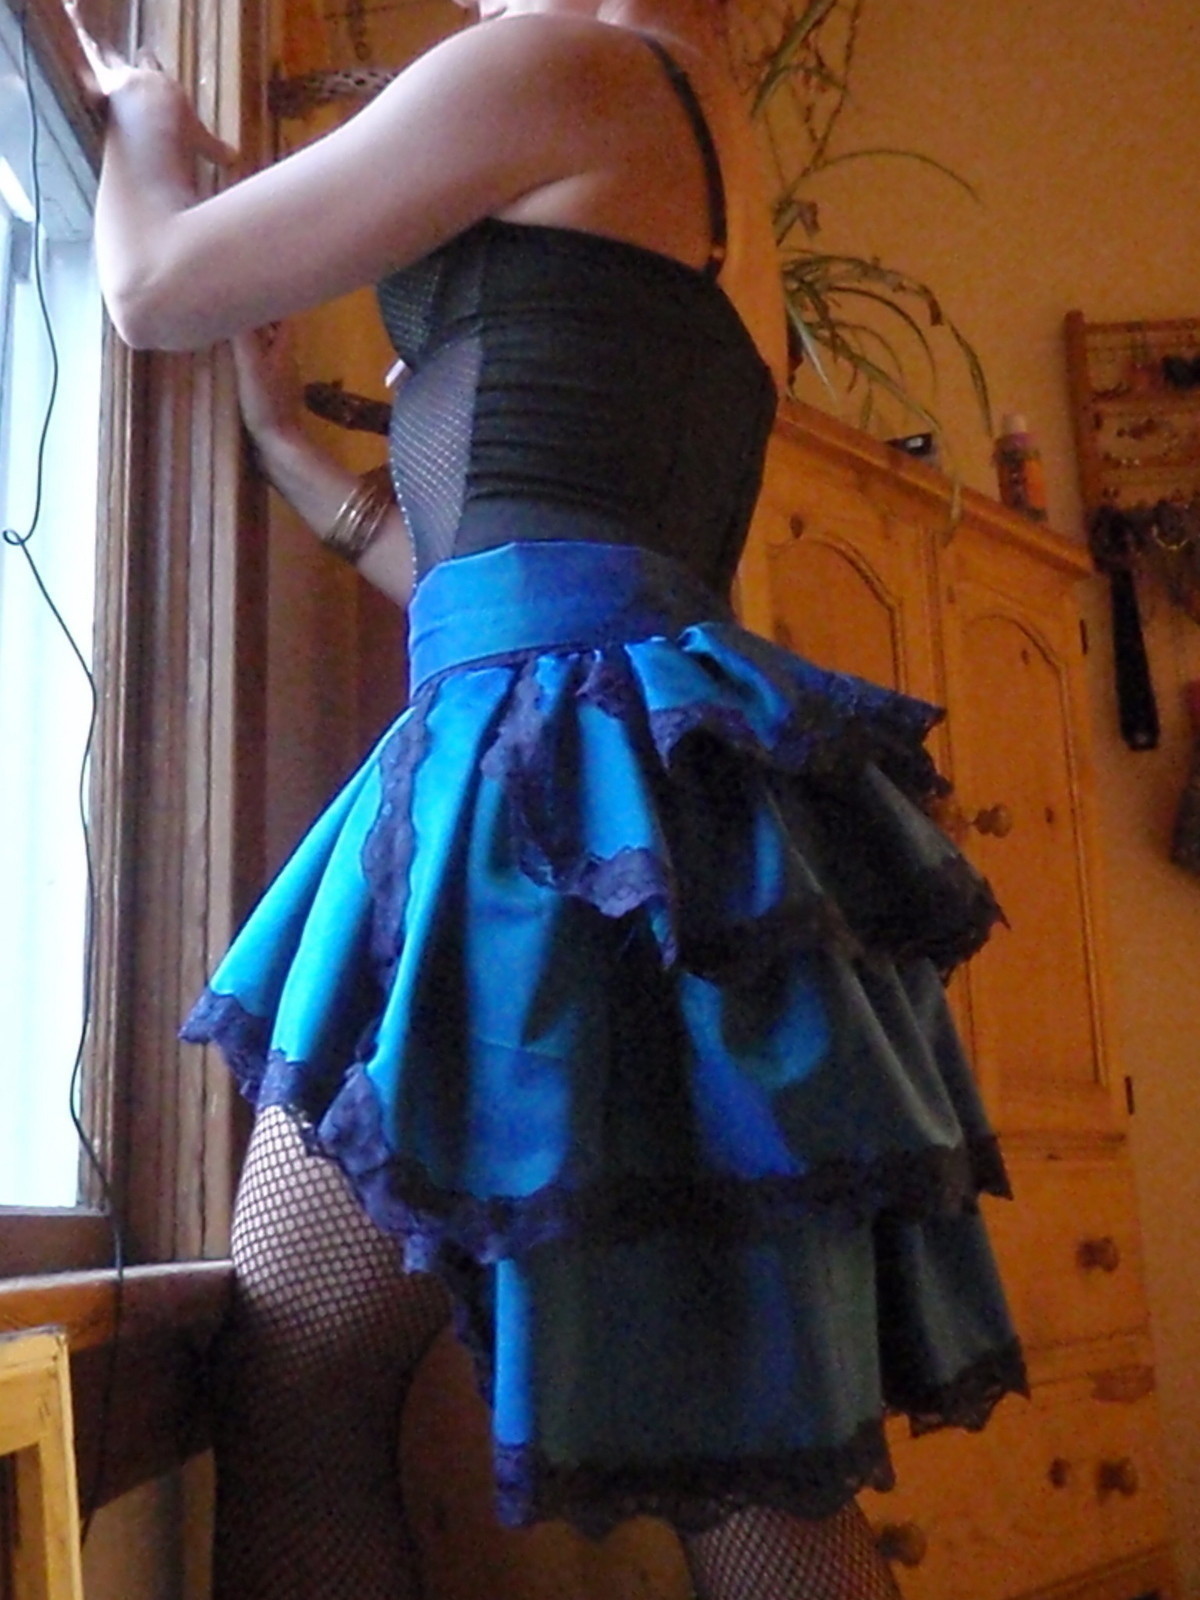
ruffle and bustle to your own leg-kickin' tune!!
My friend Kerry was my first inspiration, she's been taking Burlesque lessons and we've been talking about making bustle skirts. My second inspiration was this beautiful website: http://www.lovechildboudoir.com/
with the loveliest bustle skirts and trousers. Now that I've tried out my first skirt, I'm ready to make a second with Kerry and head to BM!!
Tags
-
 Deb E. favorited Burlesque Bustle Skirt
20 Jan 18:09
Deb E. favorited Burlesque Bustle Skirt
20 Jan 18:09
-
 Mhairi G. added Burlesque Bustle Skirt to Skirts
08 Nov 16:48
Mhairi G. added Burlesque Bustle Skirt to Skirts
08 Nov 16:48
-
Mhairi G. favorited Burlesque Bustle Skirt
08 Nov 16:48
-
 Loviiletter favorited Burlesque Bustle Skirt
31 May 19:11
Loviiletter favorited Burlesque Bustle Skirt
31 May 19:11
-
 Kai' K. favorited Burlesque Bustle Skirt
27 Feb 18:16
Kai' K. favorited Burlesque Bustle Skirt
27 Feb 18:16
-
 Key West Witch favorited Burlesque Bustle Skirt
04 Oct 21:58
Key West Witch favorited Burlesque Bustle Skirt
04 Oct 21:58
-
 joy.mardon.1 added Burlesque Bustle Skirt to Sewing
28 Jan 21:48
joy.mardon.1 added Burlesque Bustle Skirt to Sewing
28 Jan 21:48
-
joy.mardon.1 favorited Burlesque Bustle Skirt
28 Jan 21:48
-
Linda S. favorited Burlesque Bustle Skirt
15 Nov 20:57
-
 Corvii added Burlesque Bustle Skirt to Bottoms
13 Jul 22:27
Corvii added Burlesque Bustle Skirt to Bottoms
13 Jul 22:27
-
 Step 1
This is the pattern I created to make my bustle skirt. You can use it as is, or change it up a little.
These instructions are super detailed, I'm basically walking you through what I learned along the way, so skip ahead if you're comfortable with some of these steps.
Decide where you want the waistband to sit - at your waist or hips, and measure that circumference + add a little bit for seams. I wanted mine closer to my hips and I wanted to use a tab-over belt-like closure to make it adjustable and add a little rustic flare, so I added a few inches to my hip measurement (42"). If you want to use a zipper or something else, you won't want to add that extra tab.
I wanted the skirt to come all the way round in the front and then to have extra layers on the bum. I also wanted my skirt to be about 18" long (finished length), with three ruffles on top of the full base skirt. In general, to make ruffles, you want to cut the rectangle to be at least 3 times as wide as the thing you're attaching it to, or wider to get adequate puff. Thus, the full skirt width is 3 x 42 = 126". The other three ruffles just sit on the bum, thus only go about 1/2 way round the waistband: 42/2 = 21 x 3 = 63". You don't have to be too exact about this though.
Then to create the layered effect, the ruffles should be different lengths, I just divided it out equally. Full skirt = 20", and the other three = 15", 10", 5". -
 Step 2
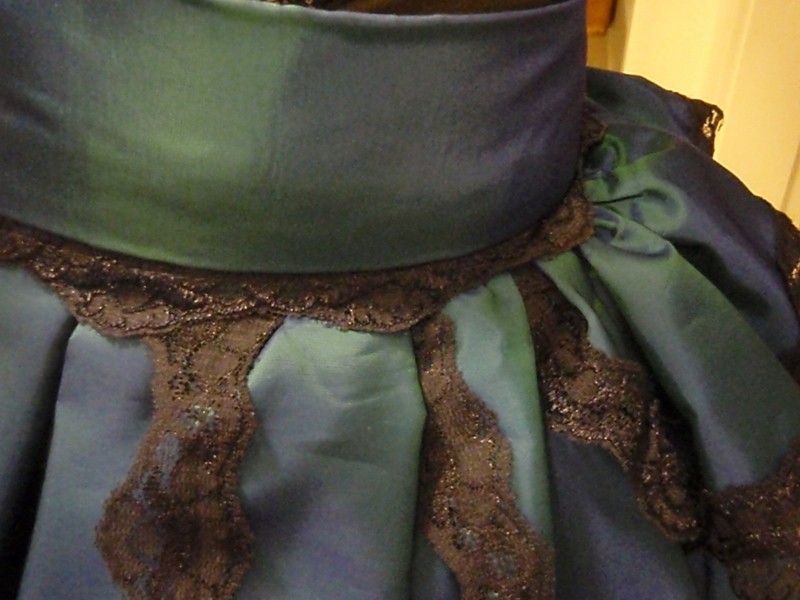
The little rectangle on the pattern below the waistband is just a little strip I cut out to attached a band of lace to. When I was putting all the pieces together without this piece, I felt it looked too plain :) So I cut out a 42" x 2" piece of taffeta and sewed lace onto it.
-
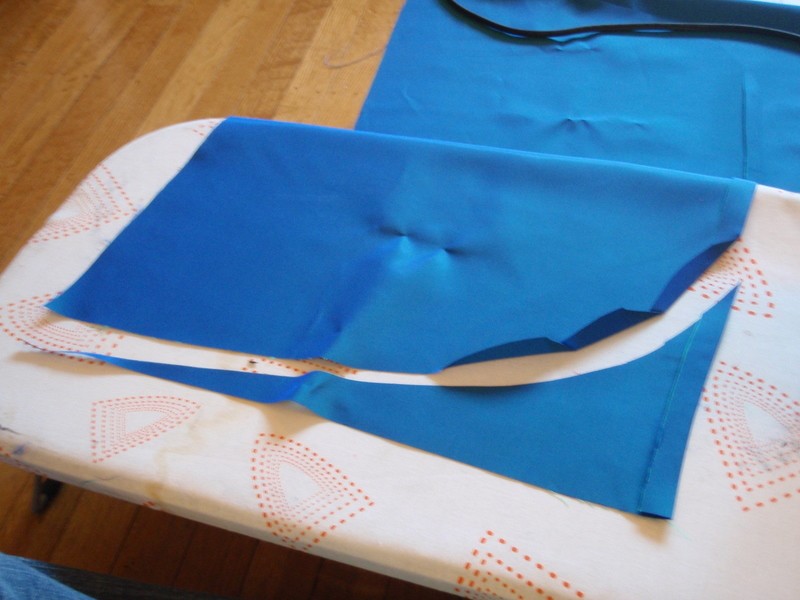
 Step 3
Once you've got everything cut out. Take your 3 ruffles and cut a curve into each end. I did this pretty roughly. You can then create a quick easy 'hem' by folding over the bottom twice (because it kind of frays) and ironing it. The great thing about fabric like taffeta is that it holds an ironed edge really well. BUT!! Be sure to use a piece of clean cotton or something in between the iron and your nice fabric, especially if your iron doesn't have a non-stick surface or if there's anything nasty melted onto your iron (like mine), so that your nice fabric doesn't get messed up.
-
 Step 4
Flipping over to the right side of the fabric, pin the lace edging all around the bottom and curved edges of the 3 ruffles + the little 2" long piece (over your ironed hem). Its easier to do this now before you ruffle your fabric. Don't attach the lace to your full base skirt, unless you want to keep it its full length. I wanted mine shorter in front, but I didn't know how to cut that shape until I had it put all together. So I waited to cut & lace that piece.
-
 Step 5
Now its time to ruffle!!
On each layer (full base skirt and 3 ruffle layers) one at a time, sew across the top of the fabric. Use a straight, long stitch and DON'T do the backwards stitch at the beginning and end that you'd normally do to keep your stitch from coming undone. Once you've sewn the length, pull on either the top or bottom thread on each side, and you'll see that your fabric starts to bunch. You might want to try this on a scrap first if you've never done it before (I did). The great thing about doing ruffles this way (as opposed to methodically pinning or pleating) is that is easy, fast, and flexible - you can make the ruffle as tight as you want. The other thing you have to make sure of is not to screw up your stitch. If you run out of thread halfway through or something, you won't be able to ruffle it properly. So, do this stitch & ruffle the full base skirt and 3 ruffle layers. -
 Step 6
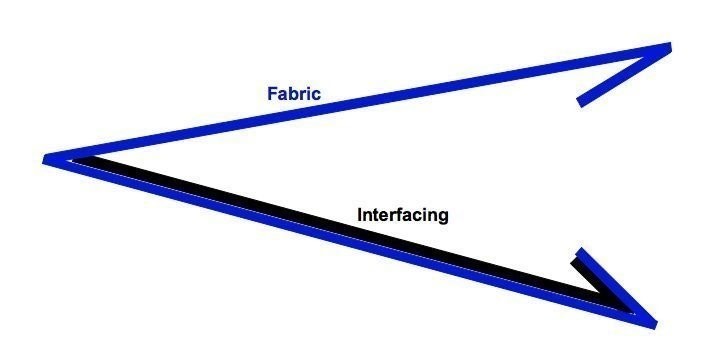
I'm not sure if this step was necessary, but if you want your waistband to be a little stiffer than just the doubled over fabric you'll want to do this... add interfacing. I'd never done this before, so what I learned is that there are many many weights of interfacing and it comes in black or white and comes in iron-on or sew-on. I used black, iron-on, medium weight. If I were to do it again, I'd use a heavier weight.
So, fold your waistband in half, so that it's 42" by 4", press (iron). Cut a piece of interfacing to the same dimensions - 42" x 4", stick it in between your folded waistband & press. The interfacing will adhere to one side to the waistband... I guess only one side of the interfacing is 'meltable'?? -
 Step 7
Then, individually, fold each of the raw edges under & press (diagram).
-
 Step 8
Ok, now you've got your waistband + interfacing & your little 2" long piece + all your ruffles!! Next you want to lay it all out to line it all up and make sure your ruffles are distributed the way you want. Be sure that the edges of your full base skirt line up perfectly with the edges of the waistband and the edges of the little 2" piece. Next make sure your 3 ruffle layers line up the way you want. I wanted them to get progressively narrower as they went up (see photo). You can move them around (tighten/loosen) anyway you like.
Next, pin the whole kitten caboodle together. I did this in stages so I could make sure I did it right. I pinned all the ruffles together + full base skirt. Then I pinned the little 2" piece on top. -
 Step 9
Then I opened up the waistband and flipped it over (photo) and pinned the inner part of the waistband to the rest of the layers. This is A LOT of layers of fabric. I then sewed the whole lot along the line I drew in the interfacing to secure everything together. This is the stitch that is keeping your whole skirt together, so you might want to go over it twice. Make sure you've done a good job pinning so that you catch all the layers in your sewing.
-
 Step 10
Folding the waistband back the other way, you can see what the finished product looks like from the right side.
-
 Step 11
On the other side (the inside, the side against your body), you need to sew the waistband down to the ruffles as well. But I didn't want to do it on the machine because I didn't want the stitch to show through the outer side. So I hand sewed it, just catching the ruffles, and not going all the way through. Then folded & pressed in the ends of the waistband & sewed those by hand as well.
I don't have a photo of it, but next I tried it on, pinned it roughly where I wanted it to close. I then draped it over a chair, and cut the outline of the full base skirt. I wanted it long in back and short in front. I just did it by eye, don't worry about having a messy edge, you'll 'hem' it and put lace over it. Just make sure you get the shape you want and that it lines up well with the other ruffles. Then do the same thing you did with the ruffles - press a 'seam' on the bottom edge of the full base skirt, pin, and sew the lace all the way around.
-
 Step 12
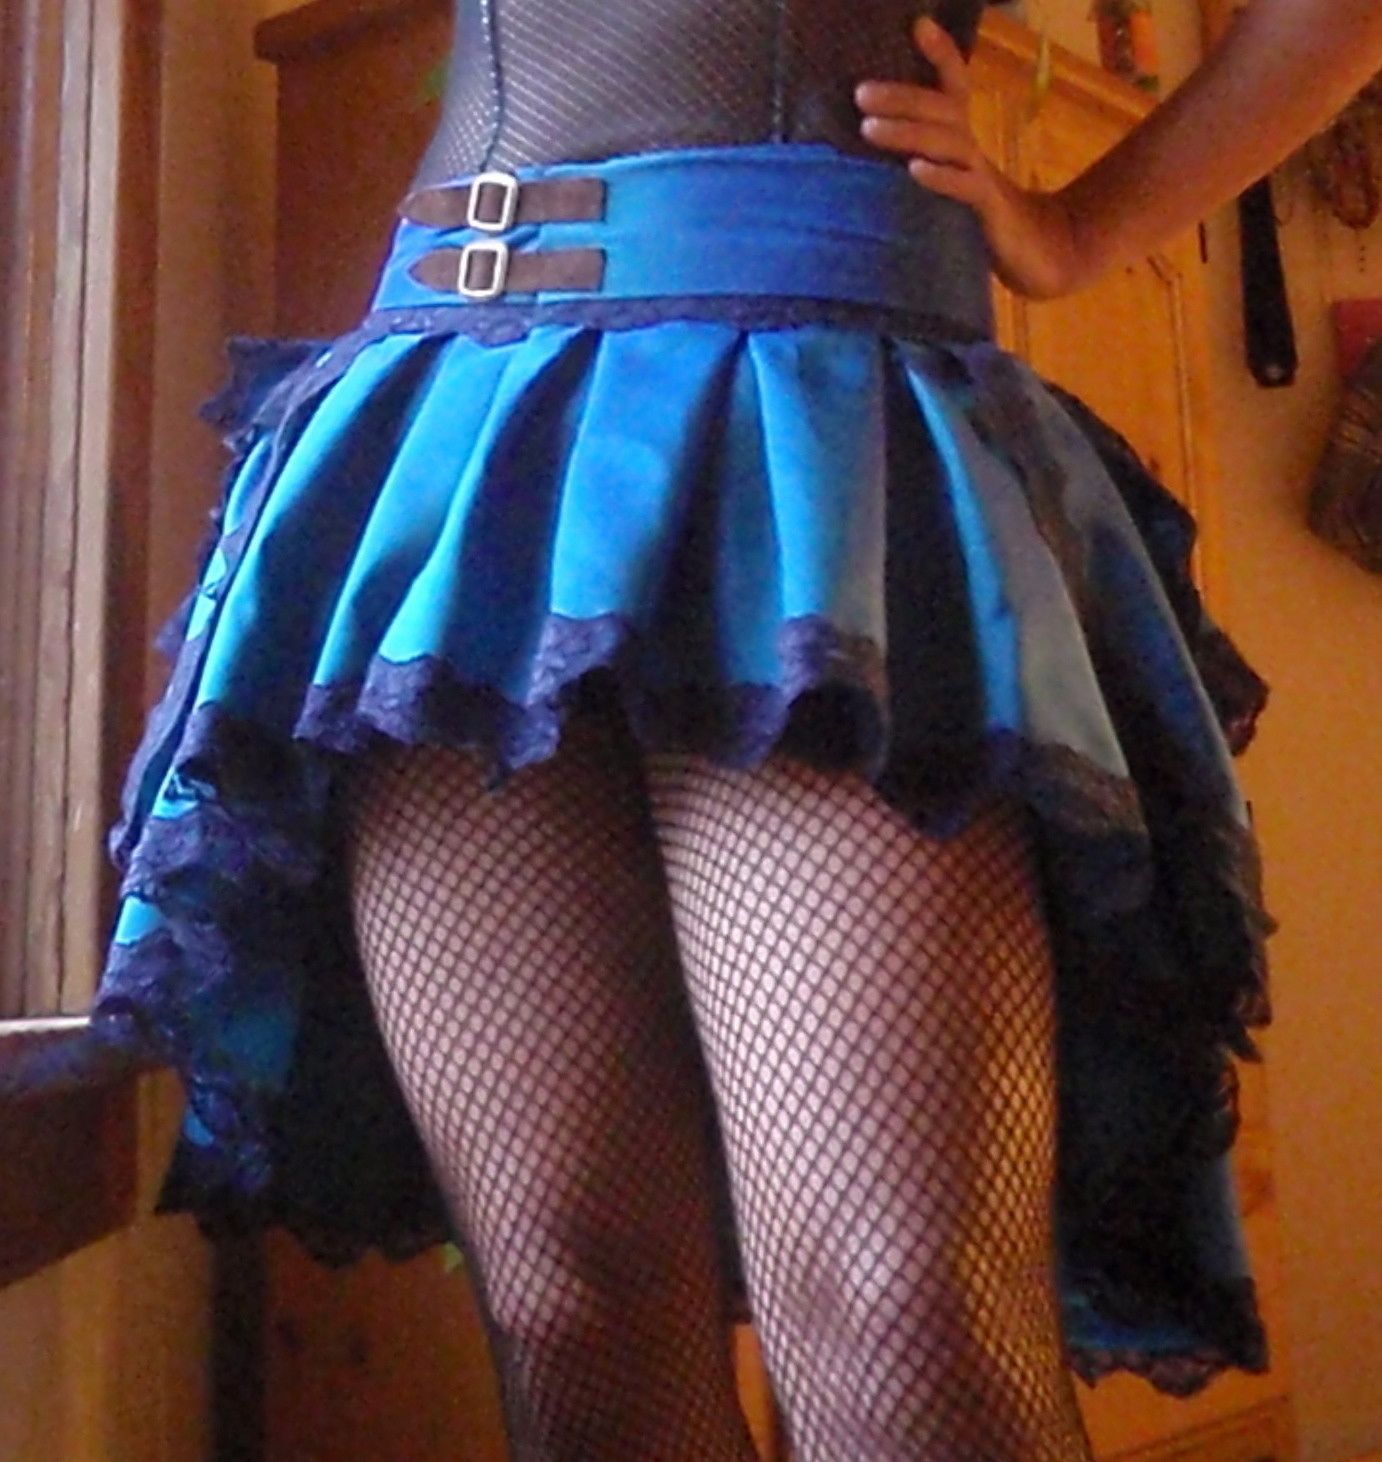
You're pretty much done now! Do whatever kind of closure you want. To do the belt-like closure, I cut out some leather I had - 2 layers thick for each strap - sewed the pieces together then sewed them to the waistband of the belt (being very careful to try it on several times & line it all up right to my hips). Then I sewed the buckles onto the other half of the waistband to line up with the leather parts. These buckles just hold by friction, so there was no need to punch holes in them like a traditional belt.
The last thing I did was to sew a tiny dart into the back of the waistband because it stood up a bit away from my body too much. I think if you made a smaller (2" instead of 4") waistband, you might not have this problem. The dart was no problem, but it does leave an unsightly (in my opinion) seam in the back that I'm thinking of covering with a ribbon flower or bow.
Alright, rock out! Your done!! Pair with your favorite fishnets, corset, and boots!! Hope to see your versions!!!


Versions
See all 50 »


Comments


 1
Paper Art »
How To Fix A Smoking Toilet
1
Paper Art »
How To Fix A Smoking Toilet
 2
Coffin Shaped Boxes »
Grave of the Great King
2
Coffin Shaped Boxes »
Grave of the Great King
 3
Gadgets »
Kitchen Hook
3
Gadgets »
Kitchen Hook
 4
Trays »
Trays For Breakfast
4
Trays »
Trays For Breakfast
