

About
Nothing says summer like simple upcycling projects and succulents.
It’s time again to reach into our recycle bins and make awesome stuff out of ‘junk’. I have this recent addiction to getting doubly green – repurposing junk and making projects that use soil and succulents. Total win win!
-
 Sarah Sylvia S. favorited Burlap Milk Carton Planter
18 Jul 02:42
Sarah Sylvia S. favorited Burlap Milk Carton Planter
18 Jul 02:42
-
 Denise published her project Burlap Milk Carton Planter
01 Jul 09:00
Denise published her project Burlap Milk Carton Planter
01 Jul 09:00
-
 Step 1
Get your supplies on hand. You can either find burlap at Michaels or drop by your local coffee roaster for a free burlap sac. For your cactus soil and succulents visit your local florist or nursery. And containers are easy - use empty juice or milk containers from your recycle bin.
Find a container the width you want. Preferably a 1 or 2 litre container. You can easily adjust the height when you trim the container.
-
 Step 2
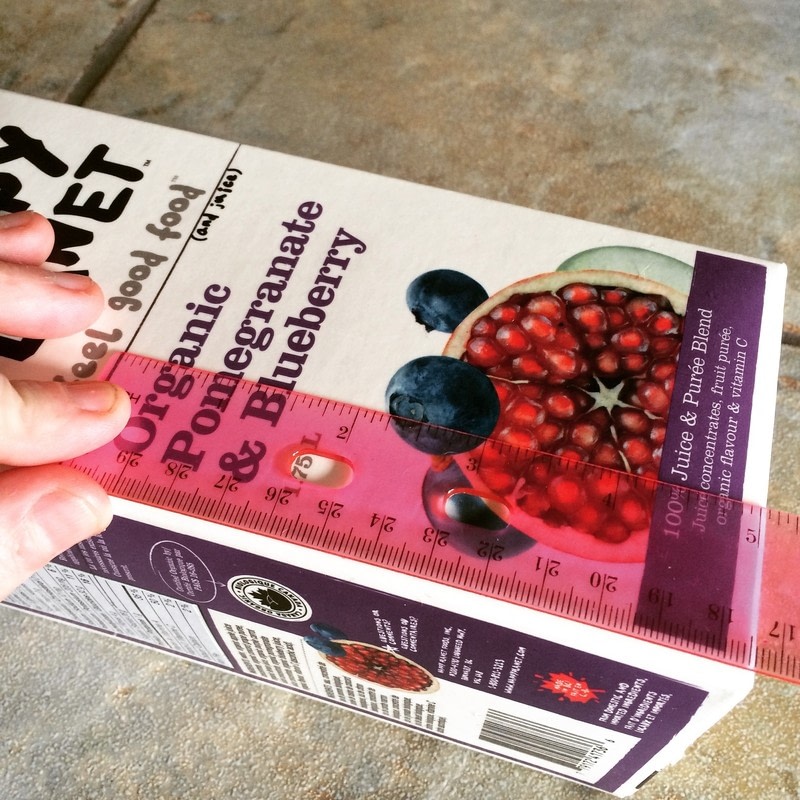
Measure and mark a line for the height you want for your planter. I measured a 5″ height for mine.
-
 Step 3
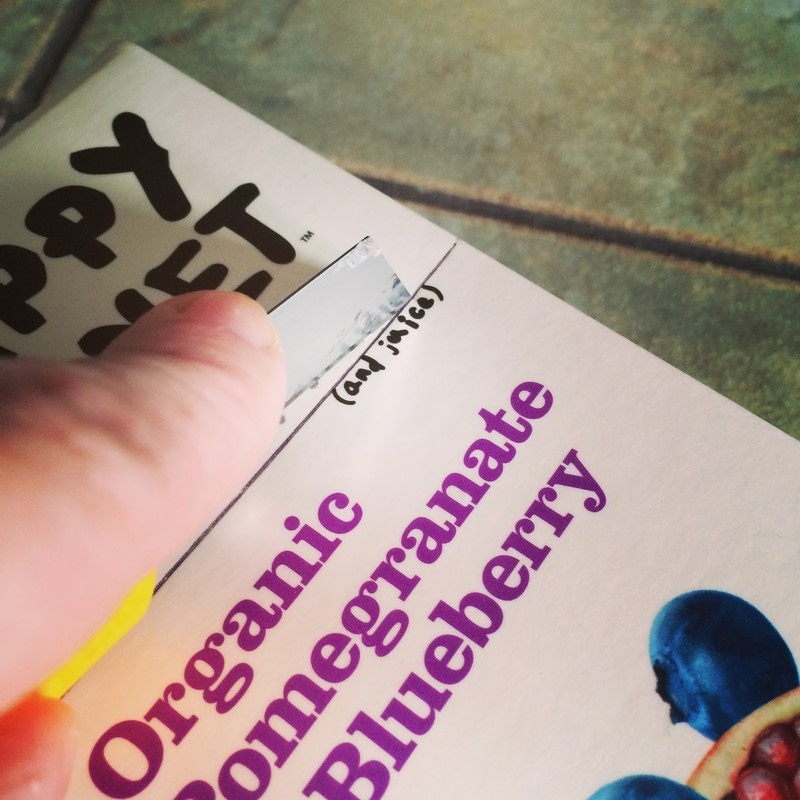
Use an X-Acto knife to cut along the measured line. We want to create an opening for the planter and remove the top of the container.
-
 Step 4
Cut slowly and carefully so you don’t damage the container or yourself.
-
 Step 5
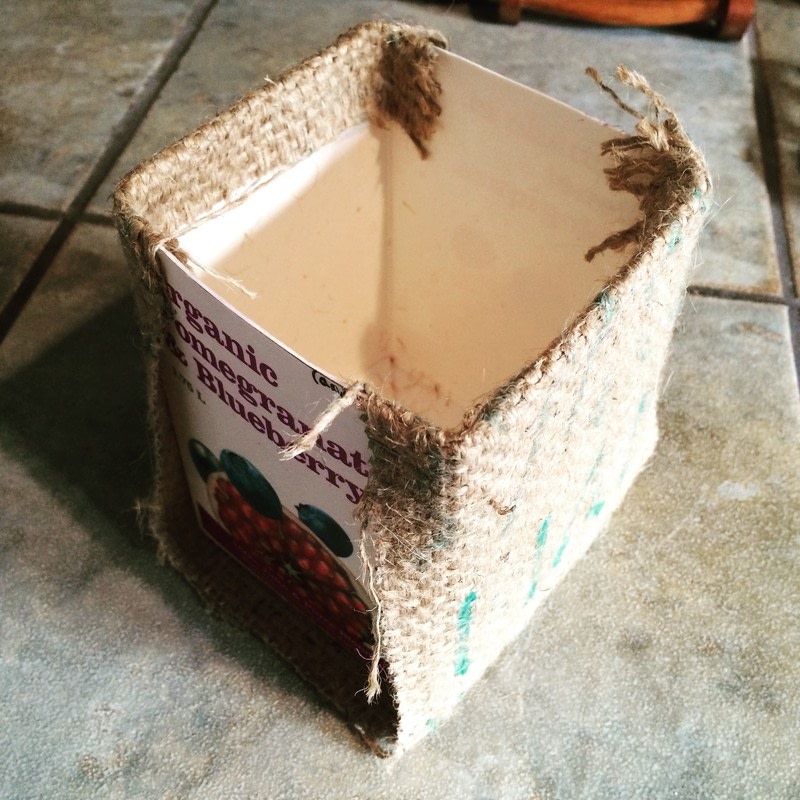
Next we’ll cut out our strips of burlap. We want two strips – measure them at the same width as the container panels plus add 1-2″. The length should be enough to cover one side panel, the bottom panel and the opposite side panel plus have enough extra burlap to fold over the edges.
-
 Step 6
Now plug in your trusty glue gun and we’re ready to add the burlap to the container. Fold the short end of the burlap over the rim. Dab glue to hold in place then wrap the burlap on the outer panel then bottom and along the opposite outer panel of the container. Dab glue as you add the burlap then fold the short edge over the opposite rim and glue in place.
-
 Step 7
Glue the sides of the long edges so they cover the fold between panels. Dab glue to hold burlap in place. Add the second strip of burlap to the other side to cover the whole container.
Fold the sides of the long edges so they align with the panels of the container. This creates a clean, professional finish plus covers the edges of the first piece of burlap.
-
 Step 8
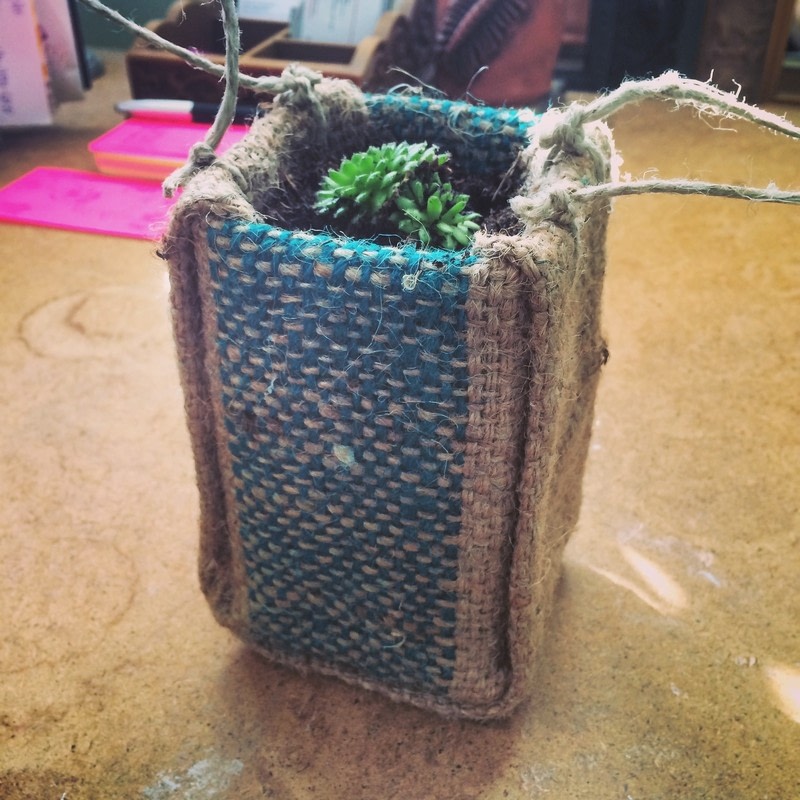
Once your container is wrapped in burlap, you’re ready to add the soil and succulent.
Since our container won't have drainage holes we'll need to create a drainage layer. Add a layer of rocks before adding the cactus soil. Dig a hole in the center of the cactus soil then plant your succulent.
-
 Step 9
You can either plant a couple of different succulents or one. You can even use trimmings - these should root with a bit of TLC. Don’t water too much as succulents need minimal water. Also remember the container will have no drainage holes for the excess water to drain through.
-
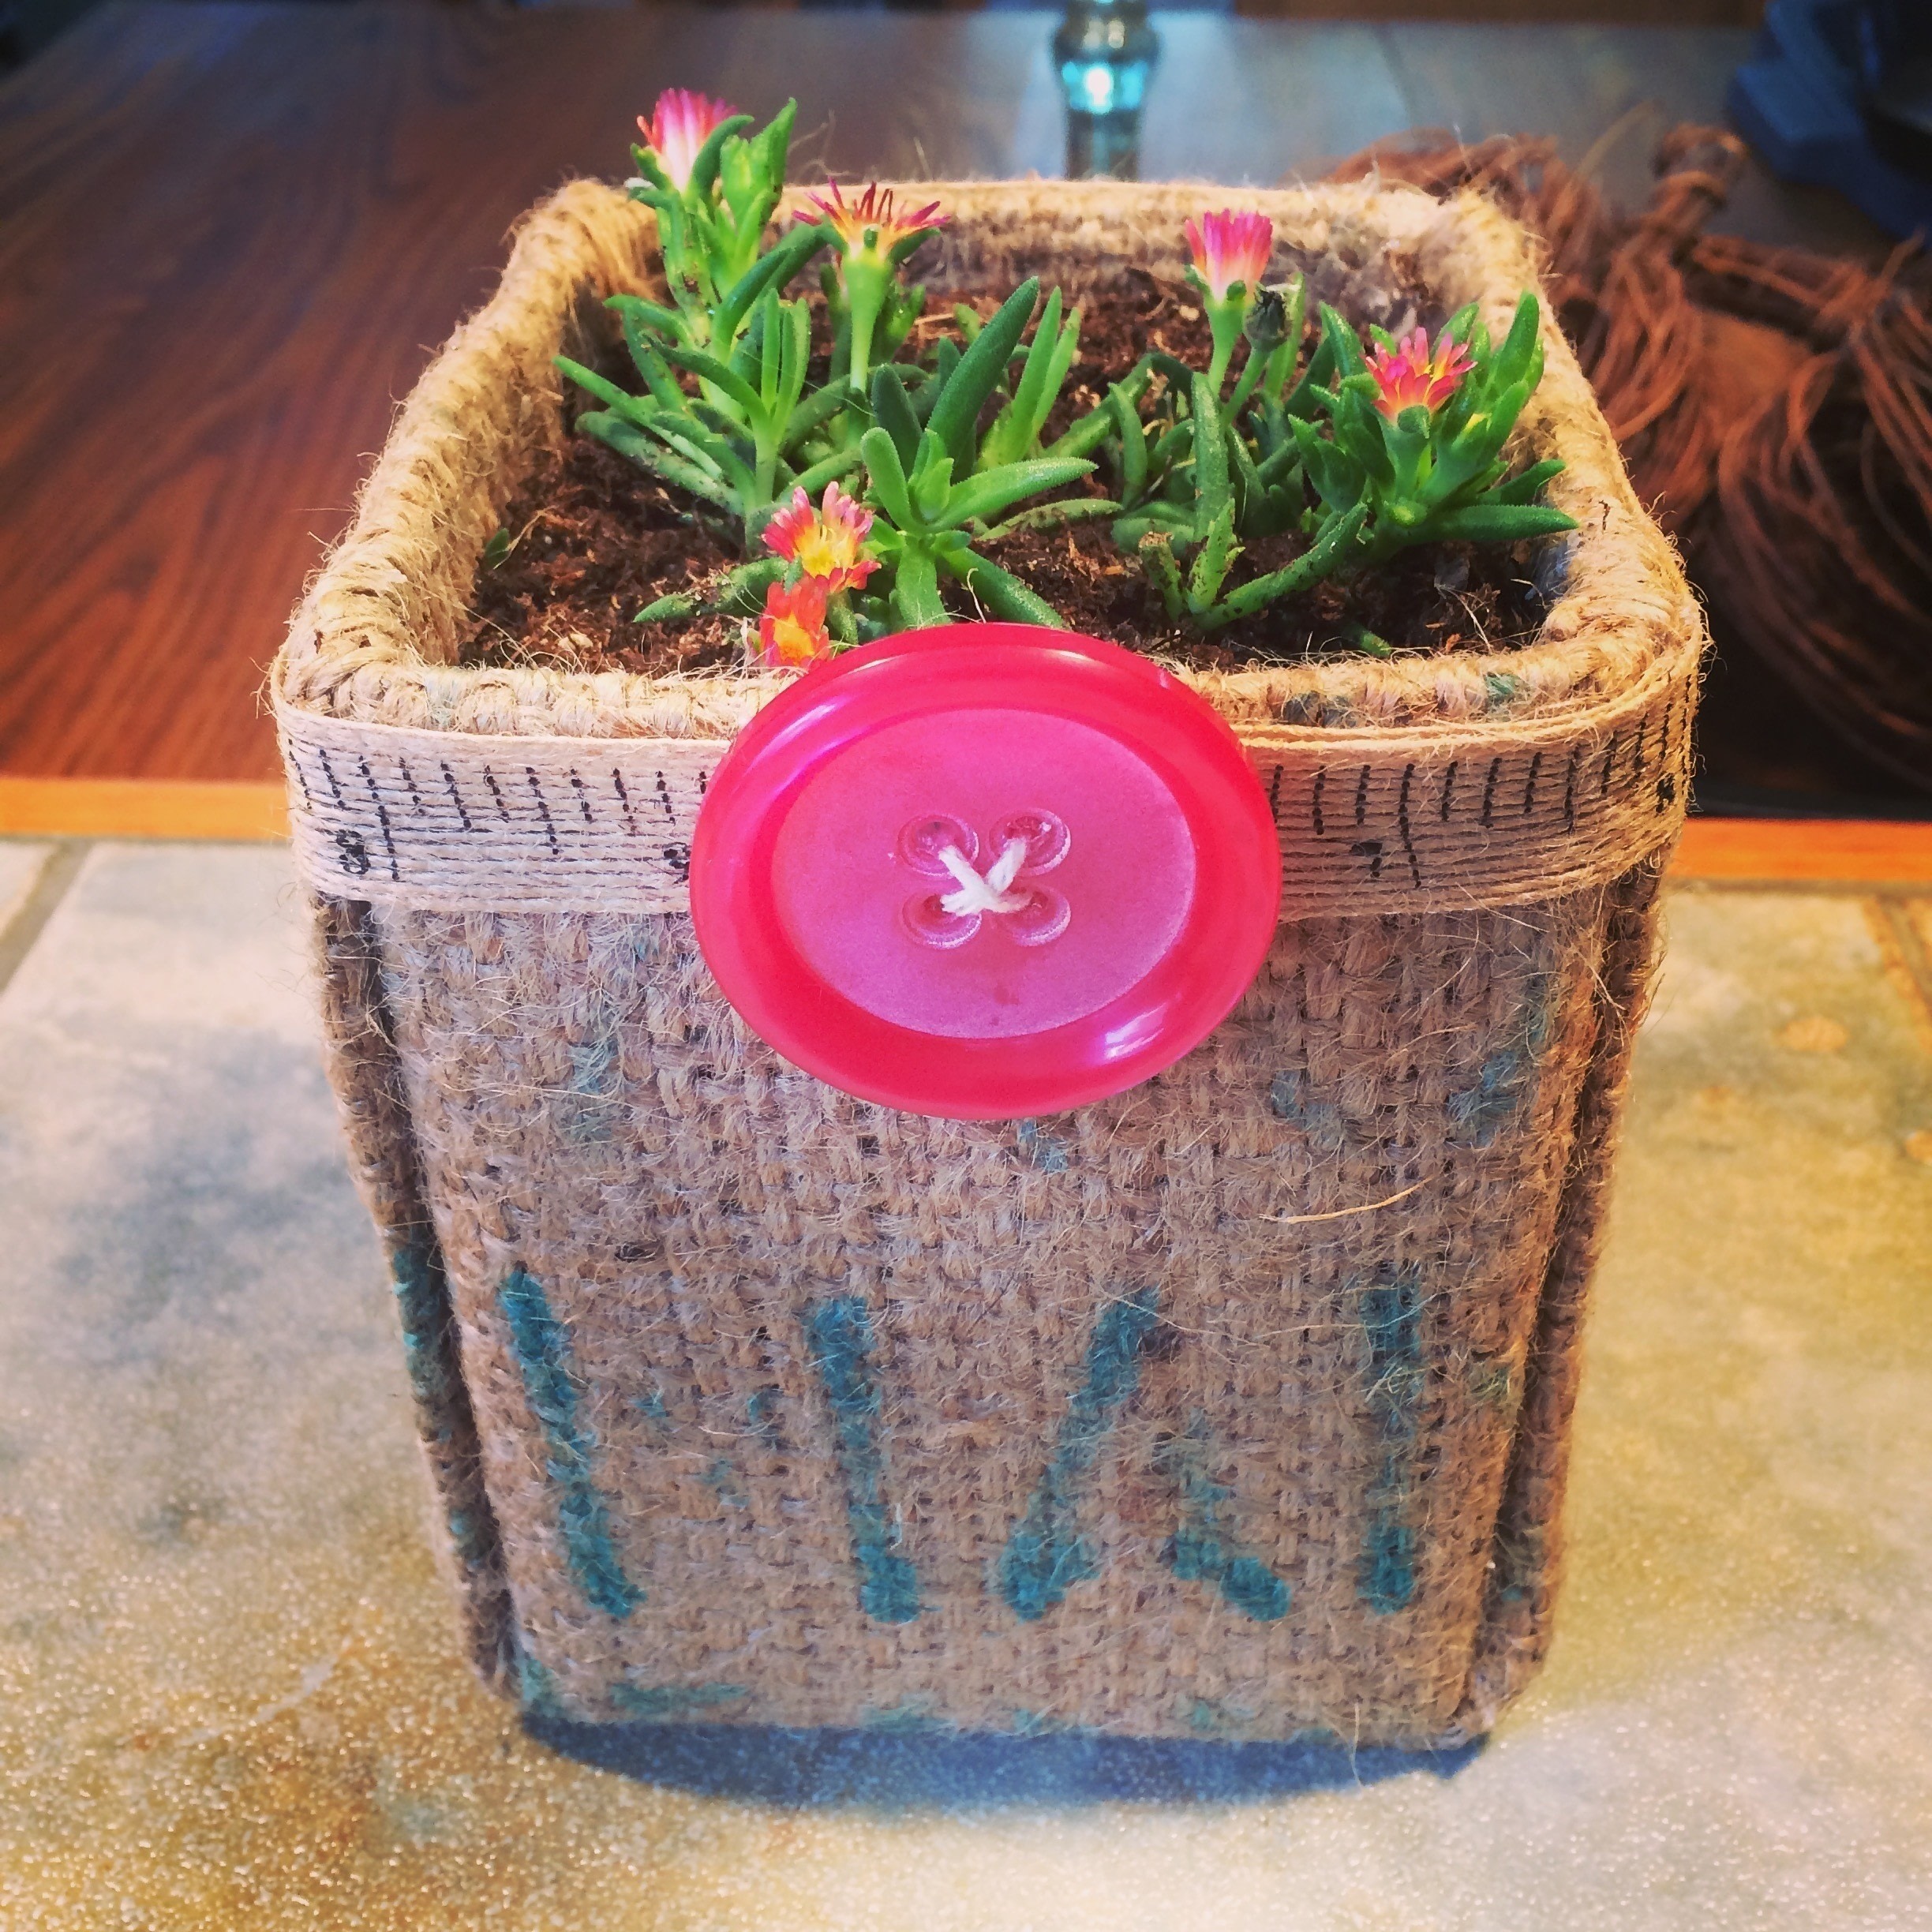
 Step 10
Feel free to add some bling - maybe ribbon, old buttons or jewelry. You can even stencil a design on the burlap using a Sharpie. This is a fun DIY that’s the perfect green gift for family and friends.