


About
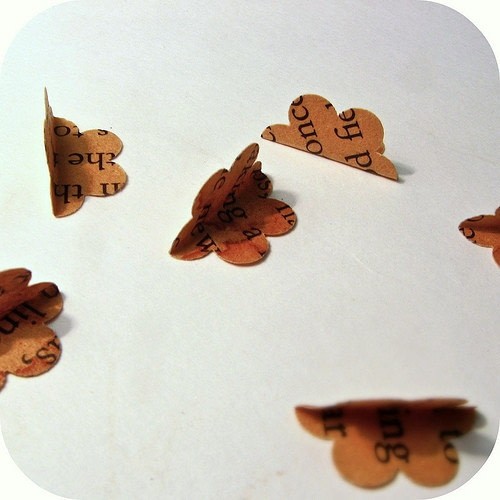
these beads feature little 'pages' that you can turn
using a bookbinding technique associated with children's board books, these little beads have pages that fan out to give them their 3D shape...but each page still turns and functions like a page in a book.
Made larger, these could be used as ornaments for the tree or whatever. You could also skewer them onto saté sticks instead of stringing them, and form little paper ball topiaries or cupcake toppers or whatever.
The pages could be pre-printed with a custom design or message, or you could draw individually on each page, or write on them. You could also incorporate other bookbinding techniques like adding pop-ups to the tiny pages, for a really sick little bead.
So go on now and make something! It is later than you think.
-
 crochetmommie added Book Beads to Jewelry Tutorials
07 Oct 09:07
crochetmommie added Book Beads to Jewelry Tutorials
07 Oct 09:07
-
 Miss_Fit favorited Book Beads
08 Jul 16:08
Miss_Fit favorited Book Beads
08 Jul 16:08
-
 Eva C. favorited Book Beads
17 Aug 08:28
Eva C. favorited Book Beads
17 Aug 08:28
-
 Katie B. added Book Beads to Library
25 Jul 04:15
Katie B. added Book Beads to Library
25 Jul 04:15
-
 Linda L. favorited Book Beads
29 Mar 21:24
Linda L. favorited Book Beads
29 Mar 21:24
-
 SF B. favorited Book Beads
09 Mar 13:09
SF B. favorited Book Beads
09 Mar 13:09
-
 Ninni Ninímél Nalíná ♦ ♏ ♦ favorited Book Beads
05 Feb 07:41
Ninni Ninímél Nalíná ♦ ♏ ♦ favorited Book Beads
05 Feb 07:41
-
 bigrthanlasagna favorited Book Beads
10 Jan 12:39
bigrthanlasagna favorited Book Beads
10 Jan 12:39
-
 ruthless.biach added Book Beads to Paper craft
28 Aug 21:28
ruthless.biach added Book Beads to Paper craft
28 Aug 21:28
-
ruthless.biach favorited Book Beads
28 Aug 21:28
-
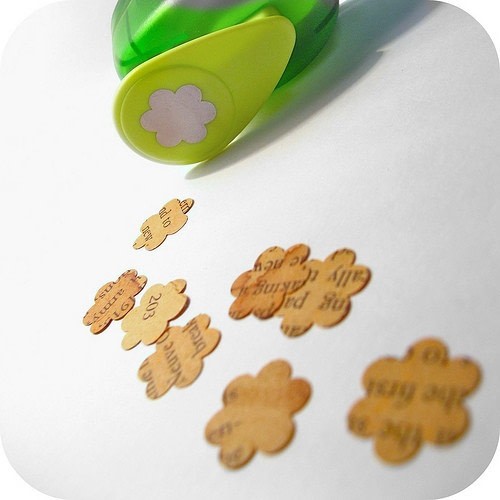
 Step 1
Cut your paper shapes out. You'll need at least 16 pcs.; you can try using more, but remember you need pairs of them.
I'm using a shape punch called "vinca" The diameter of the shape is the diameter of the bead. This is slightly less than an inch in diameter. -
 Step 2
Fold each shape in half, each side must match up symmetrically to the other side of the shape.
-
 Step 3
Take two pieces at a time, and glue them to each other, one folded side to the other folded side. If you started with 16 pieces of the shape, you'll have 8 of these pictured units, now.
-
 Step 4
Again, take two of the units just created, and glue one 'page' to a 'page' from its partner unit. You have 4 units now, and each unit has 5 'pages'. You get the idea, keep going, pairing units off.
-
 Step 5
And so on and on, until you are down to the last two units, and when you glue a page from each of these units together, you are left with one thick stack of little pages.
-
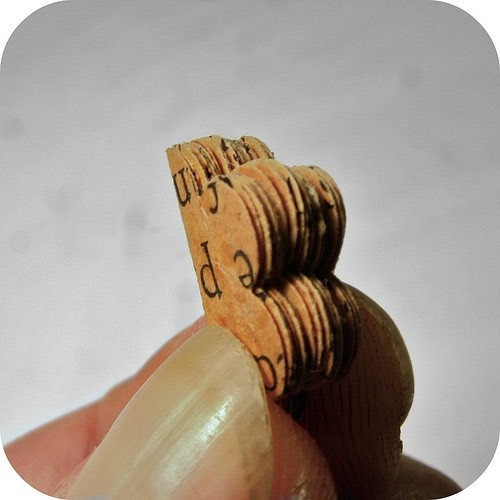
 Step 6
Next, spread glue over the front page of your 'book' and bring the last page around and join them together...creating a torus or ring of pages, with no start or finish.
And you're all done!


 1
Watercolor Art »
Watercolor Paints Made From Make Up
1
Watercolor Art »
Watercolor Paints Made From Make Up

Thank you for sharing.
so true.. i have a partially ruined copy of new moon, i should really do this.
Again, many thanks, please post your versions of this, I am sure you will come up with better and different beads.
CO + K User