
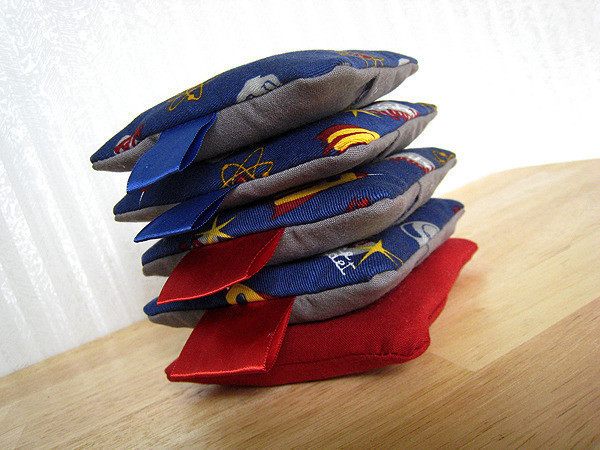


About
a great way to use up those small scraps!
I was super-psyched when I received an email from a Girl Scout Troop leader, inquiring about the Beanbags with removable covers that I had made for my nephew for his birthday. She was interested in making them as a project for her Troop to donate to shelters, and asked if I would be willing to send some instructions. So I took some photos and wrote up some instructions, and decided to make it into a tutorial!
PDF of this tutorial is available on my blog: http://grungezombie.net/index.php?id=246
You can get the supplies for these beanbags at your local craft store, except probably the "organic" fillers (beans/rice/lentils) but you can buy those in bulk an a grocery store. You can also buy the plastic pellets in bulk online if you plan to make a lot of these. Quilter's cotton fabric quarters and fat quarters work great for these, or if you can find some cotton prints in the remnant bin at the fabric store. This is also a great way to use up those small scraps!
-
 dippydiscoball added Beanbags With Removable Covers to To-make list
05 Jun 22:14
dippydiscoball added Beanbags With Removable Covers to To-make list
05 Jun 22:14
-
 Youghurt Jaja favorited Beanbags With Removable Covers
08 Aug 00:48
Youghurt Jaja favorited Beanbags With Removable Covers
08 Aug 00:48
You Will Need
-
 Step 1
Cut 2 pieces of muslin into 5" x 5" squares. If the fabric you're using is fairly thin, you may want to double-up, cutting 4 pieces.
-
 Step 2
Sew the muslin pieces together using 1/4" seam allowances, and leaving a 1"-2" opening along one edge. I usually go around twice to reinforce the stitching.
-
 Step 3
Turn muslin sack right-side out, gently pushing out corners with a knitting needle, chopstick, pen or something else pointy.
Put funnel into muslin sack opening, measure out and pour in filler. Only use about 3/4 cup filler, or you won't be able to fit the sack into the cover!
-
 Step 4
Sew opening closed, either by machine or hand, which ever you're more comfortable with.
-
 Step 5
Finished bean sack (insert)!
-
 Step 6
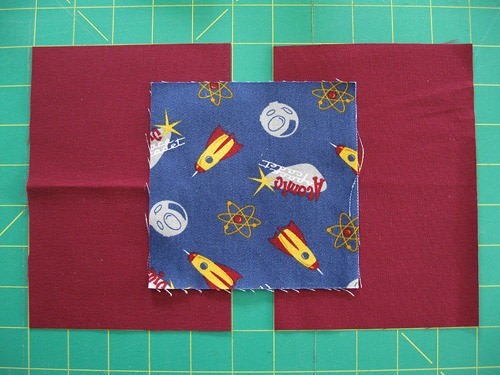
Cut a top/main cover piece into a 5" x 5" square, and cut two (2) 5" x 6" pieces for the back of the cover (to form the envelope closure).
Fold the 2 back pieces in half and iron for a sharp-hold crease.
-
 Step 7
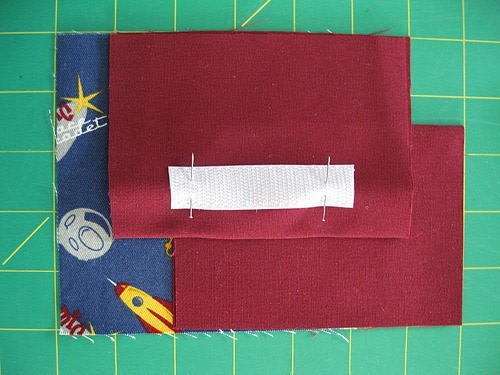
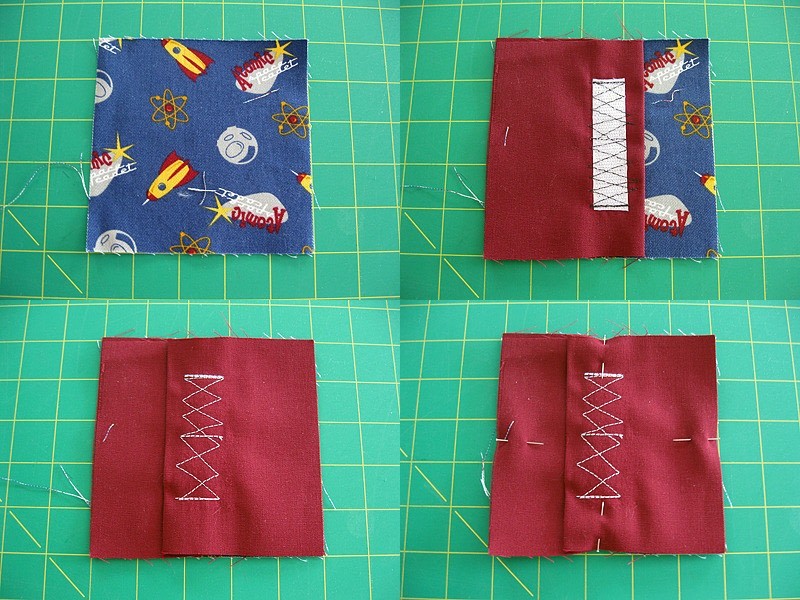
Cut a 3" piece of hook-&-loop (with both fuzzy and stiff sides). I use 3/4" white hook-&-loop (Velcro). Position the 2 back closure pieces on the 5x5 top/front piece so they make a 5x5 square. Position the stiff Velcro piece in the center of where the closure overlaps and pin into place on one of the closure pieces.
-
 Step 8
Position the fuzzy Velcro segment on the other back piece in the center of where the closure overlaps and pin into place.
-
 Step 9
Affix the hook-&-loop to the fabric; follow package instructions for iron-on, or sew into place. I prefer the sew-on type; if using iron-on, reinforcing the ends with hand-stitching would be a good idea for a heavy use item like this.
-
 Step 10
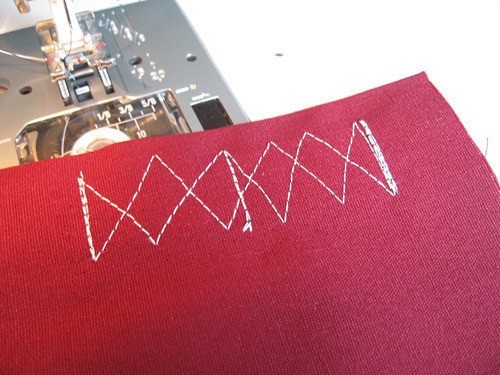
If sewing, it's easiest just to zigzag a straight stitch back and forth over the Velcro, reinforcing the ends.
-
 Step 11
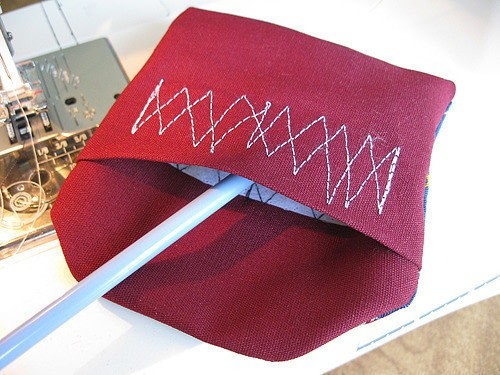
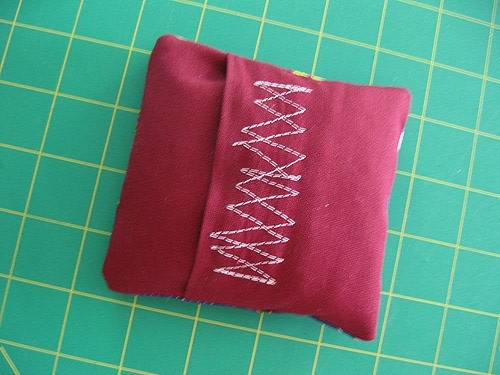
Be sure to start and end on the side of the fabric AWAY from the crease (the open end) so you can easily hide the knot when finished (see photos).
-
 Step 12
Hide knot in the fold.
-
 Step 13
With the 5x5 top/front piece print-side facing up, place the 2 back closure pieces into position, stick the Velcro together, lining them up with the edges so you have a 5x5 square. If hook-&-loop sides don't line up exactly, that's fine, as long as they catch to keep the back closed. PIN INTO PLACE
-
 Step 14
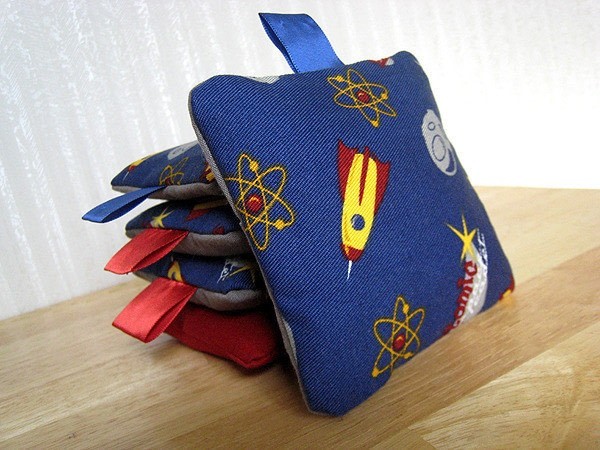
NOTE: If you would like ribbon tabs on your beanbags: cut a 2.5" length of ribbon, fold in half, iron crease, and sandwich between fabric layers with crease inward (refer to diagram).
-
 Step 15
Sew completely around the edge using a 1/4" seam allowance; I usually go around twice for reinforcement.
-
 Step 16
Be sure to backstitch at the four points where there will be stress on the cover during removal (marked with pins in photo).
-
 Step 17
Turn the cover right-side out
-
 Step 18
push out corners with fingers or gently push out with a knitting needle, chopstick, pen or something else pointy.
-
 Step 19
Insert the filled muslin sack into the cover. It's kind of tricky... Stuff it as far as you can into one side, lining up the corners as best as possible.
-
 Step 20
Then flip the other side over and line up the other corners...
-
 Step 21
...and you have a completed beanbag!
-
 Step 22
Care & Washing
Washing the Removable Cover: Remove cover, close Velcro together (if applicable) and machine wash cover with a load of laundry of like colors (cold); tumble dry low. DO NOT WASH BEAN SACK (see below for care)
Drying a Wet Bean Bag: The best way to dry a bean bag that has gotten slightly wet or moist is to remove the cover and set the bean bag in direct sunlight (warm, dry air) for 30-60 minutes. You could also microwave the bean bag (without cover) for 20-30 seconds on high. BE VERY CAREFUL WHEN REMOVING BEAN BAG FROM MICROWAVE as it will be HOT; it's best to let it rest for a minute before touching. If sack contains plastic pellets, DO NOT MICROWAVE!
What to do if bean bag has been soaked through: If the sack contains plastic pellets, a thorough drying will work fine (see Drying a Wet Bean Bag). If the sack contains organic filler (lentils, navy beans, rice) it is best to completely replace the contents to avoid rotting and/or mold/mildew. Remove the cover, carefully cut the sack's stitching approx. 1" in the center of one side. Dump out and dispose of the contents. Throw the empty muslin sack in the dryer with a dry towel and tumble dry thoroughly. Refer to step #4 for refilling guide and measurements. Hand stitch the hole closed and put cover back on, and it's ready to use!
-
 Step 23
For First Aid Use
Hot Compress: Organic filler only; DO NOT MICROWAVE PLASTIC PELLETS! Microwave the bean bag (without cover) for 20-30 seconds on high; replace cover and use as hot compress. BE VERY CAREFUL! Always test the temperature of the bean bag before placing it against the skin. Microwave times may vary, so test to see what works best for you. Hot compresses are great for relieving ear infection pains.
Cold Compress: Freeze the beanbag (without cover) for at least 1 hour, or keep in the freezer until needed; replace cover and use as cold pack for bumps and bruises. Be sure to monitor the "freshness" of your beanbag if using this method, as freezing and thawing can cause moisture buildup. (see What to do if bean bag has been soaked through for content replacement instructions).


Comments


