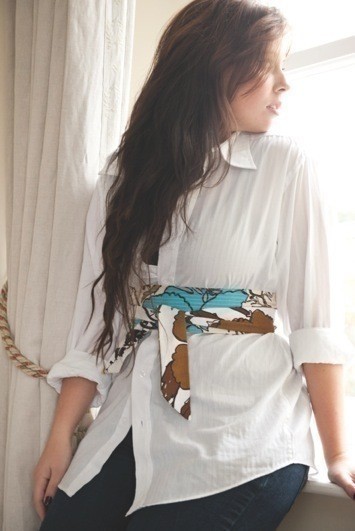
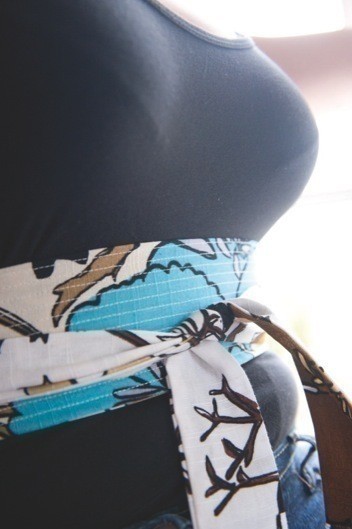
Awesome Obi Belt
Extract from Get the Most from Your Sewing Machine • By Marion Elliott • Published by David & Charles

About
Sew an Awesome Obi Belt
Tags
© 2024 Marion Elliott / David & Charles · Reproduced with permission.
-
 Alma favorited Awesome Obi Belt
18 Jun 11:32
Alma favorited Awesome Obi Belt
18 Jun 11:32
-
 Laouen favorited Awesome Obi Belt
13 Dec 10:53
Laouen favorited Awesome Obi Belt
13 Dec 10:53
-
 Julie K. favorited Awesome Obi Belt
26 Oct 13:02
Julie K. favorited Awesome Obi Belt
26 Oct 13:02
-
 greenstyle added Awesome Obi Belt to Sewing
19 Aug 02:00
greenstyle added Awesome Obi Belt to Sewing
19 Aug 02:00
-
 Vanessa B. added Awesome Obi Belt to Bag, Purses, and Scarfs Oh my!
23 Mar 16:33
Vanessa B. added Awesome Obi Belt to Bag, Purses, and Scarfs Oh my!
23 Mar 16:33
-
 Kaiulani W. favorited Awesome Obi Belt
14 Jan 23:26
Kaiulani W. favorited Awesome Obi Belt
14 Jan 23:26
-
arune e. favorited Awesome Obi Belt
23 Aug 17:39
-
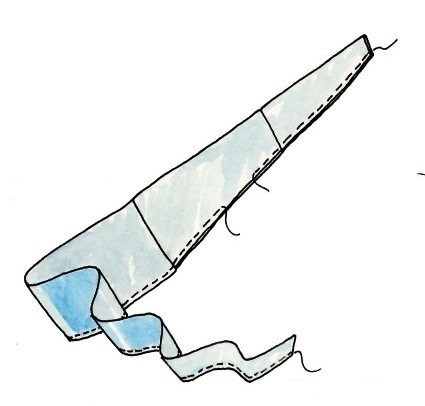
 Step 1
Transfer all the belt template pieces to thin paper and cut out. Cut out all the belt pieces from the main fabric. Cut the lining for the side panels from the plain fabric. Pin one lining to one side panel and machine stitch together, right sides facing, using a 1cm (3⁄8in) seam allowance. Press open the seam. Repeat to join the other side panel to its lining. With right sides together, pin the side panels to the belt centre. Machine stitch together using a 1cm (3⁄8in) seam allowance.
-
 Step 2
Pin the straight ends of the of each tie to the ends of the side panels, with right sides facing. Machine stitch together, using a 1cm (3⁄8in) seam allowance. Press open all the seams. Fold the entire belt in half lengthways, right sides facing, pin and machine stitch the tie ends and lower edge using a 1cm (3⁄8in) seam allowance, leaving a 10cm (4in) opening in the lower edge to turn through.
-
 Step 3
Trim the corners of the tie ends and turn the belt through to the right side. Press under the raw edges of the opening and slip stitch closed. To add the quilted effect to the front of the belt, set your sewing machine to a medium straight stitch and sew rows of stitching along the belt centre, spacing them about 1cm (3⁄8in) apart.