


About
For these days when you just wanna eat peoples brains... Cause they don't use them anyways...
Sooo I saw this project here ( http://www.cutoutandkeep.net/projects/zombie-necklace-2 ) and was heavily inspired. Anyways, knowing how I handle my jewellery, I was concerned it might break and so I came up with a different idea to make a rocking zombie necklace... Check it out!
Actually, there's no picture of me wearing it yet cause it's still drying. XD
Tags
-
 Vi F. favorited Zombie Necklace
23 Oct 01:23
Vi F. favorited Zombie Necklace
23 Oct 01:23
-
 FallenBeyond added Zombie Necklace to Make the Look
07 Nov 03:18
FallenBeyond added Zombie Necklace to Make the Look
07 Nov 03:18
-
 Tierra T. favorited Zombie Necklace
16 Nov 23:45
Tierra T. favorited Zombie Necklace
16 Nov 23:45
-
 japheel.ledguies favorited Zombie Necklace
15 Aug 22:41
japheel.ledguies favorited Zombie Necklace
15 Aug 22:41
-
 Goodgollymissholly favorited Zombie Necklace
04 Aug 15:41
Goodgollymissholly favorited Zombie Necklace
04 Aug 15:41
-
 Maura B. favorited Zombie Necklace
18 Jul 09:52
Maura B. favorited Zombie Necklace
18 Jul 09:52
-
Barbara M. favorited Zombie Necklace
05 May 19:27
-
 pierced&inked added Zombie Necklace to revamp bags
24 Mar 10:42
pierced&inked added Zombie Necklace to revamp bags
24 Mar 10:42
-
 Toxic Cupcake Killjoy favorited Zombie Necklace
01 Feb 15:07
Toxic Cupcake Killjoy favorited Zombie Necklace
01 Feb 15:07
-
FallenBeyond added Zombie Necklace to To-make list
14 Oct 23:26
-
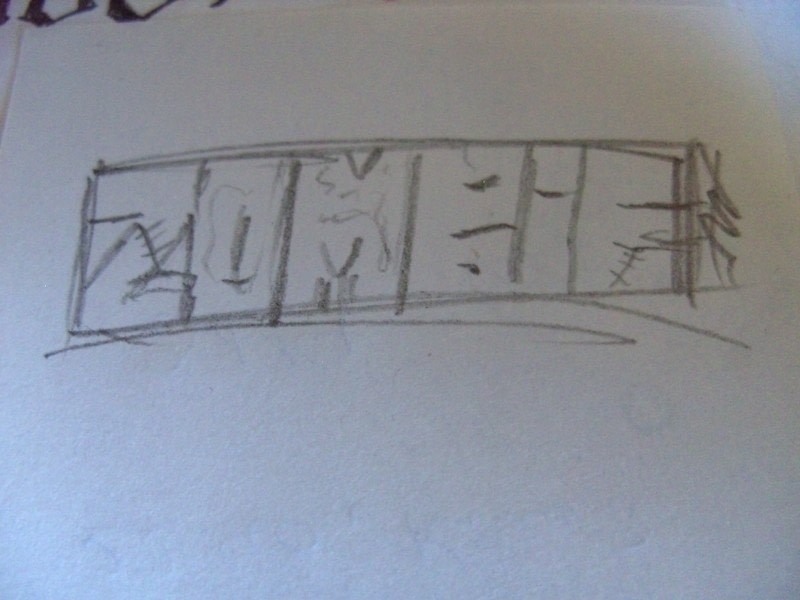
 Step 1
Draw a rough template. You don't HAVE to write "Zombie", do whatever the hell you feel like telling the world, even if it's "I'msopissedIcouldbiteeveryonesheadoff" ( Uh, have fun with that one... )!
Jst make sure it's not too complicated and try to make the letters have square shapes, it's just easier to deal with.
-
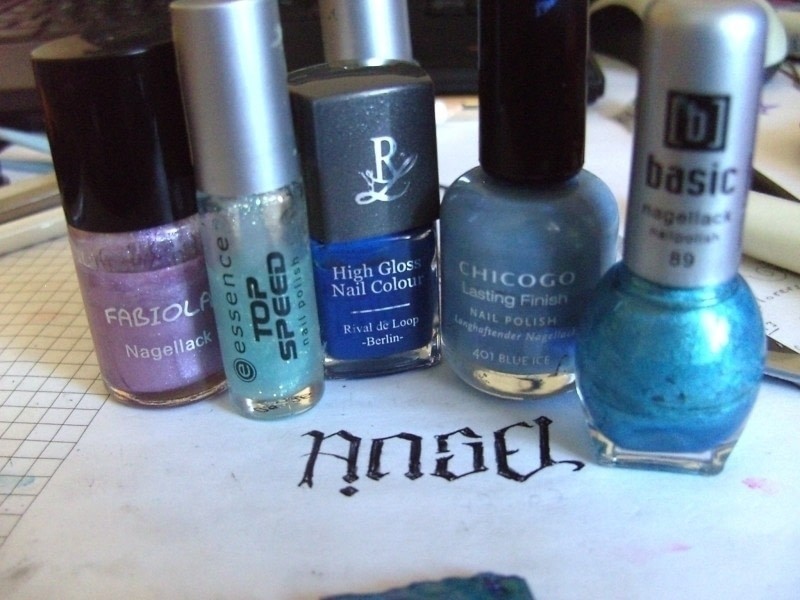
 Step 2
Transfer your word onto a hard piece of plastic. That's what I did, cause I do not own that fancy shrinking plastic stuff.
So I used the plastic that came with two adorable hair clips... It's rather thick and sturdy. Perfect. ( Be aware that the colour might show a little bit in the end... Clear is always better... I'm just showing you the stuff I'm using in this pic... )
Cut the shape out, use an exacto knife for the parts inside the letters, if you have any...
I messed up the outlines of the letters a bit, made them have dents and stuff. At least, we're dealing with a zombie here, aren't we?Poke two holes in the upper corners. Use a hot needle for that, for example.
-
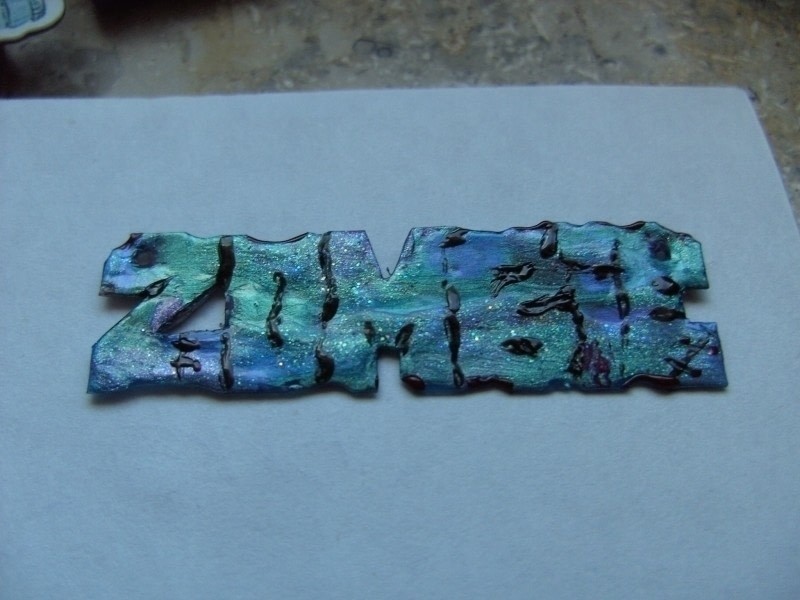
 Step 3
Go get your nail polishes. I didn't have any neon green, sadly, so I started with the blue in the middle. Then, while the blue polish was still wet, I started swiping the adorable shiny turquoise on the right in. Then a little bit of purple shimmer, a tiiny bit of blue shimmer and a dash of green glitter. SO much fun...
Well... A lot of people tell you to buy the stuff THEY used, saying "It only works with this brand!!!"... Screw it. Use whatever you have.
-
 Step 4
This is what you'll get. Let all that dry, do some laundry, the dishes, or the work you are originally supposed to do for your upcoming exam......... *harrumphs*...... Well..........
-
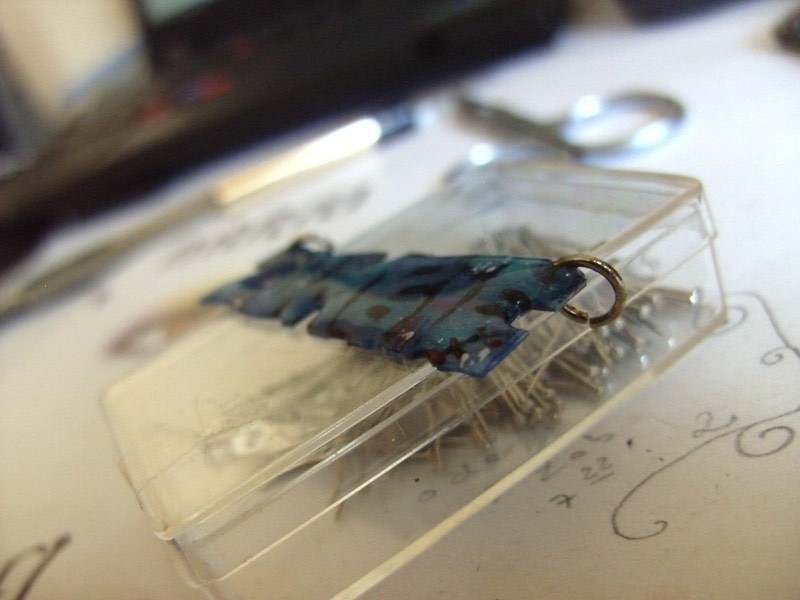
 Step 5
Now I started painting in the outlines of the letters with a needle and black polish. I added a few stitches, red dots of blood on the stitches and a bit of colour here and there. Don't overdo it!
-
 Step 6
At last, when everything is dry, slip in the jump rings and give it a niiice thick coat of clear glue! This will a) protect your polish artwork, b) make the necklace more sturdy and c) what's most important imho, it takes away the... painted plastic look and gives it a nice, thick jewellery feel. A bit of a 3D-Effect, you know what I mean...
-
 Step 7
Let it dry. For hours, if you can resist touching it all the time... One the glue is half stiff, you'll leave fingerprints on it, so be patient! It's hard, I know that...
I'll show you a picture with it on an actual necklace asap. :)
Have fun with trying out your own stuff.


Versions


Posted by
<3Turtle Lover<3

Posted by
Pixie Havoc

Posted by
Chelsea D.


Thanks for posting this idea!!
Thanks.