


About
zip rose accessory
I've seen these in the shops and couldn't imagine spending money on them when I could make one myself! Not at all hard to do. I'm going to hot-glue a brooch back onto it and wear it on my coat :)
-
 Sarah Sylvia S. favorited Zip Rose
25 Jul 04:32
Sarah Sylvia S. favorited Zip Rose
25 Jul 04:32
-
 Kathy C. favorited Zip Rose
14 Nov 03:23
Kathy C. favorited Zip Rose
14 Nov 03:23
-
 GiftedDiva24 added Zip Rose to Upcyclyed & Recycled Diy Jewelry & Crafts
04 Mar 16:50
GiftedDiva24 added Zip Rose to Upcyclyed & Recycled Diy Jewelry & Crafts
04 Mar 16:50
-
 Dawn C. added Zip Rose to Jewelry
11 Aug 17:30
Dawn C. added Zip Rose to Jewelry
11 Aug 17:30
-
 CookieBird Lover added Zip Rose to Headbands and hair clips
02 Sep 04:26
CookieBird Lover added Zip Rose to Headbands and hair clips
02 Sep 04:26
-
CookieBird Lover favorited Zip Rose
24 Jul 07:35
-
 JamieB331 added Zip Rose to Want To Make!
02 Mar 02:25
JamieB331 added Zip Rose to Want To Make!
02 Mar 02:25
-
 Diamond Sight Creations added Zip Rose to Make List
15 Sep 12:26
Diamond Sight Creations added Zip Rose to Make List
15 Sep 12:26
-
 Laura R. favorited Zip Rose
23 Jul 22:18
Laura R. favorited Zip Rose
23 Jul 22:18
-
 Britta J. entered their project Zip Rose to Sweater Surgery Contest
09 Apr 10:25
Britta J. entered their project Zip Rose to Sweater Surgery Contest
09 Apr 10:25
You Will Need
-
 Step 1
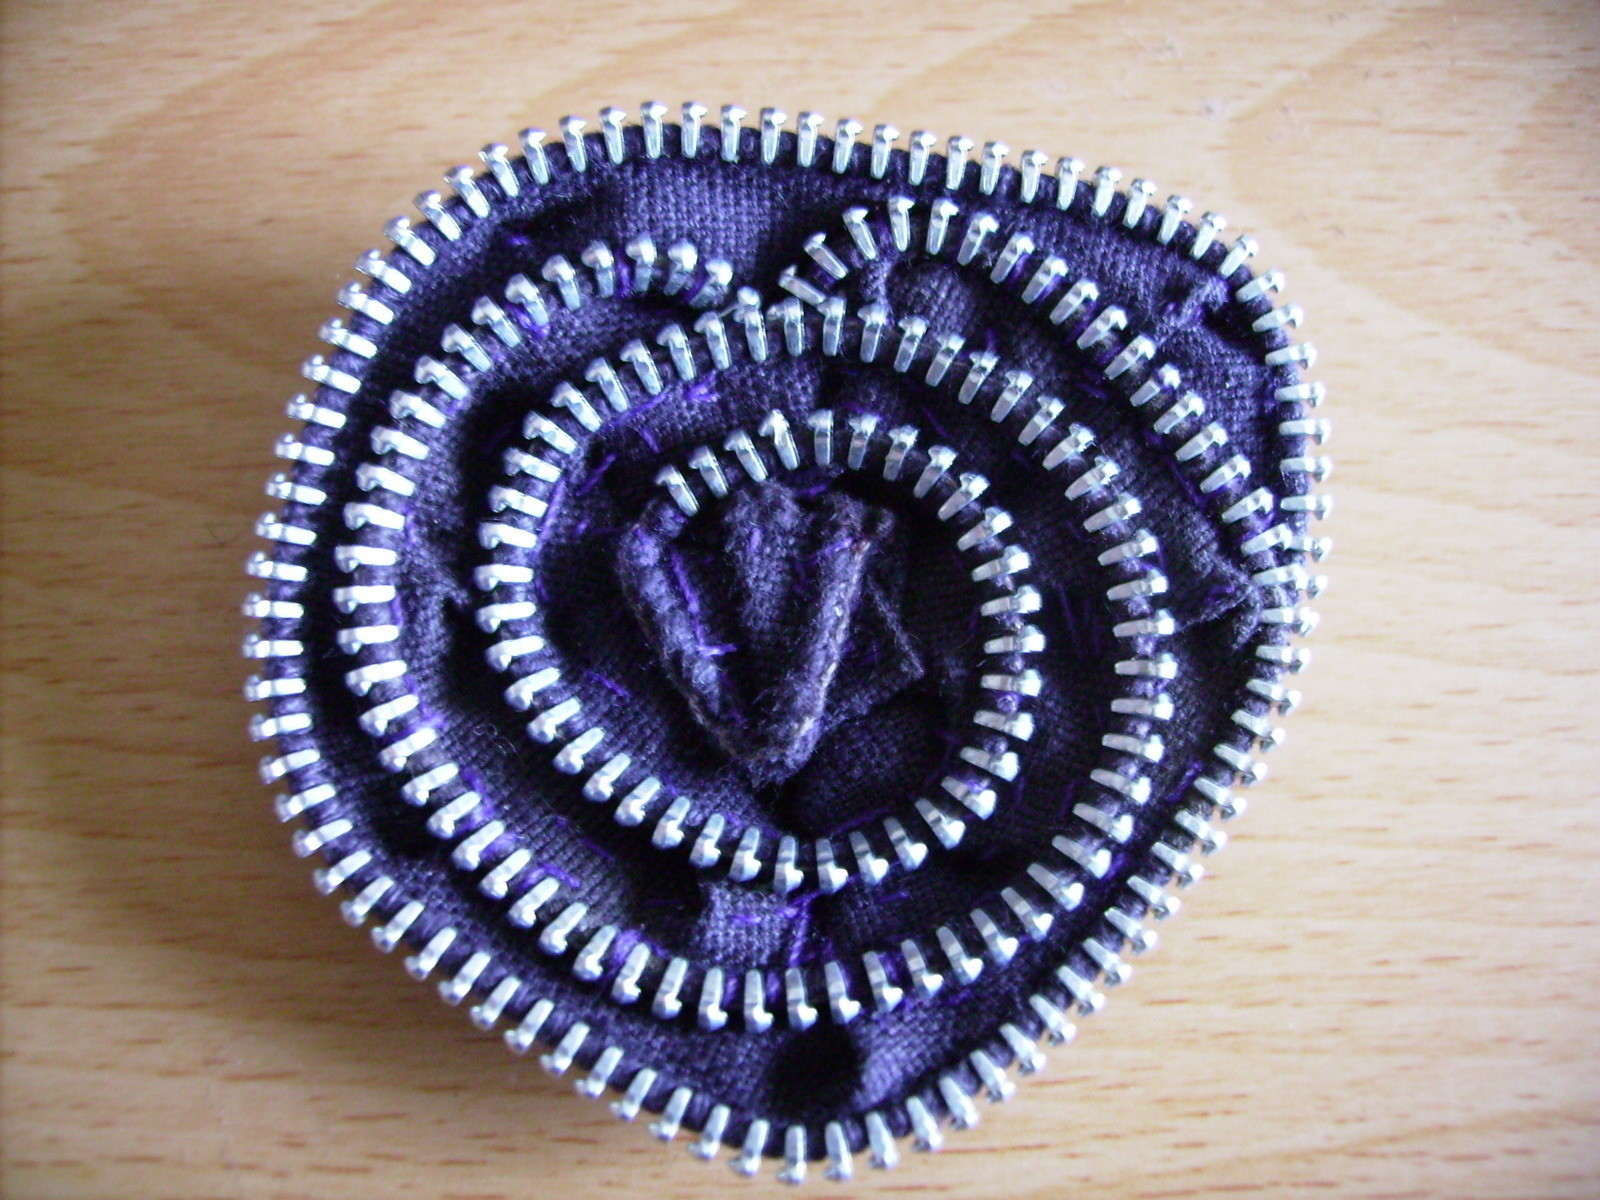
Get your zip. The best type to use for this are the ones with chunky metal teeth so that your 'petals' will really stand out!
-
 Step 2
Open it all the way out and grab hold of the left (lower in the picture) end to start working from. I'm right-handed so this means I'm more comfortable turning it clockwise as I work, but if you're left-handed you might prefer to try the opposite.
-
 Step 3
Fold over the fabric end and pinch it in place with your thumb, then get your needle and thread to secure it in place. Keep turning it and sewing as you go along.
-
 Step 4
This is what it looks like when you've done one rotation. To attach the outer layer to the inner, sew between the teeth of the zip as well as going over folds in the fabric. Try to keep it as flat as you can.
-
 Step 5
Progress shot.
-
 Step 6
When you're near the tag, cut off the metal stopper so that the pull can be removed. This is to keep the rose as flat and un-bulgy as possible, otherwise later on you'll be trying to sew over that.
-
Step 7
-
 Step 8
Tuck this end under neatly and sew into place.
-
 Step 9
Do the same with the other raw end and then continue to create the outer layer.
-
 Step 10
When you get to the end of the zip, tuck it under so that it just gradually disappears from sight and sew.
-
 Step 11
View from the back.
-
 Step 12
The last stage is to flip it over and go back over all the loose fabric folds, securing them in place. Keep checking on the front to make sure you're keeping it looking neat.
-
 Step 13
And your zip rose is finished! Use it as a hairclip, or as a brooch, as a pendant, wear it on your wrist like American girls do on prom night, use it to decorate soft furnishings etc etc :)


How did you do it? just roll it an sewed?Please try to ansewr to me ^^
Bye!