

About
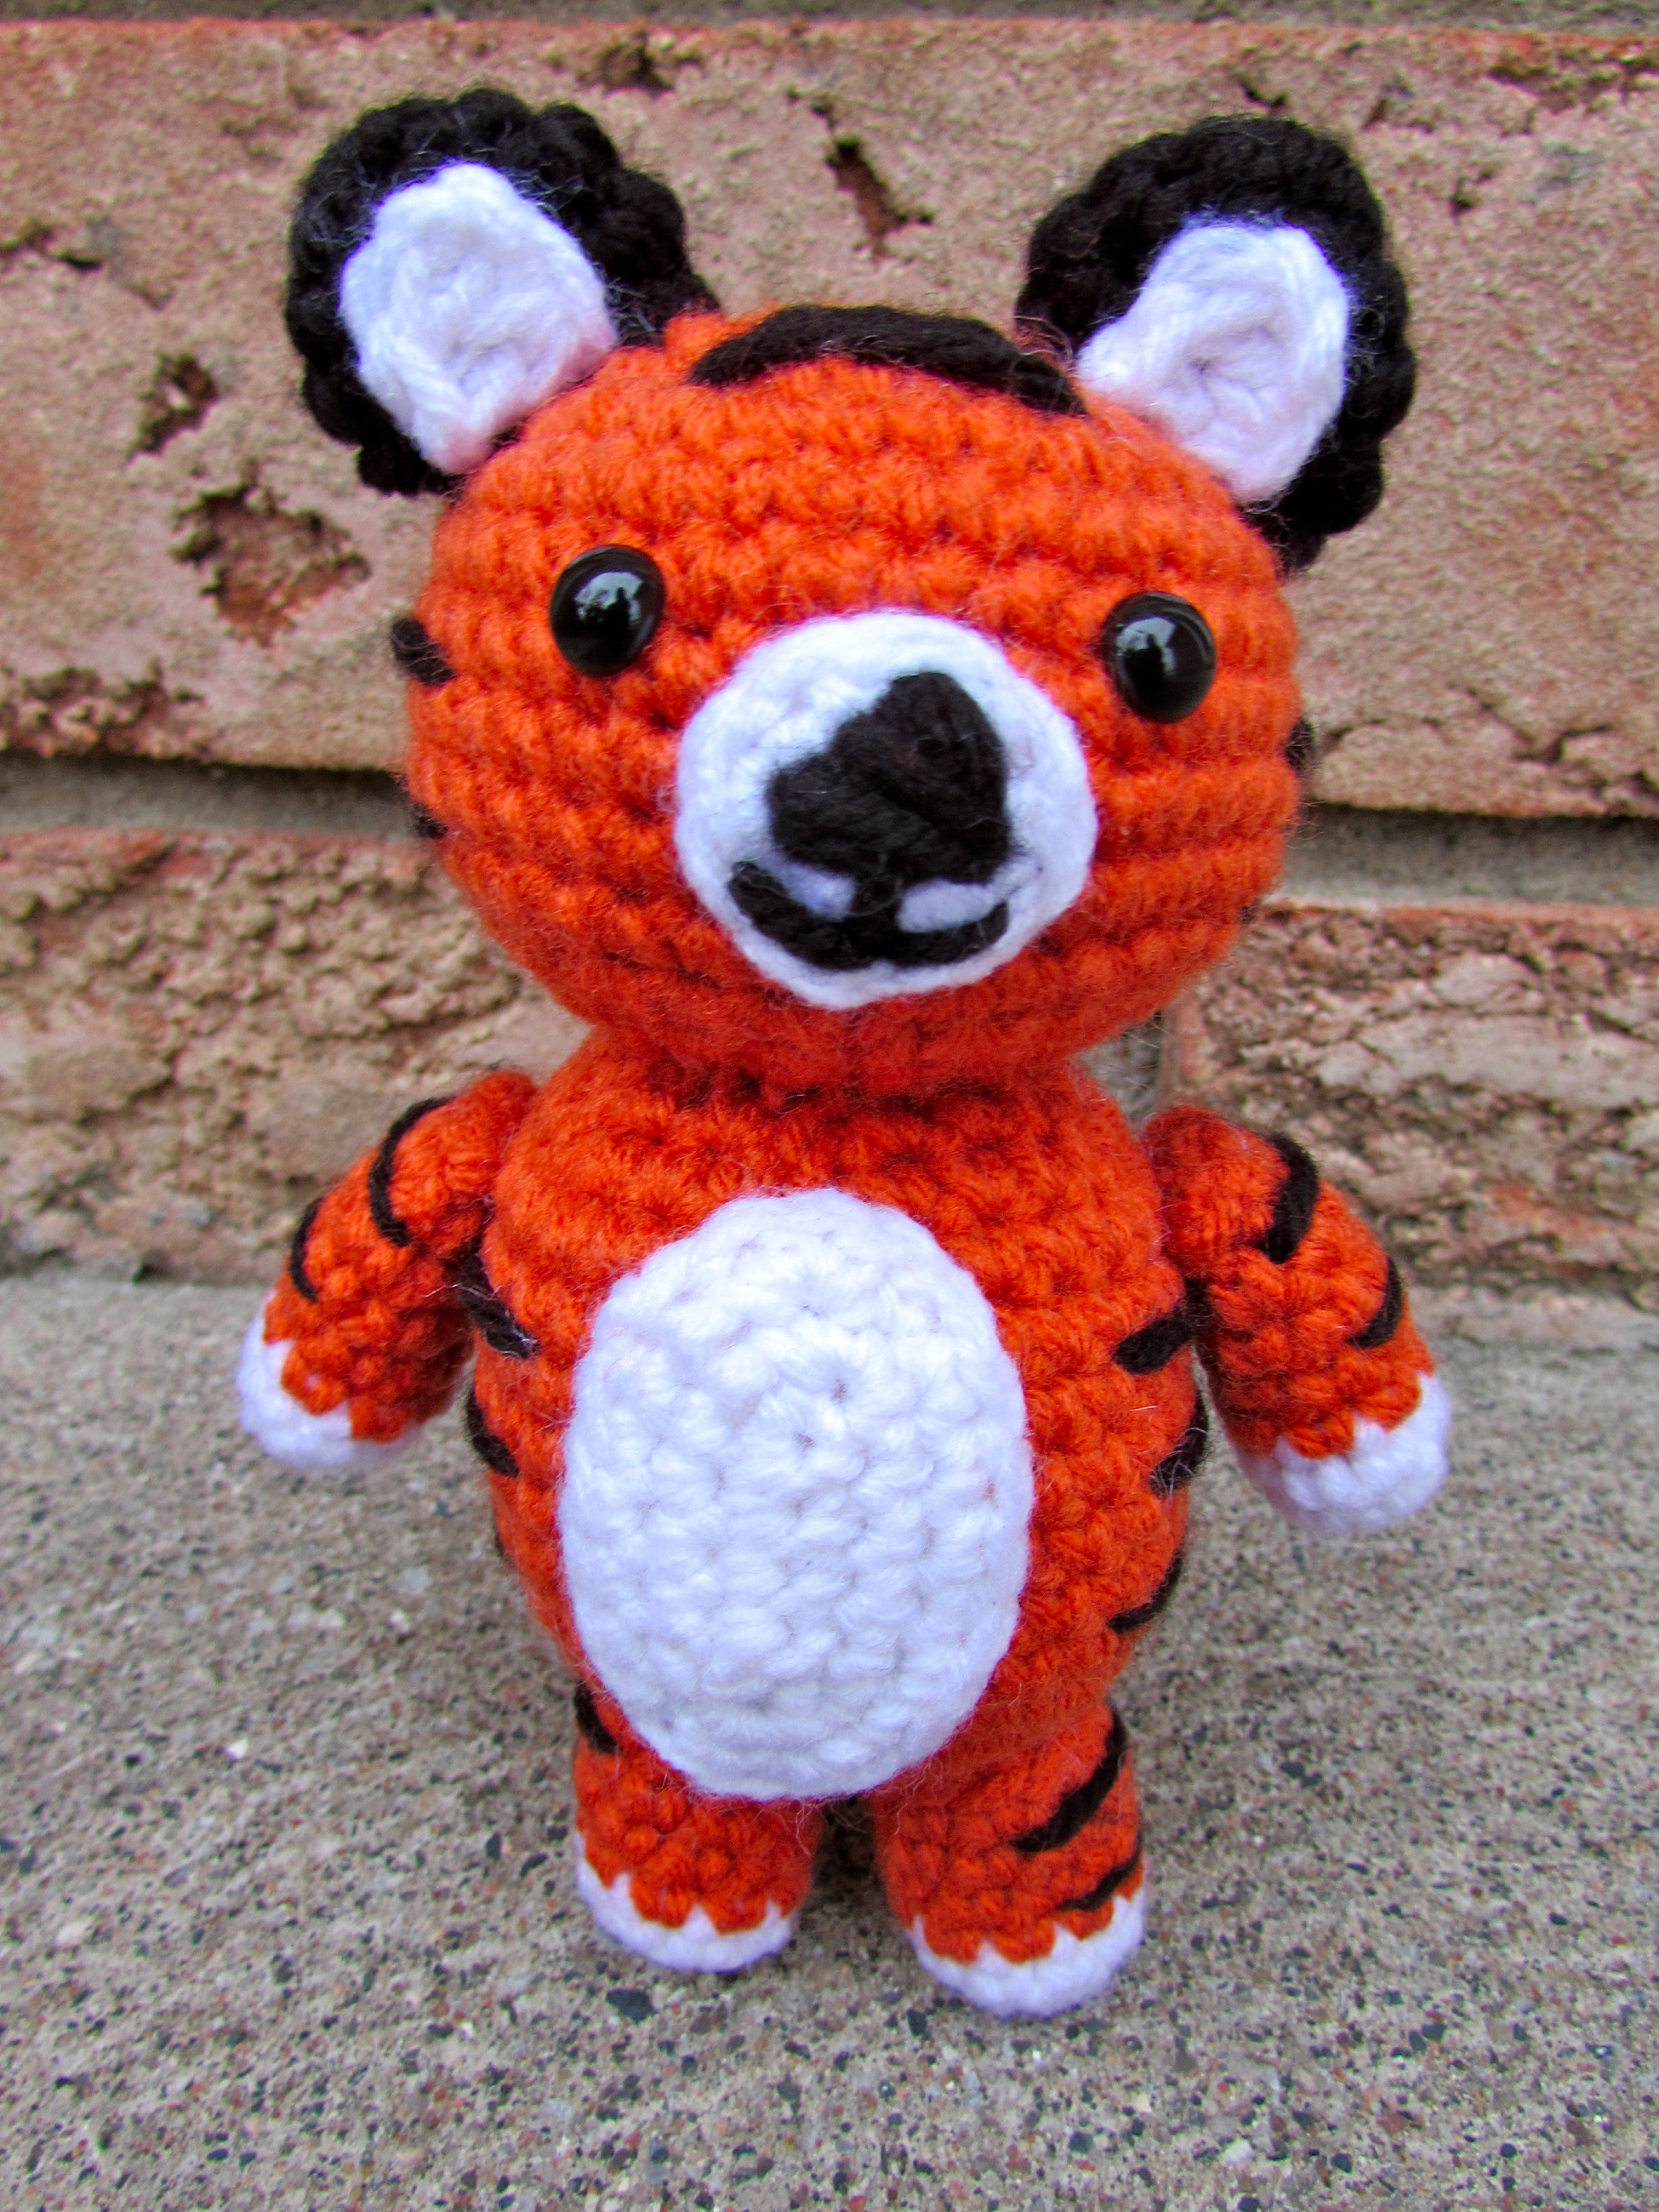
Learn to crochet this adorable amigurumi tiger!
Find out how I made this adorable amigurumi tiger, and how I sewed on all the daunting stripes!
Tags
-
 Lena W. favorited Ziggy The Tiger
03 Mar 15:51
Lena W. favorited Ziggy The Tiger
03 Mar 15:51
-
 Emma F. published her project Ziggy The Tiger
27 Nov 15:52
Emma F. published her project Ziggy The Tiger
27 Nov 15:52
-
Step 1
Body: in orange
1) ch 2. 6sc in the first chain (6)
2) inc around (12)
3) *inc, 1sc* around (18)
4) *inc, 2sc* around (24)
5) *inc, 3sc* around (30)
Rows 6-13) 1sc in each stitch (30)
14) *sc dec, 3sc* around (24)
15) *sc dec, 2sc* around (18)
16) *sc dec, 1sc* around (12)
17) sc dec around (6) Fasten off and leave a tail for sewing. -
Step 2
Head: in orange
1) ch 2, 7sc in the first chain (7)
2) inc around (14)
3) *inc, 1sc* around (21)
4) *inc, 2sc* around (28)
5) *inc, 3sc* around (35)
Rows 6-11) 1sc in each stitch (35) Attach the safety eyes between rows 7 and 8, with 5 stitches between them.
12) *sc dec, 3sc* around (28)
13) *sc dec, 2sc* around (21) Stuff firmly
14) *sc dec, 1sc* around (14)
15) sc dec until the hole is closed. Fasten off and weave in the end. Sew the head onto the body. -
Step 3
Arm: (make 2) in white
1) ch 2, 4sc in the first ch (4)
2) inc around (8)
3) 1 sc in each stitch (8) change to orange
Rows 4-8) 1sc in each stitch (8) Stuff.
Pinch the arm closed, and sew through the 2 layers of the arm, so it lays flat against the body -
Step 4
Leg: (make 2) in white
1) ch 2, 5sc in the first ch (5)
2) inc around (10)
3) 1 sc in each stitch (10) change to orange
Rows 4-7) 1sc in each stitch (10) Stuff. Fasten off and leave a tail for sewing. Sew the legs onto the body. -
Step 5
Tummy: in white
1) ch 6. Starting in the second ch from the hook, 1sc in the next 4sts, 3sc. Now working on the other side of the ch, 1sc in the next 3sts, 2sc in the last st, sl st to the first st. Ch 1 to start the next round
2) 1sc in the next 5sts, 3sc, 1sc in the next 5 sts
3) 1sc in the next 7sts, 3sc, 1sc in the next 7sts, 3sc. Fasten off and leave a tail for sewing. Sew the tummy onto the body -
Step 6
Tail: in white
1) ch 2, 5sc in the first ch (5)
2) inc around (10) change to orange
Rows 3-9) 1sc in each stitch (10) Fasten off and leave a tail for sewing. Sew the tail onto the body. -
Step 7
Outer Ear: in black
1) ch 2, 5sc in the first ch (5)
2) inc around (10)
Rows 3-4) 1sc in each stitch (10) Fasten off and leave a tail for sewing -
Step 8
Inner Ear: in white
1) ch 3
2) Starting in the second ch from the hook, 1dc in each st (2) Fasten off and leave a tail for sewing. Sew the inner ear to the outer ear. -
 Step 9
Mouth: in white
1) ch 2. 6sc in the first chain
2) 1sc, 1sc, inc, 1sc, 1sc, inc. Fasten off and leave a tail for sewing.
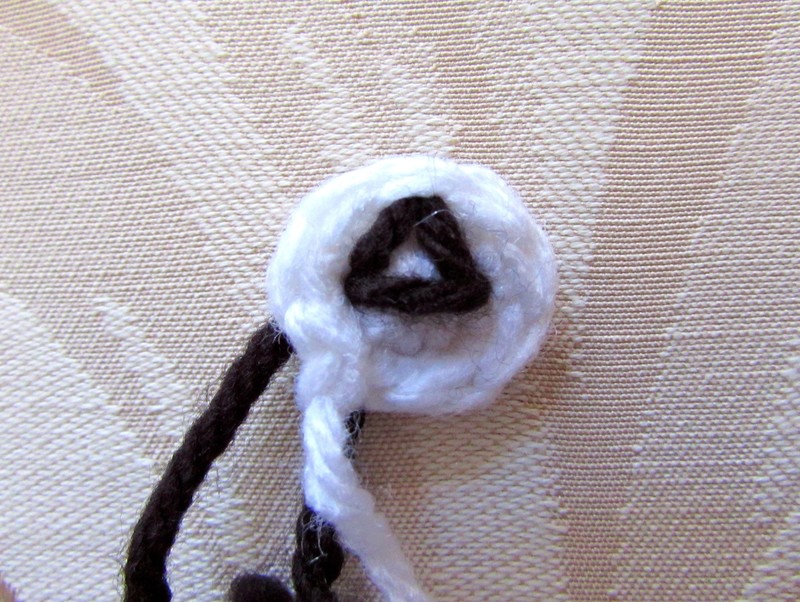
With black yarn, sew an upside down V to start off the nose shape -
 Step 10
Make the V into a triangle
-
 Step 11
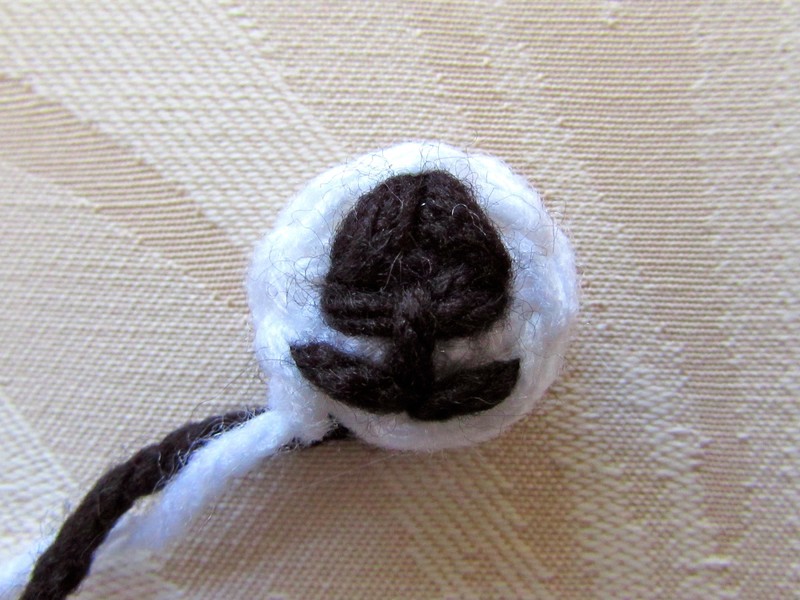
Fill the middle of the nose
-
 Step 12
Starting in the middle of the triangle, bring the yarn down past the bottom of the triangle to start the mouth of the Tiger
-
 Step 13
Sew a half a smile on the left
-
 Step 14
And complete the smile on the right. Fasten off, and weave in all the ends.
-
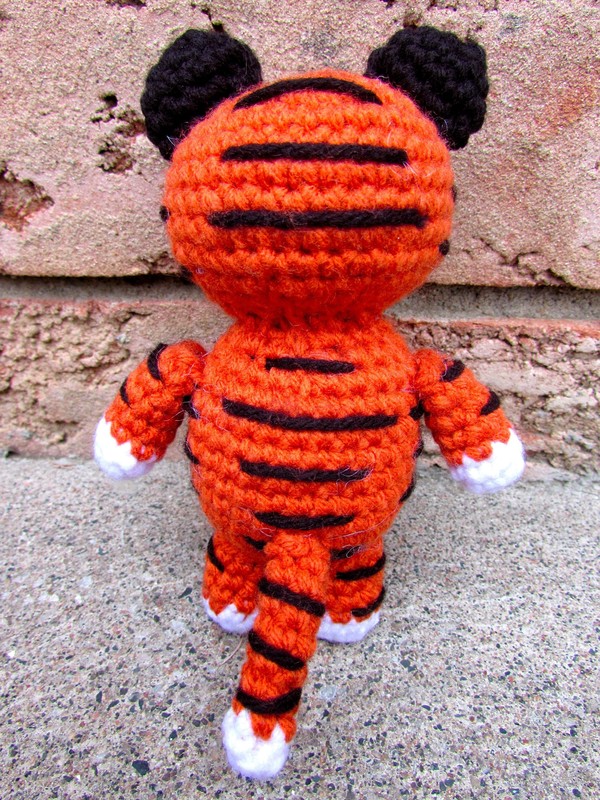
 Step 15
I made all my stripes at least 1 row apart from each other, except on the forehead. I sewed 3 stripes on the tail, 4 on the back, and 2 on the forehead.
-
 Step 16
I sewed 2 stripes on each arm and leg, and 3 on each side