About
How to Make a Yo-Yo Pincushion
This design showed up in my sketchbook a long time ago, but I resisted making it because I really don’t need another pincushion. But I do have a pretty serious yo-yo habit, and finally broke down when I couldn’t resist playing with my yo-yo maker any longer.
So, this project begins with 6 to 8 yo-yos. I used my beloved Clover Yo-Yo Maker in the 1 3/4? size. If you prefer to kick it old school, then use Heather Bailey’s gorgeous tutorial for making them from scratch.
-
 zoegirl221 favorited Yo Yo Pincushion
18 Sep 00:37
zoegirl221 favorited Yo Yo Pincushion
18 Sep 00:37
-
 Youghurt Jaja favorited Yo Yo Pincushion
27 Oct 19:43
Youghurt Jaja favorited Yo Yo Pincushion
27 Oct 19:43
-
 leticia m. favorited Yo Yo Pincushion
23 Jun 17:18
leticia m. favorited Yo Yo Pincushion
23 Jun 17:18
You Will Need
-
 Step 1
Warning! Math-y Bits!
So, let’s figure out some sizing for your pincushion. I promise, being very math-challenged, I’ve tried to keep this part as painless as possible.
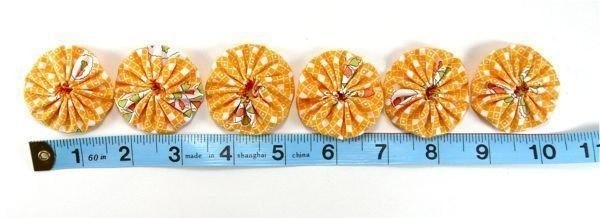
Lay your 6 to 8 yo-yos out side by side, and measure the length of this group, as seen here. You can see that my six 1 3/4? yo-yos measure 10 1/2?.
-
 Step 2
Now all we have to do is take that 10 1/2? and find out what size circle it makes. You could use complicated mathematical formulas for this, but for pete’s sake – this is why we have the internet! So go to the Circle Solver Calculator (http://www.onlineconversion.com/circlesolve.htm).
The 10 1/2? we measured earlier will be the circumference of our finished pin cushion. So put that number into the calculator and click the magic button. That’ll give you the diameter of the finished pincushion – 3.34?.
Now, take a deep breath and make some tea. We’re nearly done math-ing.
-
 Step 3
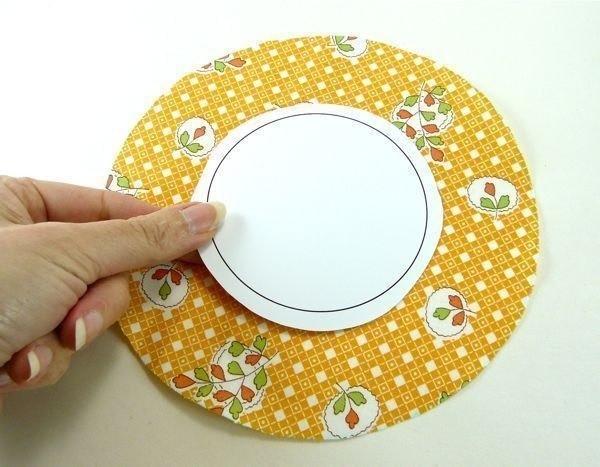
To make my life easier, I popped into my page layout software and drew up a circle with a 3.34? diameter. (You could also draw one by hand.) Then, I added a 1/4? seam allowance all the way around that. (I’ll be using this piece as a pattern to make the base pincushion in a moment.)
Next, you’re going to need one big yo-yo for the top of your pincushion. In fact, you’ll need a yo-yo that’s also 3.34? in diameter. To get that, cut a circle of fabric that’s twice that diameter, or 6.68?.
I used Heather’s tutorial to make this big yo-yo.
-
 Step 4
See? When finished, that 6.68? diameter circle makes a 3.34? yo-yo. And here ends the math-y bit!
-
 Step 5
So now, you just need to cut out the pieces for the base pincushion. Use that paper pattern we made earlier to cut two circles – one for the top, and one for the bottom. Then, cut a strip for the sides of the pincushion. It should be 1/2? taller than your yo-yos, to allow for seam allowance. And make it about an inch longer than the length we measured in Step 1.
(For my pincushion, the strip is 2 1/4? tall by 11 1/2? long.)
-
 Step 6
Okay, so let’s sew this puppy together! Pin the side strip all the way around the edge of one circle, right sides together.
-
 Step 7
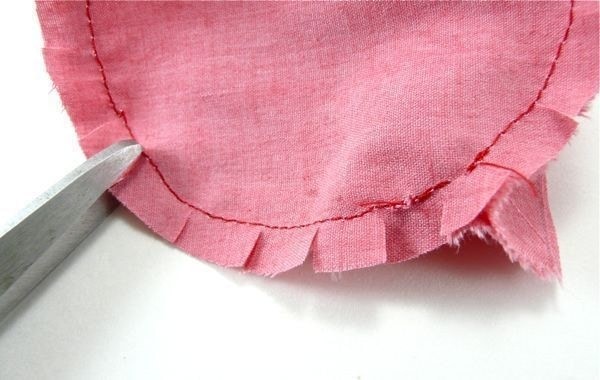
Sew all the way around the circle, using a 1/4? seam allowance. Then, clip into the seam allowance at intervals, like this. (This helps the curved seam keep a nice, round shape.)
-
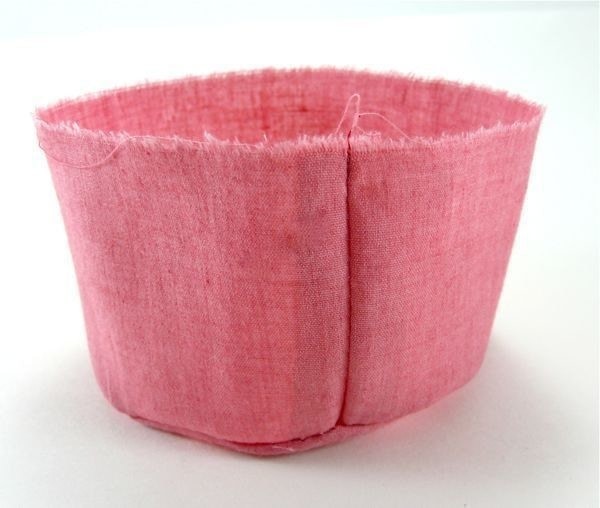
 Step 8
Next, you can sew up that side seam. I added some extra length to the side strip, just to give us some leeway. So, just make the seam wherever the two ends of the fabric meet up against the circle. You want to end up with it looking like this.
-
 Step 9
Now, pin the second circle to the top edge of the pincushion.
(Dang, guys – I promise to apply some hand lotion before I shoot my next tutorial.)
-
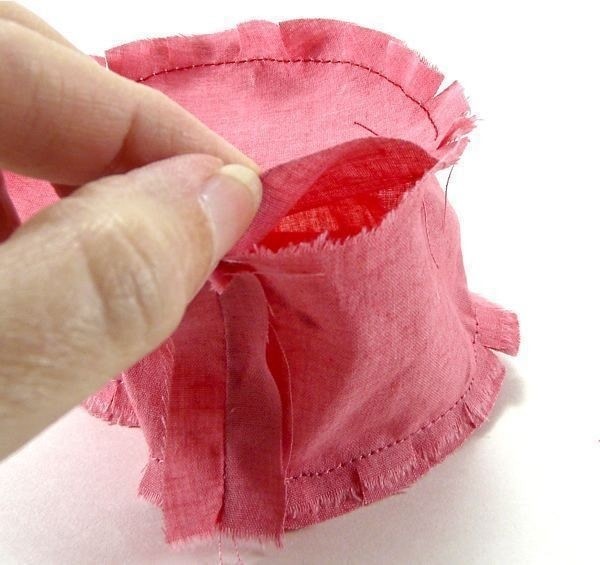
 Step 10
Sew along the edge of this circle, also with a 1/4? seam allowance. Leave about a 2? gap in the seam. Go ahead and clip into the seam allowance as you did before.
-
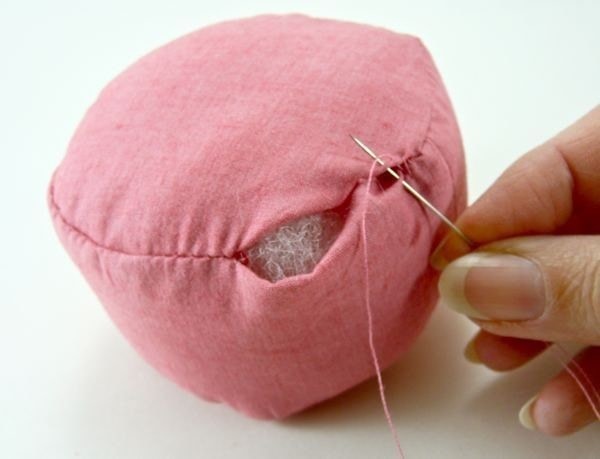
 Step 11
Turn the pincushion right side out and stuff it medium-firmly with some fiberfill. Then hand-sew that opening closed. (It’s looking rather cheerful at this point, don’t you think?)
-
 Step 12
Time to add the yo-yos! Take the big one and place it on top of the pincushion. I like to tack it in place by sticking some pins into it, like this. Just be careful as you’re hand-sewing that you don’t squeeze the pincushion too tightly, or – ouch!
-
 Step 13
Sew the yo-yo to the pincushion with a tiny whip stitch. I like to use that seam around the edge as my sewing guide.
When you’re done sewing, remove all those pins.
-
 Step 14
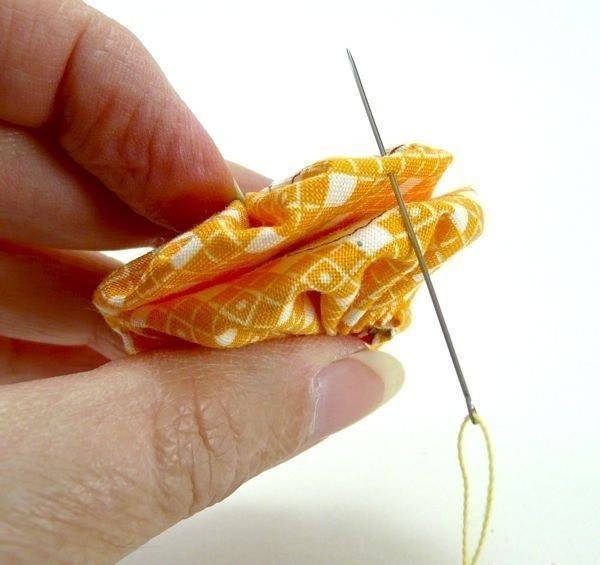
With that done, it’s time to join your small yo-yos together in a strip. Place two yo-yos back to back, matching up all the edges. Then, thread a needle with single thread and tie a knot in the end. Pass that needle through the top yo-yo only, as shown here.
(Incidentally, that will hide the knot beneath the yo-yo. Tricky, eh?)
-
 Step 15
Whip stitch the two yo-yos together, using only about 6 to 8 stitches. Knot the thread at the back.
Repeat this process to join the rest of the yo-yos until they form one long strip.
-
 Step 16
Wrap this strip around the side of the pincushion, and tack it in place with pins. (Same warning as before – don’t be squeezing!)
-
 Step 17
Whip stitch the top and bottom of each yo-yo to the pincushion – again, you can use those seams as a sewing guide.
When I’ve finished stitching one yo-yo down, I just pass the needle through the pincushion and bring it out where I need to start stitching the next yo-yo.
-
 Step 18
Lastly, stitch the two end yo-yos together at the side. Remove all those pins.
(Man! My hand-sewing starts to look pretty wonky in the macro lens. I assure you, at actual size, it’s much less embarrassing.)
-
 Step 19
Now, we’ll sew a nice, big button to the top of the pincushion. This helps squish it a bit flatter and give it a cuter shape.
Thread a needle with doubled thread, and tie a nice, big knot in the end. Pass the needle through the pincushion from bottom to top, squishing it a little to help the needle reach through.
-
 Step 20
Next, thread a button onto the needle. Pass the needle back down through the button, as shown. Make several stitches through the pincushion and button like this, pulling them fairly tight, so the shape of the pincushion gets compressed a bit.
-
 Step 21
Lastly, tie a nice, secure knot in the thread at the bottom of the pin cushion.