About
Vintage Liner Bra
For tips and tricks on how to sew the Vintage Liner Bra and insert it into a garment, click on the link to view a tutorial on the Pattern Union Blog page.
-
 Chuckee added Vintage Liner Bra to To-make list
28 May 01:56
Chuckee added Vintage Liner Bra to To-make list
28 May 01:56
-
 Crafterella featured Vintage Liner Bra
18 May 23:00
Crafterella featured Vintage Liner Bra
18 May 23:00
-
 Jessica M. added Vintage Liner Bra to Sewing
14 May 17:08
Jessica M. added Vintage Liner Bra to Sewing
14 May 17:08
-
 Sarah P. published their project Vintage Liner Bra
11 May 10:14
Sarah P. published their project Vintage Liner Bra
11 May 10:14
-
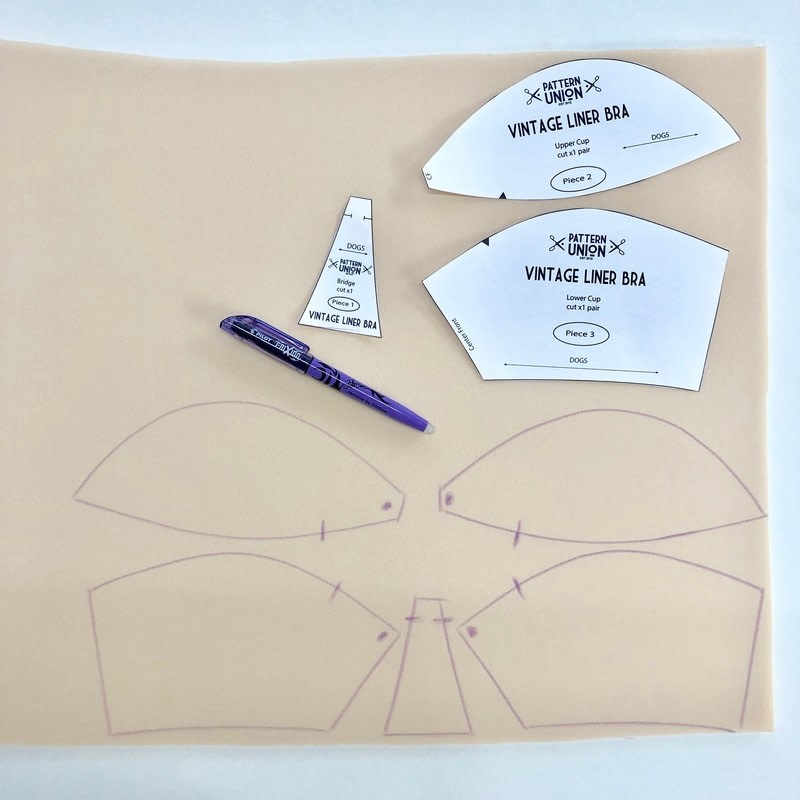
Step 1
1. Cut the pattern pieces out of the cut-and-sew foam. Make sure the cutting is smooth.
-
 Step 2
2. Mark the notches using chalk or an erasable pen.
-
 Step 3
I like to mark a dot to indicate the center front.
-
 Step 4
3. Sew the upper cups to the lower cups (align the notches and place the foam so the two pieces butt up against each other but don’t overlap).
-
 Step 5
Use a zig zag stitch of 4 wide and 3 long.
-
 Step 6
4. Sew the cups to the bridge (align the notches on the bridge to the seam of the cups and place the foam so the two pieces butt up against each other but don’t overlap). Use a zig zag stitch of 4 wide and 3 long.
-
 Step 7
5. Finish the bottom edge by sewing FOE (fold-over elastic) to wrap the raw edges. Use a zig zag stitch of 4 wide and 3 long. Pull the elastic gently while sewing to make the cups turn in slightly - this will help prevent gaping.
-
 Step 8
NOTE: I do this in one pass, but you can do in two by sewing one edge of the elastic to the wrong side, then folding the elastic to the right side to wrap around the edges and sewing the final pass.
-
 Step 9
Finish the top edge by sewing FOE (fold-over elastic) to wrap the raw edges. Use a zig zag stitch of 4 wide and 3 long. Pull the elastic gently while sewing to make the cups turn in slightly - this will help prevent gaping.
-
 Step 10
Congratulations! Your Vintage Liner Bra is now ready to be sewn into a garment! – share on social media using the tags
@patternunion @vintagelinerbra