About
A Neat and Pretty Way to Organize a Timeline
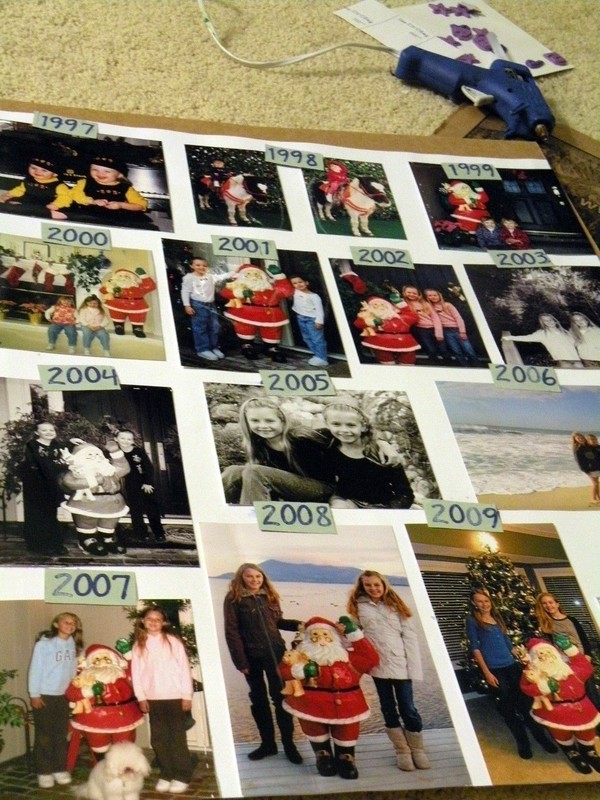
I made this as a gift. It displays Christmas photos of my sister and I over the years. You can do this for birthdays, anniversaries, holidays, etc. It works best if you have a photo of the same people every year. I had a tough time finding ALL the photos, but don't worry, you'll find it if you just believe. :)
Anyway, I very pleased with the outcome of this project. Yes, frames are expensive to buy, but I think it adds a professional look to it.
-
 Zombie Babe favorited Timeline Picture Collage
12 Sep 08:45
Zombie Babe favorited Timeline Picture Collage
12 Sep 08:45
-
 Step 1
Buy a frame. Make sure it has one of those shiny pieces of paper inside.
-
 Step 2
Turn that piece of paper over and start organizing your photos in chronological order across your frame. Make sure to leave space.
I cropped a lot of my photos so I would have equal space between each photo. -
 Step 3
Glue your photos down. I used a glue gun.
-
 Step 4
Cut out your colored paper into rectangles and stamp, punch, or write the dates of the photos on those tiny cards.
-
 Step 5
Now glue your cards above, below, or around the designated photo.
-
 Step 6
Put your collage in the frame.
-
 Step 7
Now pop a marshmallow in the microwave for 10 seconds and watch what happens.
Feel free to chomp on it when you're done observing.
:)