


About
DIY: Button Statment Rings
Buttons, buttons everywhere!! Someone please tell me why I’ve collected all these buttons.
-
 Key West Witch added Statement Button Ring to Rings
30 Jun 07:18
Key West Witch added Statement Button Ring to Rings
30 Jun 07:18
-
 Ash A. favorited Statement Button Ring
25 Apr 05:55
Ash A. favorited Statement Button Ring
25 Apr 05:55
-
 Tiffany M. added Statement Button Ring to Outfit for Tracee Ellis Ross
09 Sep 04:37
Tiffany M. added Statement Button Ring to Outfit for Tracee Ellis Ross
09 Sep 04:37
-
Susanna Q. added Statement Button Ring to Accessories
08 Apr 23:34
-
 MischievousRaven added Statement Button Ring to Jewellery Makes
18 Feb 23:52
MischievousRaven added Statement Button Ring to Jewellery Makes
18 Feb 23:52
-
 RareJewel favorited Statement Button Ring
30 Nov 05:09
RareJewel favorited Statement Button Ring
30 Nov 05:09
-
Quinetta J. favorited Statement Button Ring
12 Aug 19:58
-
 CurlyMade added Statement Button Ring to Miley's Style
30 Jul 18:57
CurlyMade added Statement Button Ring to Miley's Style
30 Jul 18:57
-
Maxine M. added Statement Button Ring to To-make list
19 Apr 10:30
-
 laurie.keenercaid added Statement Button Ring to My stuff
15 Apr 18:43
laurie.keenercaid added Statement Button Ring to My stuff
15 Apr 18:43
-
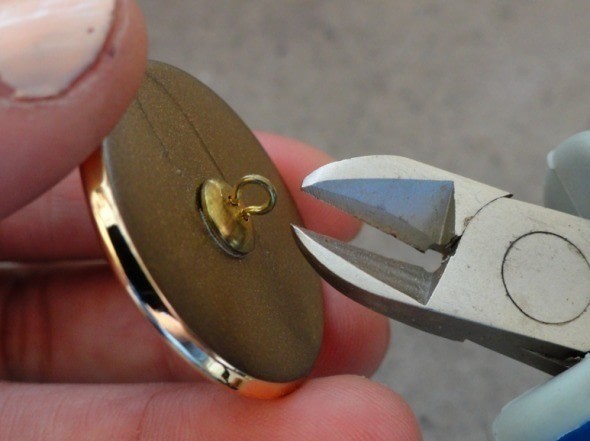
 Step 1
Use your clippers to remove the shank from the back of the button.
-
 Step 2
Once you’ve made the back of the button flat, use an ample amount of glue to secure the ring to the back of the button.
-
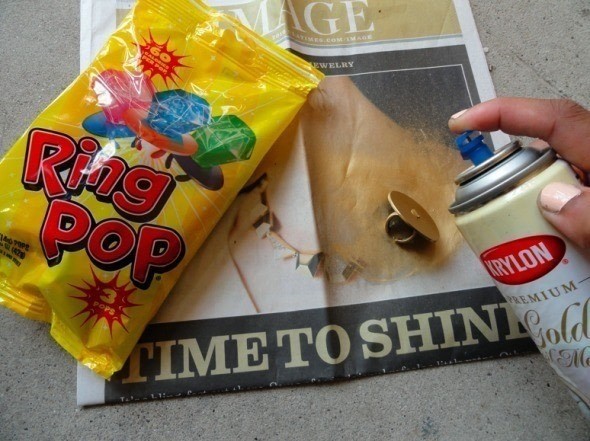
 Step 3
Here’s another hint: If you can’t find a flat ring base, Ring Pops are a fun alternative. After you’ve removed the candy and cleaned the ring base, grab your Kylon spray and paint it.
-
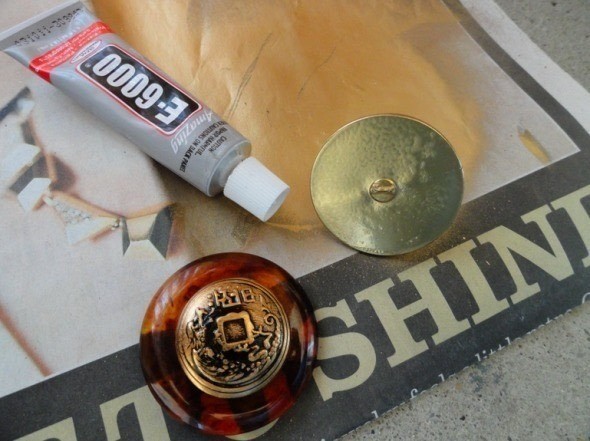
 Step 4
Once the base has dried, glue on the button.
-
 Step 5
I now thing I have enough new statement rings to get me through the month.


CO + K User