


About
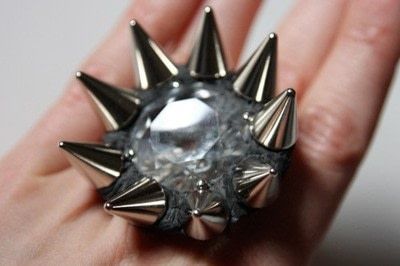
Don't Buy, DIY: Spiked Crystal Ring
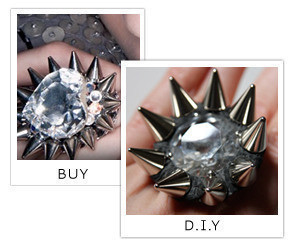
My obsession with all things spiked and studded has been well-documented, and this ring is no exception. An edgy Swarovski piece, there's no way I would be able to afford its price tag. But DIY? You betcha!
-
 Key West Witch favorited Spiked Crystal Ring
07 Aug 22:57
Key West Witch favorited Spiked Crystal Ring
07 Aug 22:57
-
Key West Witch added Spiked Crystal Ring to Rings
30 Jun 07:37
-
 Ash A. favorited Spiked Crystal Ring
24 Apr 19:17
Ash A. favorited Spiked Crystal Ring
24 Apr 19:17
-
trinity z. favorited Spiked Crystal Ring
10 Dec 19:28
-
trinity z. commented on Spiked Crystal Ring
10 Dec 19:27
-
 Xfluffy_unitatoX favorited Spiked Crystal Ring
17 Nov 01:54
Xfluffy_unitatoX favorited Spiked Crystal Ring
17 Nov 01:54
-
 Angy L. favorited Spiked Crystal Ring
13 Apr 23:41
Angy L. favorited Spiked Crystal Ring
13 Apr 23:41
-
 Crafterella added Spiked Crystal Ring to Taylor Momsen
08 Jun 11:46
Crafterella added Spiked Crystal Ring to Taylor Momsen
08 Jun 11:46
-
 shyamala iyer commented on Spiked Crystal Ring
18 May 11:51
shyamala iyer commented on Spiked Crystal Ring
18 May 11:51
-
 GiftedDiva24 added Spiked Crystal Ring to Diy Jewelry
28 Mar 18:51
GiftedDiva24 added Spiked Crystal Ring to Diy Jewelry
28 Mar 18:51
-
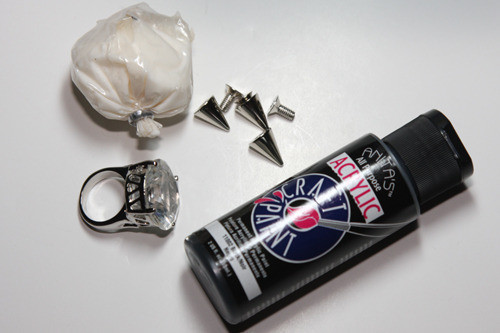
 Step 1
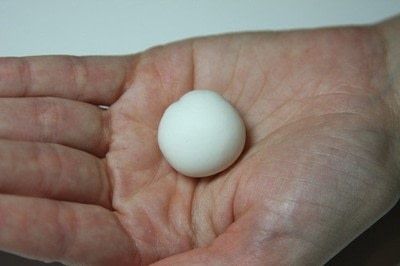
If your clay is not black...
-
 Step 2
mix a small amount of the paint into a ball of clay about the size of half a golf ball; knead until color is consistently achieved.
-
 Step 3
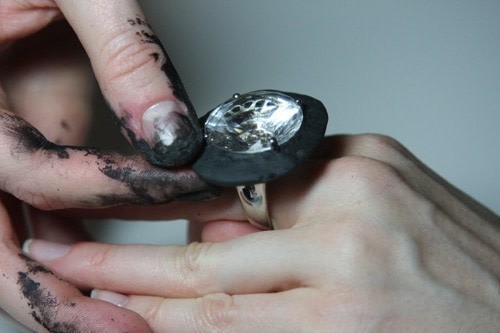
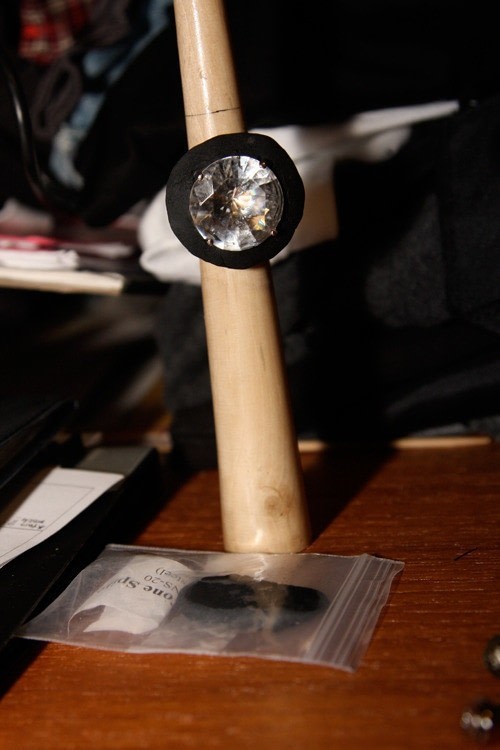
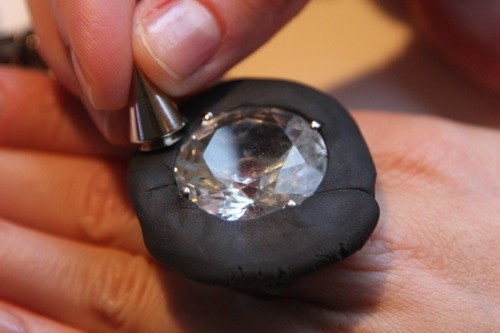
Divide ball of clay in half. Mold half of the softened clay around rhinestone part of ring - going down the ring's central support to create a base.
-
 Step 4
Mold clay into a flat base about 3/8" wide around the rhinestone, slightly below the top of the stone.
-
 Step 5
Allow base to dry as per clay instructions. (Save other half of clay in a little zip-top bag with a moist paper towel over it so it won't dry out.)
-
 Step 6
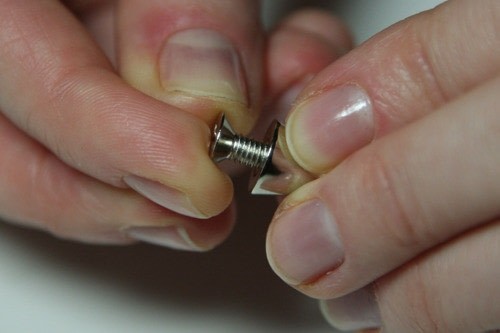
Screw base screws into spikes as far as they will go (a little of the screw head will protrude).
-
 Step 7
Taking a small part of the clay you saved, place it on the dried base you molded in step 2). Push spikes one by one into clay base, making sure clay goes all the way up beyond the screw around the body of the spike.
-
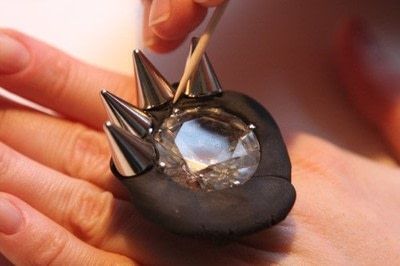 Step 8
Use a toothpick to push the clay around the base of each spike. (I worked with about 3 spikes at a time, setting and then letting the clay dry before moving on to the next 3 spikes. I found that trying to set all the spikes at once was too difficult, as they kept falling out from the soft clay as I continued setting them.)
-
 Step 9
After all the spikes have been set and the clay is semi-dry, add more clay around the edges or anywhere you may have missed.
-
 Step 10
Allow to air dry for 48 - 72 hours. You can then sand the piece if desired.
Bling a bling...stab!


.
xoxo
Carly
Thanks for your comment!
xoxo
Carly
LOL kellbear! It totally would!
@quirky been v.: I just noticed that. I uploaded it through CutOutandKeep's "upload a project" feature, where someone on their team inputs the information into their interface. They must have missed that. I have now fixed it. Thank you for bringing it to my attention.
xoxo
Carly