


About
show your nails who's boss!!!
This is one for all those of you who have fingernails that tend to split and peel ( meaning you can peel off the upper layer, dunno how you native guys would call it ;) ).
Please note that this is NOT a SOLUTION to the problem but merely a last minute rescue before having to cut your carefully groomed nails...
Furthermore: This method is NOT invisible! You will have to cover it in a opaque colour.
-
 The Makeup Honey favorited Sos Nail Rescue Plus Nail Designs
09 Jan 07:21
The Makeup Honey favorited Sos Nail Rescue Plus Nail Designs
09 Jan 07:21
-
 Mi.ezekatze replied to a comment on their project Sos Nail Rescue Plus Nail Designs
28 Nov 16:19
Mi.ezekatze replied to a comment on their project Sos Nail Rescue Plus Nail Designs
28 Nov 16:19
-
 jenny.furner commented on Sos Nail Rescue Plus Nail Designs
27 Nov 09:14
jenny.furner commented on Sos Nail Rescue Plus Nail Designs
27 Nov 09:14
-
 Danielle A. favorited Sos Nail Rescue Plus Nail Designs
09 Oct 04:22
Danielle A. favorited Sos Nail Rescue Plus Nail Designs
09 Oct 04:22
-
 blurrymind commented on Sos Nail Rescue Plus Nail Designs
22 Sep 09:53
blurrymind commented on Sos Nail Rescue Plus Nail Designs
22 Sep 09:53
-
 WerewolfCas favorited Sos Nail Rescue Plus Nail Designs
04 Sep 05:54
WerewolfCas favorited Sos Nail Rescue Plus Nail Designs
04 Sep 05:54
-
 munday.wendy favorited Sos Nail Rescue Plus Nail Designs
20 Jul 17:02
munday.wendy favorited Sos Nail Rescue Plus Nail Designs
20 Jul 17:02
-
Mi.ezekatze entered their project Sos Nail Rescue Plus Nail Designs to Violent Lips
20 Mar 12:12
-
 Step 1
Gather your material:
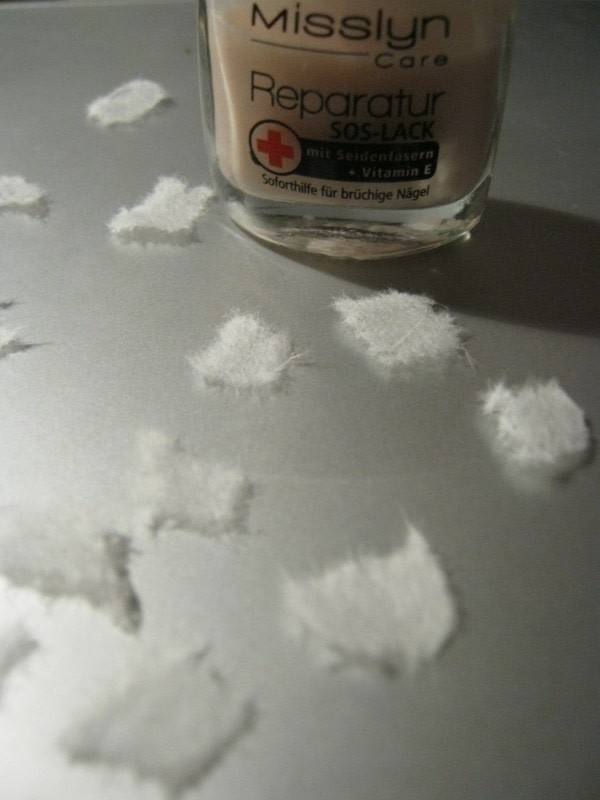
- A tea bag ( you can get tea bags for loose tea or just sacrifice a bag of pre-packed tea ;) )
- Your base coat of choice, I'm using Misslyn Repair polish.
- a soft, gentle nail file ( no metal or glass )
- Uhm, your nails, obviously? :D -
 Step 2
Rip the tea bag tissue into little pieces. You can do like I do and rip a lot and store some for later use, or you just rip a few.
First of all: you won't neccessarily need 10 of them. If, say, 5 of your nails show splitting symptops, you'll only need 5 little pieces, right?
Try to get the size about right so you're ready to go once you started. Small pieces for your pinkie, bigger pieces for your thumb, you'll get the idea.I do not recomment cutting the pieces because the define edges might show!
-
 Step 3
Work slowly and thoroughly: Give your first damaged nail a layer of base coat. after a few seconds - before the polish dries! - pick a piece of tissue and lay it down over the damaged white part of your nail. You don't need to cover more!
gently press down with your finger tips, dab down stubborn edges with the polish brush.
LET DRY!
Give it another layer of your basecoat, covering the length of the tissue also. Work from the tip down to smooth down the lower edge of the tissue.
Give your undamaged nails a normal layer of basecoat.
Let dry!
-
 Step 4
Once everything has dried - this is VERY important!! - get your file and carefully and softly (!) file off the excess tissue in a downward motion ( see picture ). If your nails aren't dry yet, you'll just pull off the tissue again.
The excess tissue will come off by itself once filed down everywhere, don't pull it off.
It's basically the same step you'd do for a nail foil. :) -
 Step 5
Here's what you'll end up with.
Continue your usual nailpolish procedure from here. I recommend using opaque polishes that are not too runny but rather thick and gooey as the texture of the fixed nail might snow.
Please note that if you go and take a bath or swim, you will be able to peel the tissue off. You'll have to remove / undo this after a long soaking session.
The tissue comes off easily with nail polish remover. -
 Step 6
*drumroll*
From here on, it's just nail designs I made. :P
I call this one 'before dawn': Purple gradient on translucent pink base with black design.
-
 Step 7
Candy shop, my alltime favorite.
-
 Step 8
The Thing from the Swamp: Steel grey with a sweep of red/green changing pigments, black claw marks.
-
 Step 9
Water Marble style
-
 Step 10
Laggon ( on acrylic nails I had last summer ): glittering lilac base with a blue gradient and black swirls.
-
 Step 11
Most recent design, 'Mermaid': Steel grey to blue gradient, embellished with some glitter particles and a few rhinestones.


prettymarshmallow.blogspot.com