


About
Simple yet beautiful!
These steps will help you in any basic beaded wire necklace. The project can be whatever you want it to look like. You pick the color, the beads, etc.
Personally I read once that the people we find most attractive in this world have more symmetry to their face than the average person. To me jewelry is the same way.. I tend to work on a symmetrical look with each piece I make.
-
 Kathy C. favorited Simple & Beautiful Beaded Wire Necklace
06 Feb 07:23
Kathy C. favorited Simple & Beautiful Beaded Wire Necklace
06 Feb 07:23
-
 Haliej added Simple & Beautiful Beaded Wire Necklace to Jewelry
31 Jul 15:06
Haliej added Simple & Beautiful Beaded Wire Necklace to Jewelry
31 Jul 15:06
-
 Step 1
Gather all your supplies.
Layout your beads in the order in which you want to string them. A beadboard helps. These are relatively inexpensive and will more than make up for their cost in use.
-
 Step 2
Once you know the order of your beads and layout, start stringing your beads onto the beading wire.
Tip: By keeping your wire attached to spool you wont have to worry about beads falling off or length of wire not being long enough. Keep it attached until you are ready to crimp on one end.
-
 Step 3
Once all beads are one pull wire tight on one free end. Slip on crimp bead to end. Pull end back through making a tight loop. Use crimp pliers on crimp bead. Cut off excess wire from crimp bead.
-
 Step 4
Slide all beads down tight against crimp bead. Cut wire a few inches from end of beads attached to spool. Hold this side up or you will lose your beads :-(
-
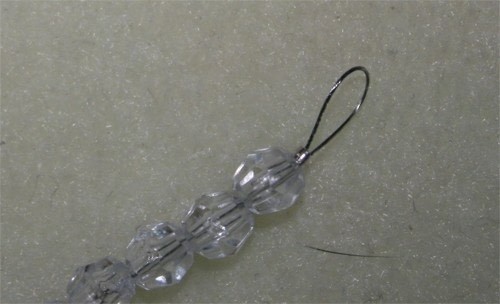
 Step 5
Slide on crimp bead like you did on other end. Slip end through making a small loop. Try to get as close to beads as possible. Use crimp pliers on crimp bead.
-
 Step 6
Cut of excess length of wire.
-
 Step 7
Open one jumpring, put through one loop end of wire and close.
Open other jumpring, put through other loop end of wire for necklace and slip on clasp, close jumpring.
-
 Step 8
That's it! Your necklace is ready to go!!


Comments


