

About
Easy plastic jewelry that's easily personalized.
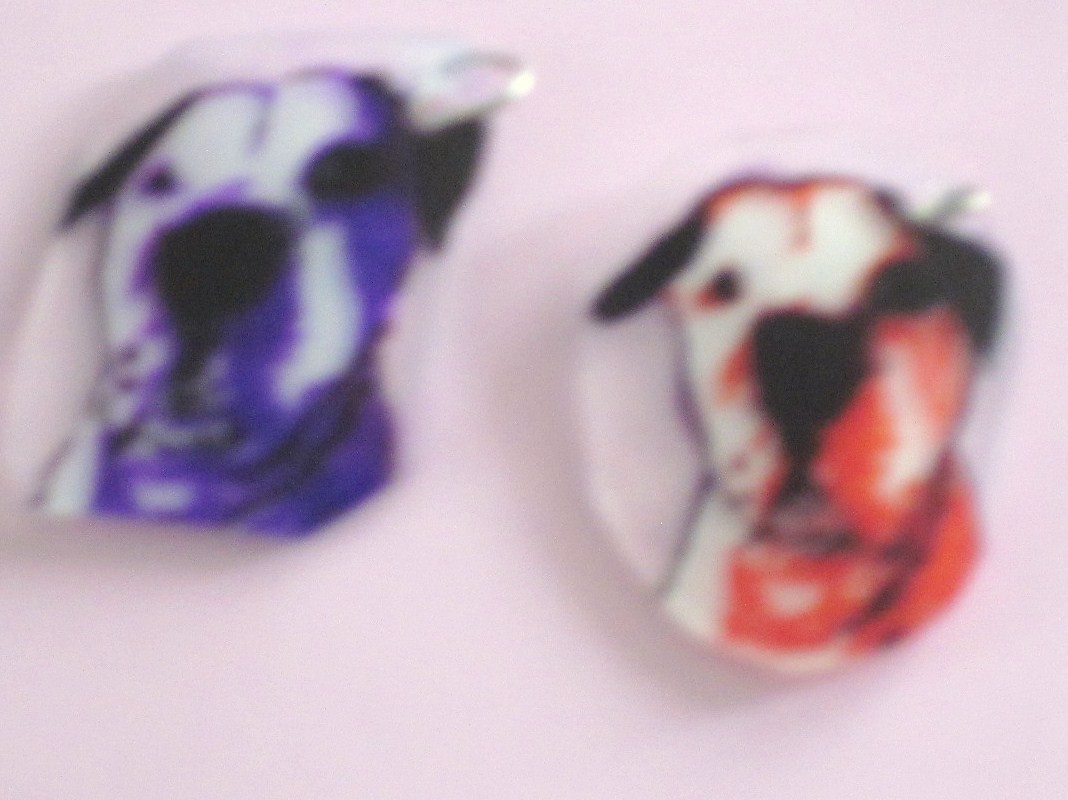
I came across this idea somewhere a long time ago as a cheap alternative to Shrinky Dinks, and things like it. It's super easy and I love the end result. I made these for my boyfriend of his dog that just died. R.I.P. Chopper.
Tags
-
 Sunnie favorited Shrunken Plastic Jewelry
15 Feb 18:08
Sunnie favorited Shrunken Plastic Jewelry
15 Feb 18:08
-
 rheaghan favorited Shrunken Plastic Jewelry
26 Jan 17:19
rheaghan favorited Shrunken Plastic Jewelry
26 Jan 17:19
-
Step 1
Pre-heat your oven to 350 degrees F.
-
 Step 2
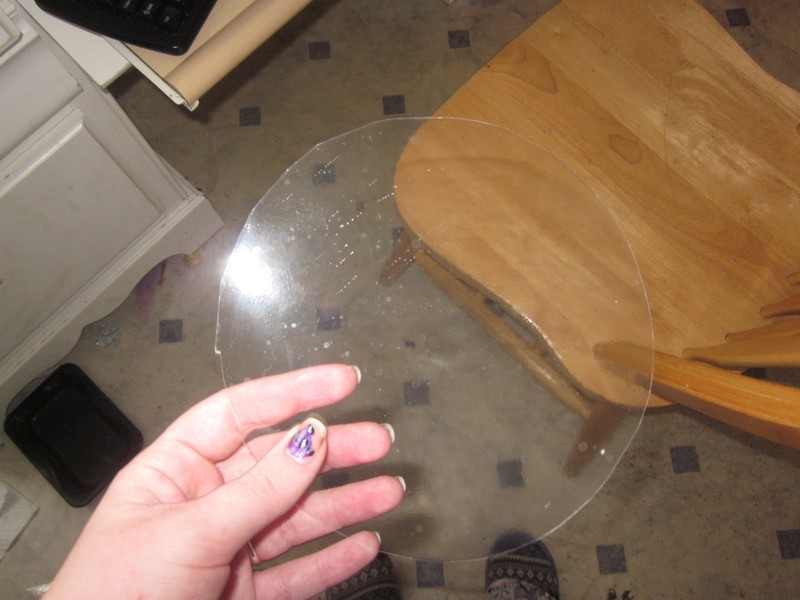
Start with a plastic container. Number 6 works best and it's the easiest to find. Mine was a pie cover thing.
-
 Step 3
Cut out the flat part so it's easier to work with.
-
 Step 4
Take your picture (I photoshopped it so the contrast was higher and easier to see) and tape it right side down onto the plastic.
-
 Step 5
Trace over it with the markers and color it however you want. Then punch a hole in it wherever you want it to hang from.
-
 Step 6
Make a little tray out of aluminum foil, put your plastic on it, and put it in the oven.
-
Step 7
Keep it in the oven for a minute or two, checking on it every 30 seconds or so. The plastic curls really weird for a little bit, but it'll flatten out, don't worry!
-
Step 8
Take it out of the oven. If you want to bend it, do it within the first 10 seconds. It should be okay to touch.
-
Step 9
I put on a coat of clear nail polish, but that's optional.
-
Step 10
Put it on a string, chain, ear rings, bracelet, whatever you want! Enjoy!


Hey do you talk about farenheit or celcius?. not all the members live in the same part on this globe you know.LOL In Europe we use celcius.
but it's a very cool thank you for all your efforts and the sharing;-D
hope your feeling soon some better;-D