
About
Complete Dressmaking
This type of collar is one that has the lapel grown on to the
front of the garment and then extends around to the back of
the neck. So the whole collar is an extension of the front of the garment, which then rolls over to form the back of the collar and the upper collar is actually part of the front facing.
The traditional shape of a shawl collar is a gentle curve, but fashion has seen all sorts of differently shaped lapels.
-
 JadeSucksAtLife favorited Shawl Collar
26 Feb 21:16
JadeSucksAtLife favorited Shawl Collar
26 Feb 21:16
-
 Carla B. commented on Shawl Collar
14 Sep 15:28
Carla B. commented on Shawl Collar
14 Sep 15:28
-
 Creative Publishing international published her project Shawl Collar
13 Sep 09:00
Creative Publishing international published her project Shawl Collar
13 Sep 09:00
You Will Need
-
 Step 1
The facing needs to be interfaced to give it some rigidity. Cut the interfacing slightly smaller all around than the facing piece, then apply it to the wrong side of the fabric pieces, following the manufacturer’s instructions. Transfer all the markings from the pattern to the fabric pieces.
Tip: If you are making a jacket or coat, you will need to stabilise both the garment and the facing. But if you are making a blouse or dress you may only wish to stabilise the facing.
-
Step 2
Staystitch around the corner of the neckline of both the garment and the facing on the seam allowance line, making sure to pivot on the small dot.
-
Step 3
If there are darts in the front of the collar and the facing, sew these next. (Darts will help to give the collar a smooth shape, but not all patterns will have them.)
-
Step 4
Sew the centre back seams on both the garment (a) and the facing (b). Press the seams open.
-
 Step 5
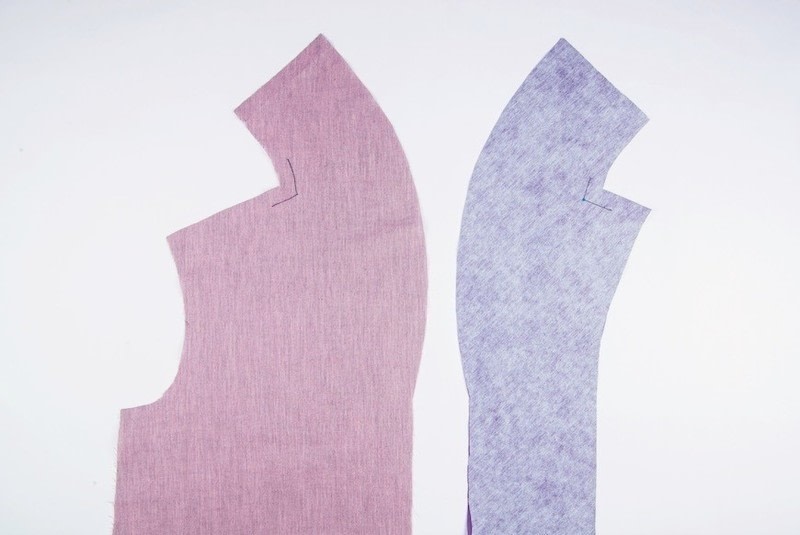
Clip into the corners of both the garment and facing neckline up to the small dot, being careful not to cut through the staystitching.
-
 Step 6
....
-
 Step 7
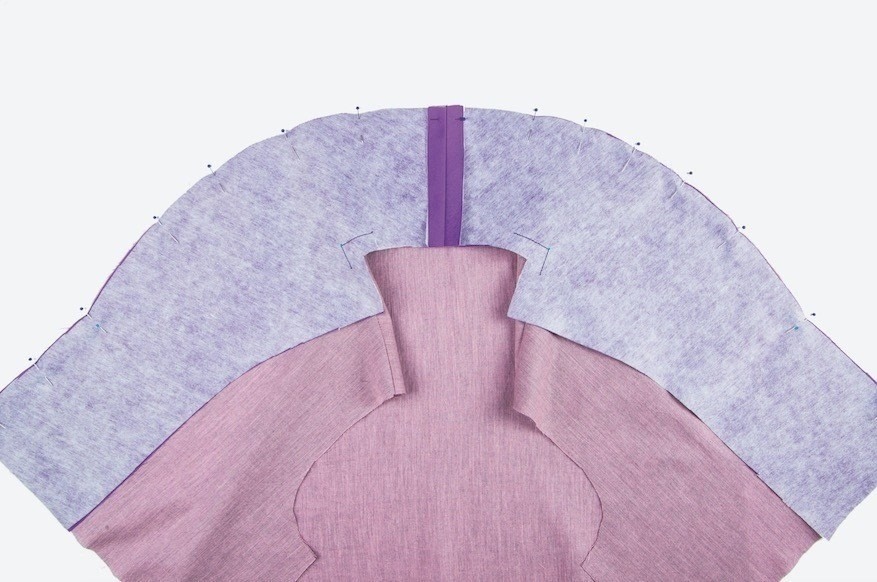
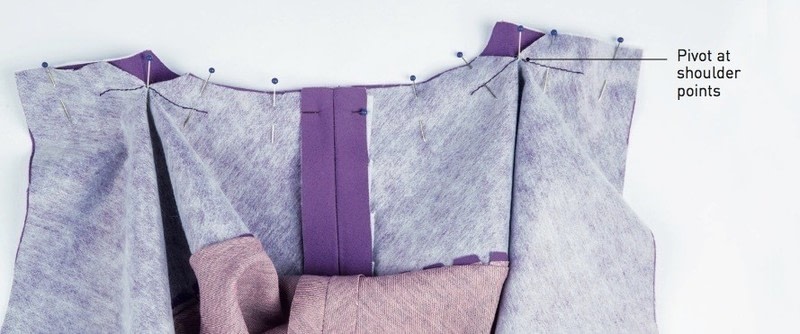
With right sides together, pin the back neckline of the collar to the back neck of the garment. Match up the centre back seam on the collar with the centre back of the garment. Pin the shoulder/neck points together, too. Pivot the collar/garment front so that the shoulders of both the garment back and the front seams will line up.
Tip: Put a pin in vertically right at the small dot to ensure that the collar doesn’t shrink back from the point of the corner as you sew.
-
 Step 8
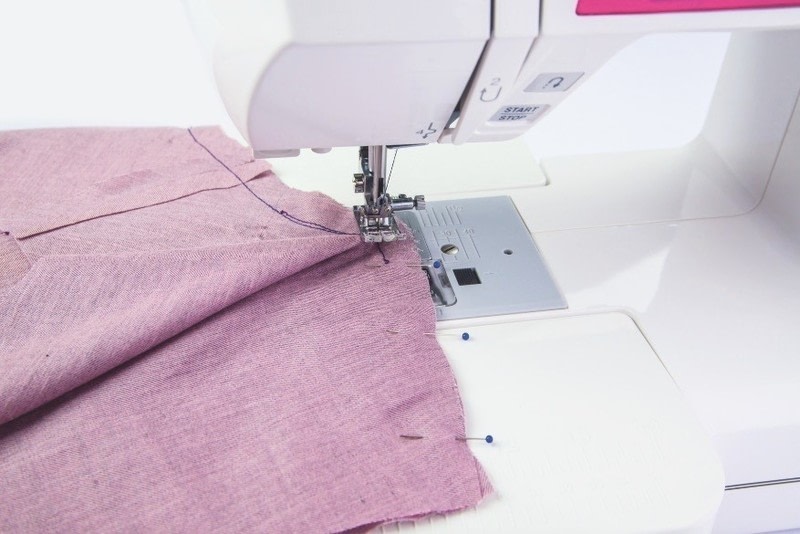
Starting at the centre back, sew to the pivot point, drop the needle down into the fabric, pivot everything around (making sure no fabric is caught under the foot) and continue sewing across the shoulder. Repeat for the other side.
-
 Step 9
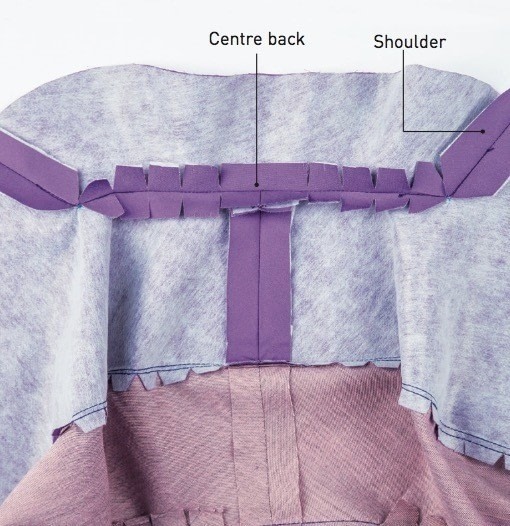
If you are finishing the collar with a back neck facing, press the shoulder and neck seam open (a). If you are finishing it without a back neck facing, press the seams closed and towards the collar (b). This will help to neaten it all later.
-
 Step 10
With right sides together, pin the collar facing to the garment along the outer edge of the collar and down the centre front.
-
 Step 11
...
-
 Step 12
Starting at the centre back, sew around the collar and down the centre front. Then repeat for the other side.
-
Step 13
To layer the seam allowance, trim one side down by half and then the other by half again. Clip into the seam allowance to remove the excess fabric; this will help the collar sit flat in a smooth curve.
-
Step 14
Understitch through the garment side of the collar and the seam allowance, starting at the centre back but stopping about 4cm (11⁄2in) from the breakpoint. (The breakpoint is where the collar folds back. If the understitching continues it will be visible on the garment front.)
-
Step 15
Turn the collar right side out and press the outer edge.
-
 Step 16
Finishing with a front neck facing
Fold under the seam allowance on the shoulders and neckline of the facing. Match up the corner points and the darts. Pin through the shoulder seam to hold in place.
-
 Step 17
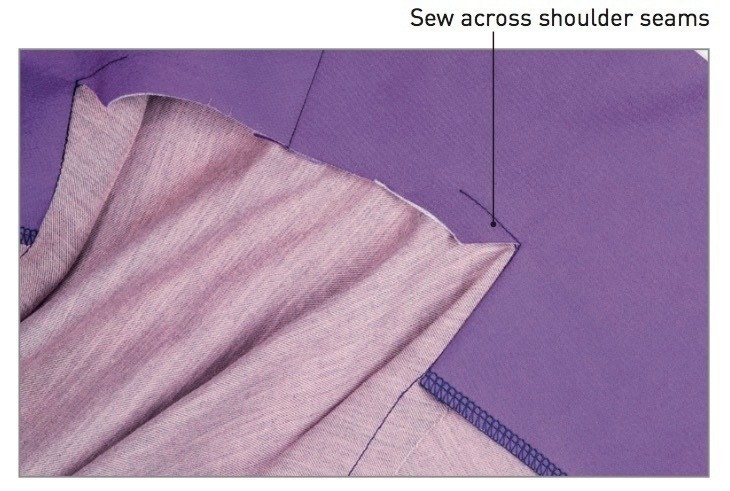
Slip your hand through the gap at the armhole between the garment and the facing and pinch the shoulder seam allowance. Pull it through the armhole. This will turn the shoulder seam inside out so that you can line up the shoulder seams of the garment and facing.
-
 Step 18
Sew along the shoulder seam from the corner to the shoulder point just inside the original row of sewing. Turn the shoulder right side out again and press the shoulder seam. Repeat for the other shoulder.
-
 Step 19
Make a few small snips in the back neck seam allowance to enable it to sit flat when folded under. Lay the folded edge to the row of sewing along the back neck and hand or machine sew in place.
-
 Step 20
Finishing with a back neck facing
The back neck facing needs to be interfaced to give it some rigidity. Cut the interfacing slightly smaller all around than the facing piece, then apply it to the wrong side of the fabric, following the manufacturer’s instructions. Transfer the dots for the pivot points from the pattern to the facing.
-
 Step 21
With the right sides together, match up the centre backs and pin. Pivot at the smalls dots as before and line up the shoulder seams.
-
 Step 22
Sew starting from the centre back and dropping the needle to pivot at the corners before sewing across the shoulders. Snip into the seam allowance and press the seams open.
-
 Step 23
Match up the darts and pivot points on both the garment and the facing. Slipstitch along the dart and across the back neck seam allowance to hold the collar and facing in place.
-
 Step 24
If you are not including a lining, make sure that the edges of the facing are neatened and hand caught to the shoulder seams.


Comments