


About
Anything from candy to bugs!
I started making bug pendants 5 years ago.
I love working with resins you can have so much fun.
-
 Tami R. favorited Resin Pendant With A Mold
21 Feb 00:18
Tami R. favorited Resin Pendant With A Mold
21 Feb 00:18
-
 Quackers, Vino & Cheese favorited Resin Pendant With A Mold
12 Apr 12:10
Quackers, Vino & Cheese favorited Resin Pendant With A Mold
12 Apr 12:10
-
 mmotse03 favorited Resin Pendant With A Mold
29 Mar 06:33
mmotse03 favorited Resin Pendant With A Mold
29 Mar 06:33
-
 FrankieStein favorited Resin Pendant With A Mold
16 Feb 07:05
FrankieStein favorited Resin Pendant With A Mold
16 Feb 07:05
-
 dalekordancer favorited Resin Pendant With A Mold
05 Jan 10:01
dalekordancer favorited Resin Pendant With A Mold
05 Jan 10:01
-
 Tori K. favorited Resin Pendant With A Mold
10 Dec 01:43
Tori K. favorited Resin Pendant With A Mold
10 Dec 01:43
-
 M1CHAEL5H1RLEY added Resin Pendant With A Mold to ACCESSORIES
03 Nov 03:22
M1CHAEL5H1RLEY added Resin Pendant With A Mold to ACCESSORIES
03 Nov 03:22
-
 zoegirl221 favorited Resin Pendant With A Mold
21 Sep 17:53
zoegirl221 favorited Resin Pendant With A Mold
21 Sep 17:53
-
zoegirl221 added Resin Pendant With A Mold to Jewelry
15 Sep 20:50
-
 Sandra C. added Resin Pendant With A Mold to Manualitats
30 Jun 15:36
Sandra C. added Resin Pendant With A Mold to Manualitats
30 Jun 15:36
You Will Need
-
 Step 1
Do as I say not as I do.
Make sure you're wearing clothes you can wreck just in case you wipe or spill resin on you.
I've not used gloves. You REALLY should.
Prepare yourself.
***Open your windows*** or even better do this outside.
More industrial resins should be used outside and with gas masks as fumes are toxic.
-
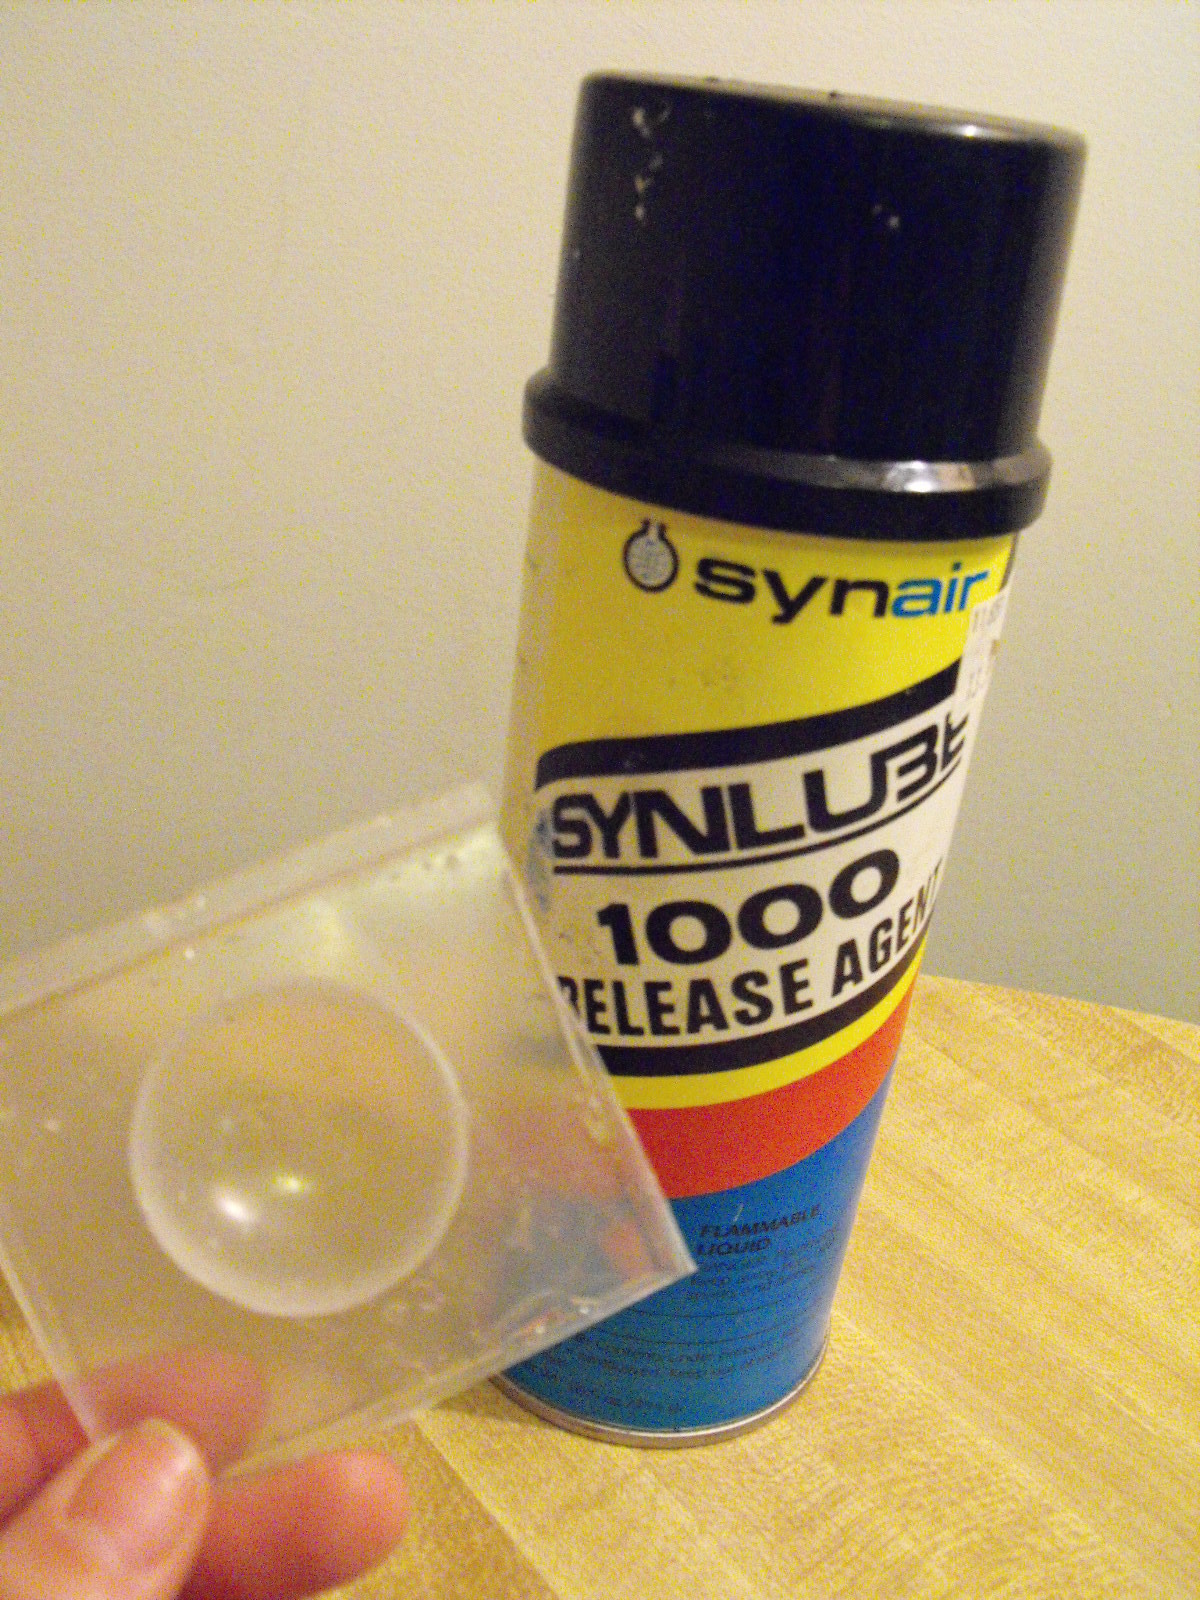
 Step 2
When you're using molds it's best to invest in a spray release. This will help prevent from you saying nasty words and getting mad when you can't get your pendant out.
You only need to spray REEEEEAAALY lightly. Like.. you don't want any big old droplets in the mold as the resin will go around it and you'll have big ol' nasty bumps in your pendant.
If nessisary take a cloth and spray it and wipe the mold.
-
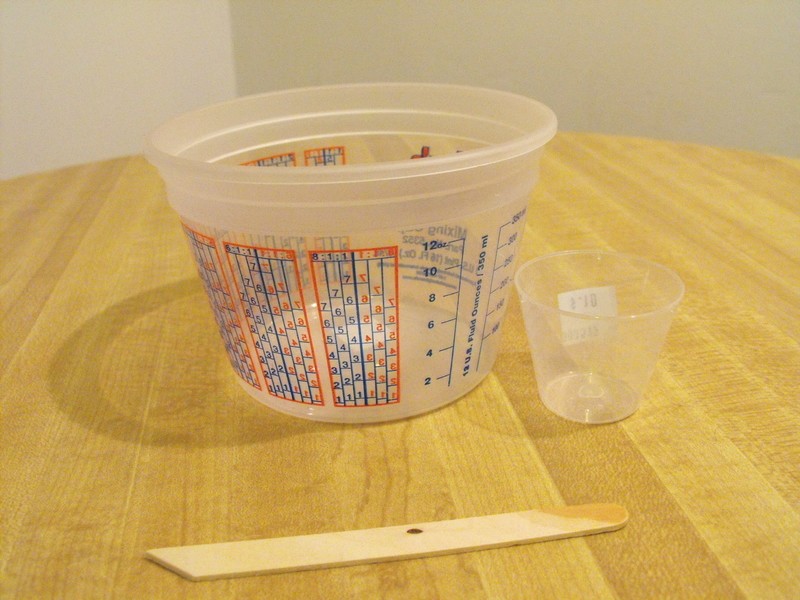
 Step 3
Always use two containers. One for measuring and one for mixing.
I don't recommend reusing these so expect to chuck em. They are cheap.
You can also use plastic cups for mixing.
-
 Step 4
You want to consider before you start about how much resin you'll be using.
You'll need to set THREE different layers and each layer needs time in between. Which means you need to make THREE seperate batches.
Think of it this way, you got a foreground, a middle ground and a background.
Each layer is about a third of how thick you want the pendant.
Allow each layer to set before proceeding to the next. This can be a few hours between.
-
 Step 5
Here I am measuring out ONE of the solutions in the kit...the hardner.
Resins are created through a chemical reaction of two solutions. One will be the catalyst.
***Always read the instructions as each resin varies on how to use.***
I'm using Envirotex Lite. In this case it's a 1:1 ration.
So if you use one ounce of one, you use one ounce of the other.
-
 Step 6
I find it difficult sometimes to see the lines on the measurements and marking your line also will ensure you measure the same amount of the second solution.
-
 Step 7
Pour into mixing container and scrap with wooden stick.
-
 Step 8
Measure them same amount of the second chemical/solution.
Remember that line we did?
-
 Step 9
Aaaand mix for at least two minutes.
It's SUPER important not to rush this step as if it's not mixed right, it aint gonna set right.
Now three things will probably happen when you do this.
1) It might feel if you hold the container that it's getting warm. This is normal since it's a chemical reaction taking place.
2) Air bubbles will appear. We'll talk about this later. Don't worry about them keep mixing.
3) It'll get milky in colour. Keep stirring this will go away.
-
 Step 10
Pour in a little bit for your foreground.
-
 Step 11
Wait for the layer to set.
-
 Step 12
I don't have a picture for this step.
If you've got an object that has small crevises use a paintbrush to paint the small parts to stop air bubbles from forming around your object for the next step.
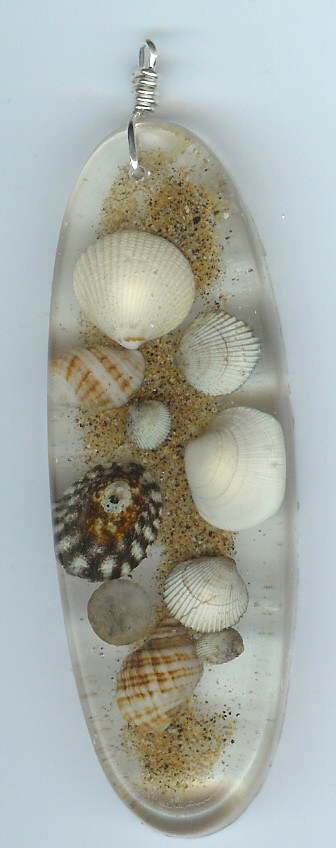
-
 Step 13
Pour in the next layer with your object.
You can just cover the object or leave a little exposed it's up to you.
I've used sand and a picture in this example.
TIP: If I wanted the sand sitting behind the object I would had put the sand in the NEXT layer.
-
 Step 14
Wait again for this layer to set
OR if you want a clear background then just go ahead and cover your object.
-
 Step 15
In the last layer you can always add colour or more embellshments as a background.
Some resins you can get colourant to add to the resin to create... well colours.
I've just gone for clear.
-
 Step 16
Allow to cure for 24-48 hours.
You should be able to literally just POP your pendant out of the mold.
Use a drill with a small drill piece for your hole an add your metal piece for hanging your necklace.
Drilling tip.. have it on a soft surface so it doesn't create too much pressure when drilling to avoid breakage. ( you can see mine chipped a lil here)
You can sometimes buy polishing solutions if you want your object more shiny.
-
 Step 17
BUBBLES!!!!!!
Nasty-son-of-a-gun bubbles.
Depending on your resin here are some ways to help get rid of them.
I mentioned in another tutorial blowing on the product Envirotex lite which is a polymine hardner or using a blow torch will make the bubbles pop. It's the CO2 in this case that makes them pop.
Polyester resins and polyurethane resins: One you mix your chemicals together tapping for a few taps the container on the bottom can help clear some out. OR when you are pouring hold the liquid high above the mold (several inches) and allows the stream the become very thin while you are pouring, bubbles will pop as the stream should be too thin for the bubbles.


Resin is avaible at craft stores or google it and your country, it's not too difficult to get your hands on.
Its great (:
Where can you buy the resin from and is it expensive?
thanks x