


About
no sewing needed for this simple reconstructed T!
I like tee shirts. They are comfortable, casual and chic. Everyone can look fabulous in a simple tee. But sometimes I simply don't feel like wearing the ubiquitous tee. And sometimes I get tired of my tees.
So the remedy for such problems is to reconstruct the tee! The best part of this is that no sewing is needed!
-
 Katie E. favorited Reconstructed T!
25 May 10:50
Katie E. favorited Reconstructed T!
25 May 10:50
You Will Need
-
 Step 1
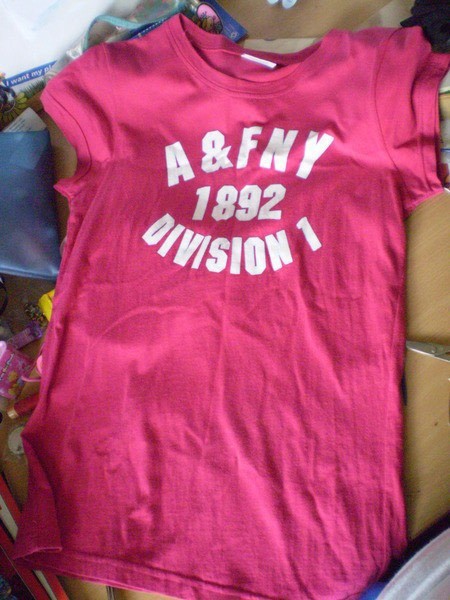
First and foremost, you gotta choose a tee. A good tee to choose is one that fits nicely and has nice graphics/words/designs in front. Take one last good look at this old tee.
-
 Step 2
Get a pair of sharp scissors.
-
 Step 3
Wear the tee and mark around the collar using a fabric chalk with the help of a mirror. How far you mark from the original collar depends on how deep you want the scoop to be.
-
 Step 4
Pin the front and back of the tee together. This helps to ensure a smooth finish to the cut. We don't want the scoop for the front and back to be different!
-
 Step 5
Take a deep breath, and cut along the line that you've just marked.
-
 Step 6
This is how the edge looks like after the cut.
-
 Step 7
To complete the look, we gotta fix the sleeves too. Turn the shirt inside-out to reveal the seams of the sleeves
-
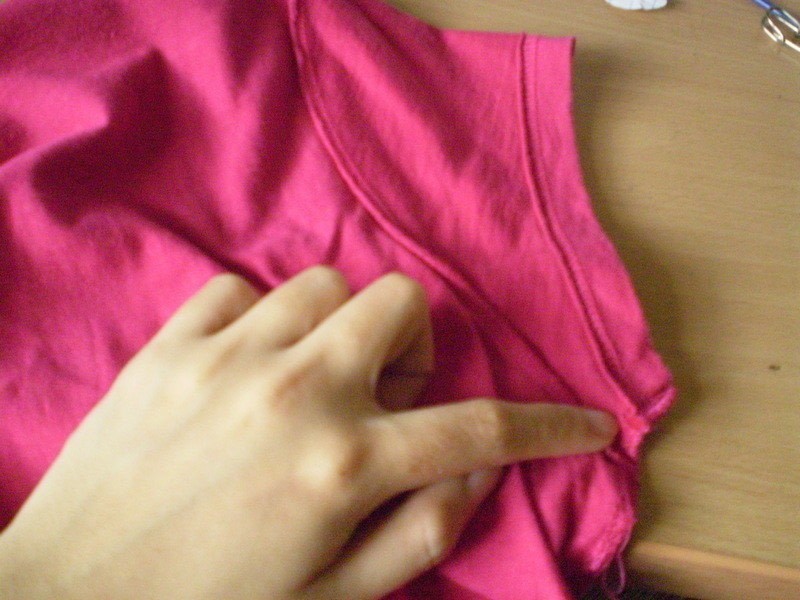
 Step 8
The bottom of the sleeves. This is where we start.
-
 Step 9
Use the scissors to make a little snip at the bottom of the sleeves, just after the seams.
-
 Step 10
Then cut along the side of the seams, around the entire sleeves, bearing in mind to cut just after the seam. Do not cut both sides of the sleeves at the same time.
-
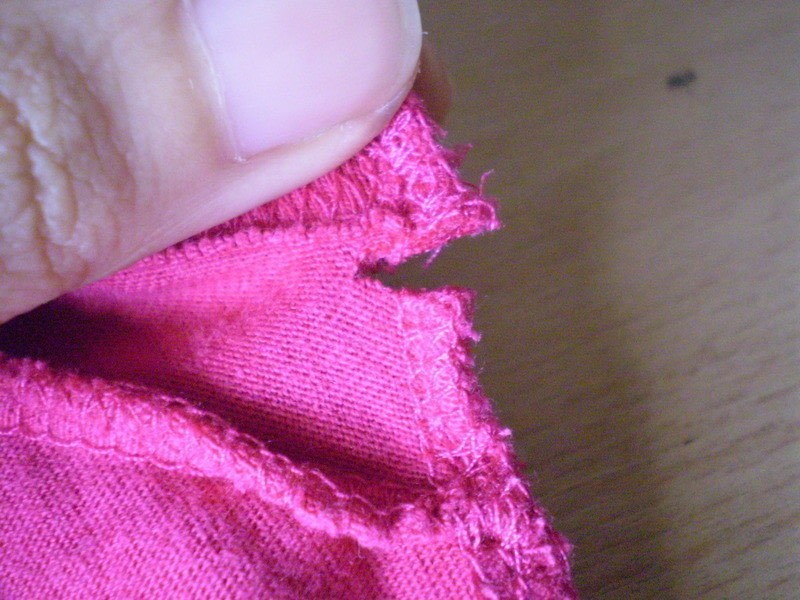
 Step 11
This is how the sleeves looks like after the cut.
-
 Step 12
Then wear the tee again to make sure that you are satisfied with how it looks!
NOTES:
If you want the collar to be even deeper, mark a line around and cut it again. Do trim the collar slowly to achieve what you want, don't be too impatient!


Versions

Comments


