

About
jewelry hanger
Cheap and easy! (No, not me)
-
 Brittany B. favorited Quick And Dirty Jewelry Hanger
28 Mar 14:57
Brittany B. favorited Quick And Dirty Jewelry Hanger
28 Mar 14:57
-
 HylianWriter534 added Quick And Dirty Jewelry Hanger to To-Make List
08 Mar 06:00
HylianWriter534 added Quick And Dirty Jewelry Hanger to To-Make List
08 Mar 06:00
-
HylianWriter534 favorited Quick And Dirty Jewelry Hanger
08 Mar 05:59
-
 Elizabeth W. favorited Quick And Dirty Jewelry Hanger
10 Oct 02:08
Elizabeth W. favorited Quick And Dirty Jewelry Hanger
10 Oct 02:08
-
 Step 1
Take an old picture frame apart. You won't need the glass for this project.
Mine was 8x10 with a little kickstand thingy (to hold it up on a table) that I found in the garage.
-
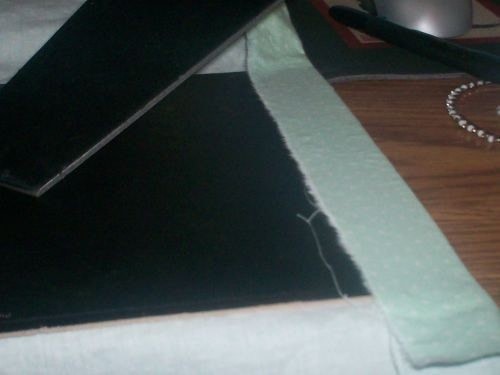
 Step 2
Take a piece of fabric that you like (it just has to be bigger than your cardboard insert from the frame;not very big at all). Slather some glue on there! I used Mod Podge.
Be sure to NOT glue down the part that props up the picture!
-
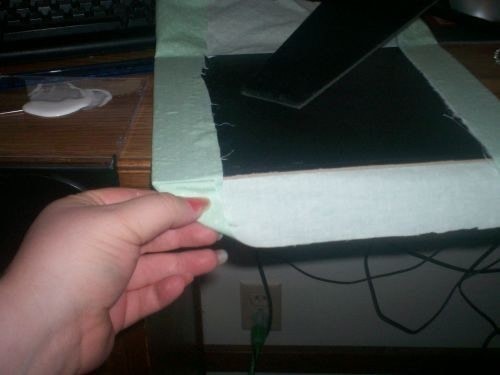
 Step 3
Pull the fabric taut against the cardboard and hold until it will stay on its own. (Like 10 seconds)
Repeat on the opposite side.
-
 Step 4
When you glue down the 3rd and 4th sides, fold the corners into triangles to make a neater corner. Or, if you are not so impatient, you can cut the fabric so that you do not have the bulk.
Glue down as before. Remember to pull the fabric so that there are no wrinkles on the front.
-
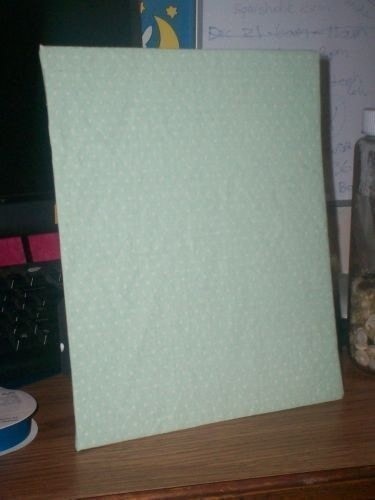
 Step 5
Ta da! All covered!
-
 Step 6
Ew, this frame is just all sorts of wrong for this fabric! There is a solution, though!
-
 Step 7
Paint it! You can use spraypaint, but I just used white acrylic paint and a brush. 2 coats worked just fine for me. (i.e. a lazy person)
-
 Step 8
After the paint has dried, hot glue some ribbon stole- um...LIBERATED from a giftbag or wherever you get your ribbon.
Be sure the ribbon is centered or it will hang all lopsided. :C
-
 Step 9
Stick some tall pushpins into the cardboard at intervals that please you. (I just eyeballed it)
The sharp, pointy, hurty ends DO poke through the back, so if you wanna hang it, or don't like being poked a lot, you can find a way to cut them off or something.
I like to reuse my pushpins, and also, this is QUICK and DIRTY, so I just let them poke through.
-
 Step 10
Now would be the time to decorate your frame with ribbon, buttons, lace or whatever else strikes your fancy. :3
-
 Step 11
Stick your fabric-covered cardboard back into the frame. (Mine fit pretty snugly, so I didn't need to use the little staples to keep it in place.
Hang some bracelets and stuff on it!
(I have no earrings, but if you do you can just put some tulle or mesh across the top third of the cardboard and hang them there)
-
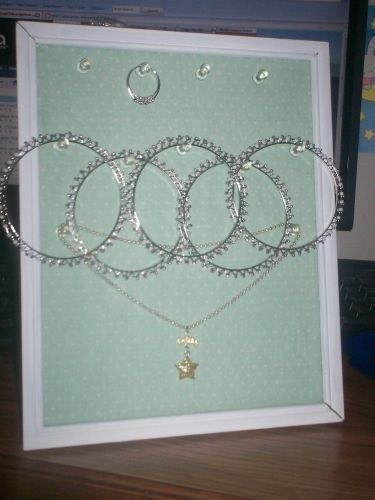
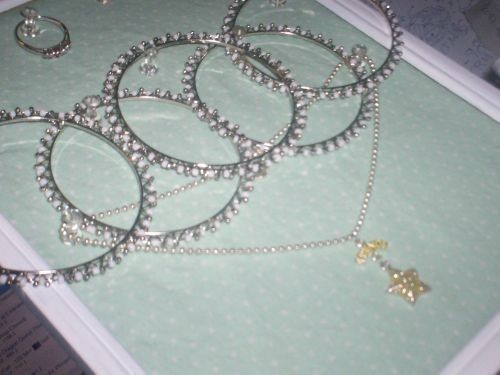
 Step 12
See how pretty and easy it is? This might only work if you have a pathetically small jewelry collection, as I do. (This is all my jewelry)
-
 Step 13
Find it a home on your desk, dresser, or maybe even on the floor. Who knows? You can also hang it, using the pretty ribbon you glued on the top.