About
spring, Easter, egg decorating
Pysanky or Ukrainian Easter Egg decorating is a captivating activity. It takes practice but once you start you'll find yourself making these amazing eggs year after year.
Tags
-
 Mischelle S. favorited Pysanky
03 Apr 13:37
Mischelle S. favorited Pysanky
03 Apr 13:37
-
 liza.minelli.564 favorited Pysanky
02 Feb 01:20
liza.minelli.564 favorited Pysanky
02 Feb 01:20
-
Olivia l. favorited Pysanky
29 Aug 03:49
-
 Wendy W. favorited Pysanky
08 May 19:58
Wendy W. favorited Pysanky
08 May 19:58
-
 Crafterella featured Pysanky
04 May 23:00
Crafterella featured Pysanky
04 May 23:00
-
 thatartistwoman published their project Pysanky
03 May 09:00
thatartistwoman published their project Pysanky
03 May 09:00
-
 Step 1
Make up your dyes as per the packet instructions. I use canning jars and keep the lids on when not in use. They tend to evaporate quickly so keeping them sealed extends their life. I make up new dyes each year as often mould will grow over time. I will use leftover dye after Easter to dye paper and coffee filters for other projects before discarding.
-
 Step 2
Choose an egg with a smooth surface and a nice shape. I tend to use large or extra large eggs. I use raw eggs. Over time the inside just dries up.
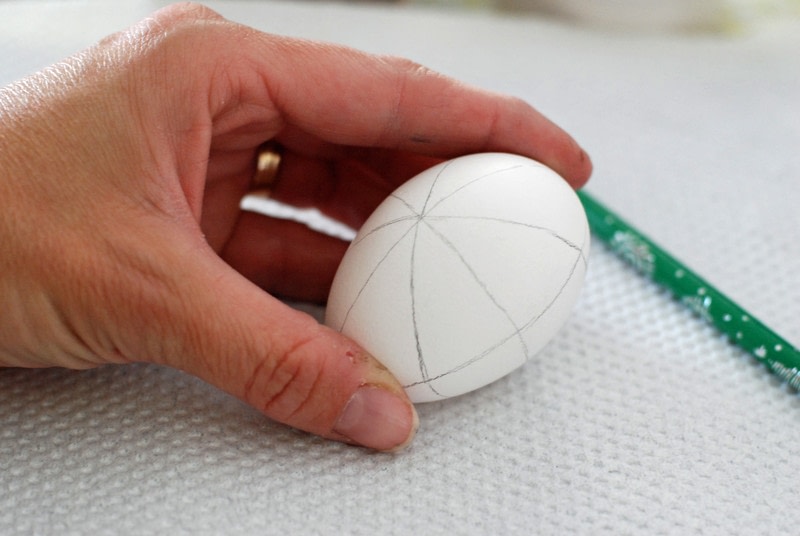
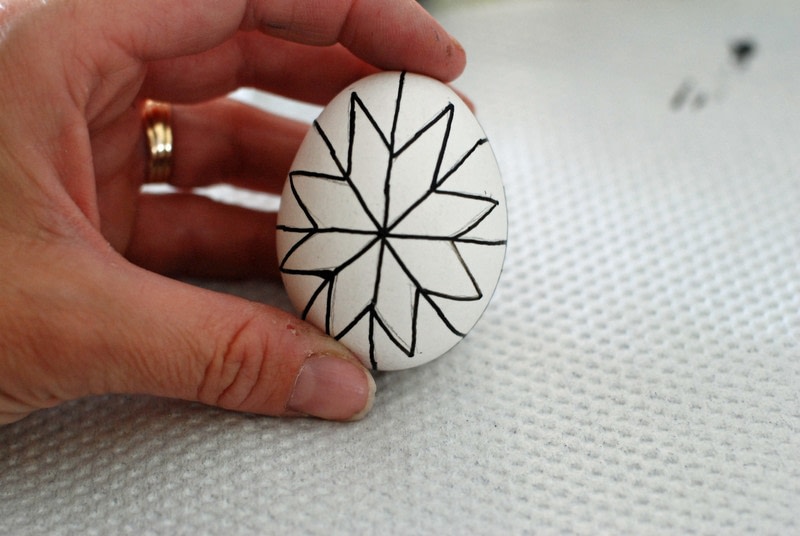
We need to divide the egg first. With a pencil draw a line the long way around the egg. Do the same on the other side. Your egg should be divide into long quarters. Draw a line around the centre, the short way. Finally you need to do the 2 diagonals. It should look like this when done. Do not erase any pencil lines. The eraser leaves a residue that will resist the dye and you will end up with spot on your egg. -
 Step 3
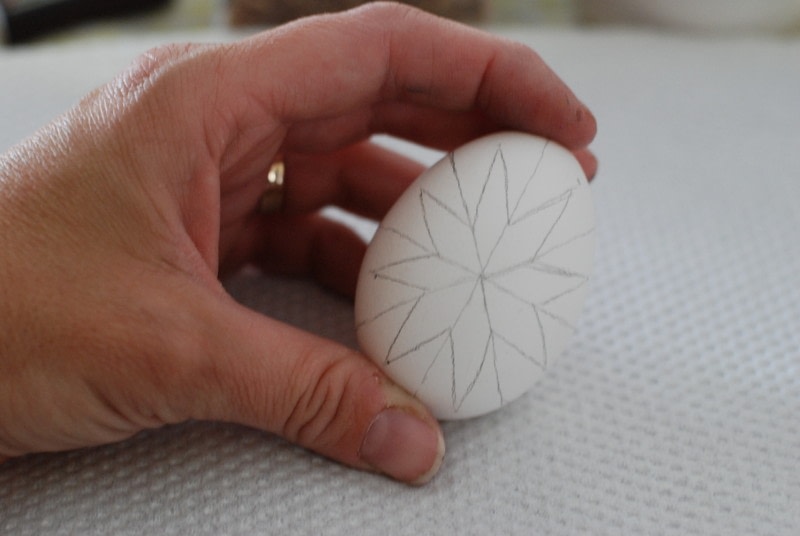
Now we have to draw the star. Put a little dot in each section about 3/4's of the way from the centre. Do this on both sides of the egg. Then connect the dots forming a star pattern. Repeat this on the other side of the egg.
-
 Step 4
Light your candle. Heat up the kistka in the flame. Just put the pointy end in ....be careful not to light it on fire. Heat for about 5 seconds.
-
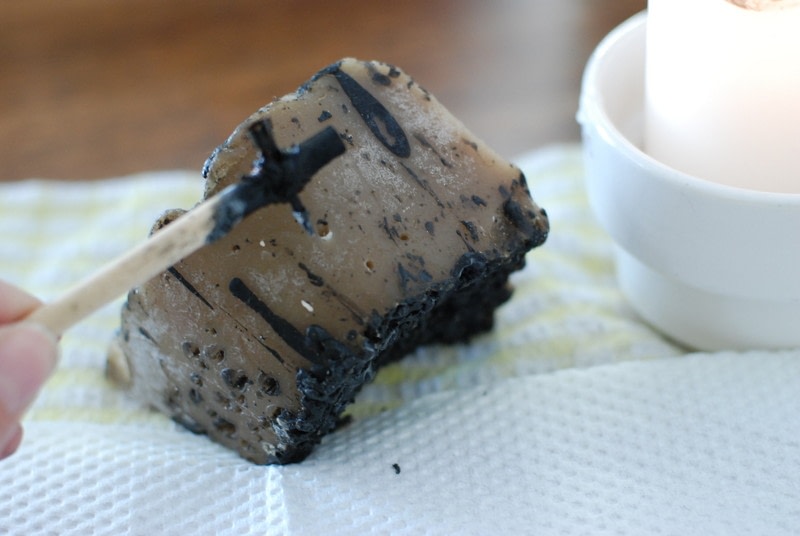
 Step 5
Place the pointy end into the beeswax.....the wax will melt and fill up the reservoir. Some sources advise you to break off a little wax and place inside funnel and then heat but I find this causes globs of wax on my egg ruining my design. I have more control this way. You may have to heat the kistka again in the flame for a few seconds before drawing on your egg.
-
 Step 6
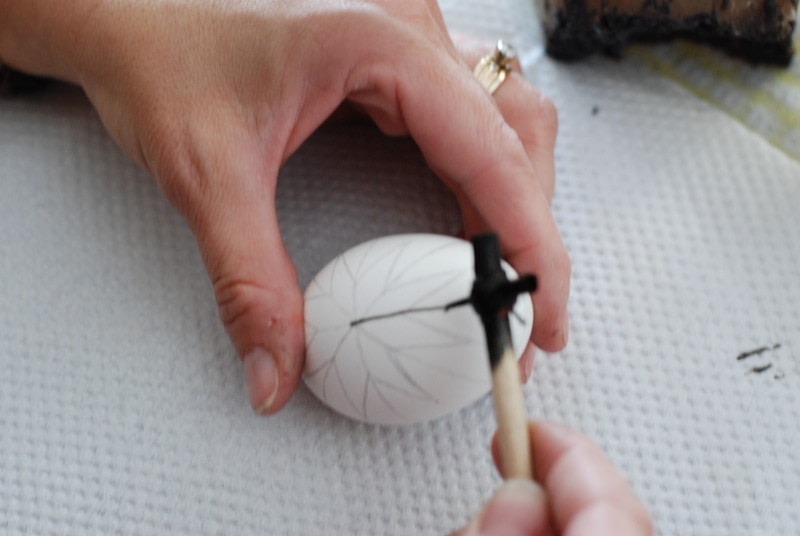
Hold your kistka like a pencil but further down the end away from the funnel. Apply the melted wax to your egg. I like to draw towards myself, that way I can see where my line is going. Try to only make one pass. Don't go over it again and again or it will look scratchy and too heavy of a line in the final egg. When I teach Pysanky I have my students practice drawing lines on paper first.
-
 Step 7
Draw over all your pencil lines in wax. It should look like this. Everywhere you have put wax will remain white in the final egg.
-
 Step 8
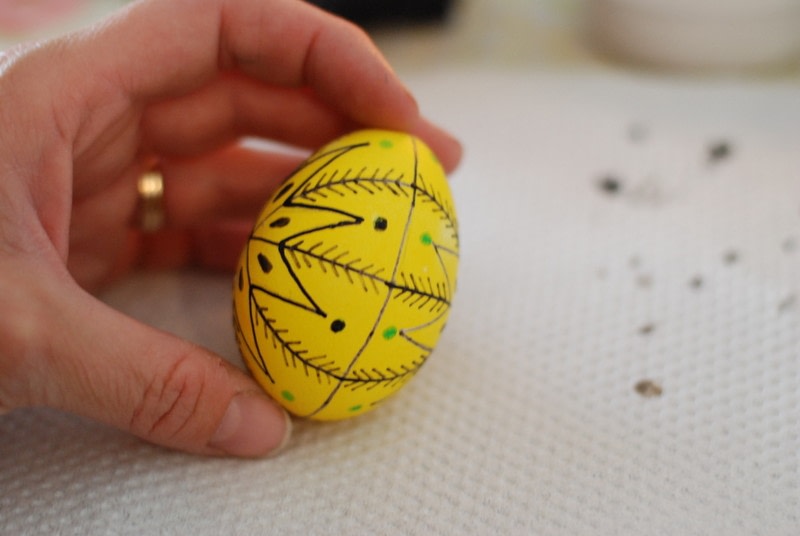
Place your egg into the yellow dye. Use a spoon to carefully lower your egg into the jar. I can't tell you how many eggs I have accidentally cracked by putting it into the jar too quickly. When your dyes are new the egg will catch quickly. Check it after 10 minutes or so. Carefully scoop it out with a spoon and dry it on a few paper towels.
-
 Step 9
Now with the kistka add teardrop shapes in each section of the star. Do on both sides. I also add feather lines along the lines coming out from the star.
-
 Step 10
The feather lines should meet up like this on your egg.
-
 Step 11
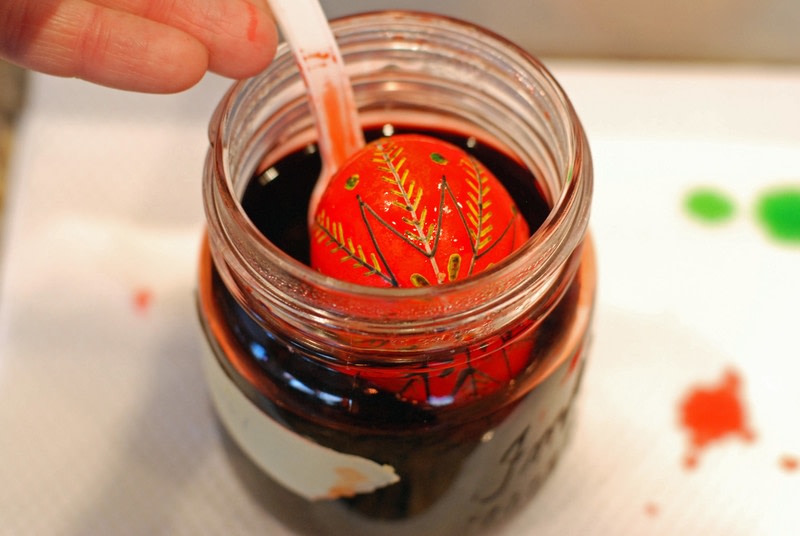
There is very little green on this egg so i take a q-tip and place a dot at the tips of the star. I then cover it with wax. You can also dye the entire egg green but you will have to follow this with a dip in orange after you put wax on the dots. Green is a dye that adversely effects subsequent dyes. The orange helps to remove it before placing it in other colours.
-
 Step 12
When your dots are covered place the egg into the red dye.
-
 Step 13
Fill in the entire star with wax. It's like colouring in a colouring book. Make sure you get a good coating as any uncovered bits will show up black in the final egg.
-
 Step 14
...
-
 Step 15
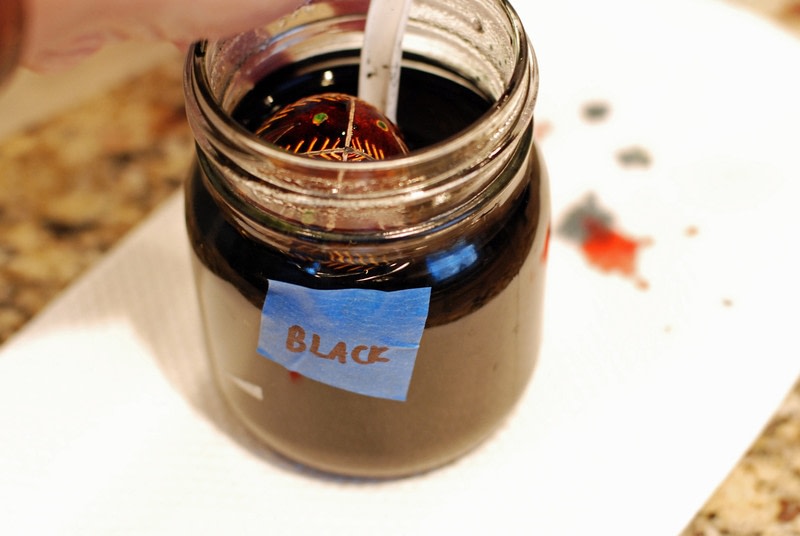
Place egg in the final dye, black.
-
 Step 16
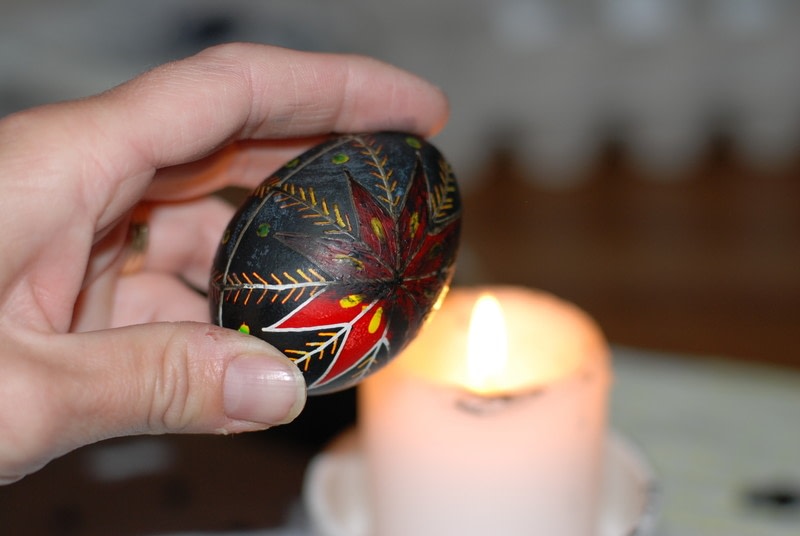
It's time to remove all the wax and reveal the colours. There are 2 ways to do this. You can melt the wax off using the candle. Wipe away the melted wax with a cotton rag. Be careful not to singe the egg by holding it in the flame too long. The other way is to melt if off in the oven. Line a cookie sheet with parchment paper. Set oven temperature to about 200 degrees fahrenheit. Place egg carefully on sheet and let it heat up until the wax looks shiny. Wipe off the wax with cotton rag.
-
 Step 17
If you want you can add a coat of oil based shellac. I use some polyvinyl gloves, I dip a finger or 2 in the shellac and then spread it on the egg. Work on wax or parchment paper. The egg will take a few days to dry and turn it at least once to help with drying.
That's it I hope you give Pysanky a try, making eggs can become addictive!