


About
A great alternative to wrapping gifts =)
Based on a pattern for a takeout box, but with straight sides.
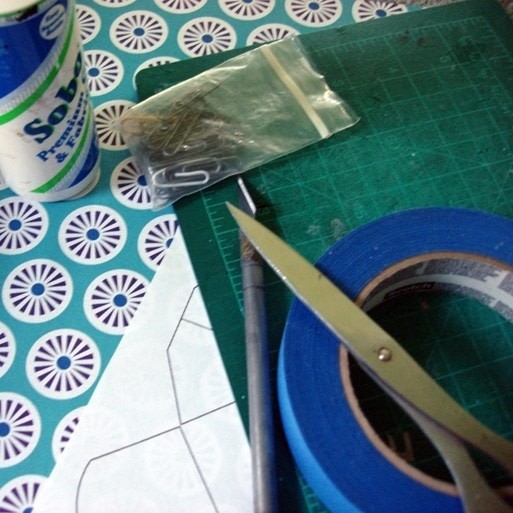
You'll need to print out the pattern, the paper or cardstock that you're making the box with, scissors or an x-acto knife (or both), painter's tape, four paper clips, and glue.
-
 Toxic favorited Paper Box
14 Aug 08:57
Toxic favorited Paper Box
14 Aug 08:57
-
 witterings favorited Paper Box
13 May 14:40
witterings favorited Paper Box
13 May 14:40
-
 Marie B. favorited Paper Box
05 Jun 21:12
Marie B. favorited Paper Box
05 Jun 21:12
-
 J. Pario favorited Paper Box
12 May 22:15
J. Pario favorited Paper Box
12 May 22:15
-
 Jessica favorited Paper Box
14 Sep 12:15
Jessica favorited Paper Box
14 Sep 12:15
-
 James A. commented on Paper Box
12 Aug 11:06
James A. commented on Paper Box
12 Aug 11:06
-
 Verda S. favorited Paper Box
11 Aug 10:49
Verda S. favorited Paper Box
11 Aug 10:49
-
 Esteph H. favorited Paper Box
13 Jul 06:51
Esteph H. favorited Paper Box
13 Jul 06:51
-
 Allison S. favorited Paper Box
01 Jul 07:47
Allison S. favorited Paper Box
01 Jul 07:47
-
 Mildred favorited Paper Box
26 Jun 11:44
Mildred favorited Paper Box
26 Jun 11:44
You Will Need
-
 Step 1
This is the pattern you need to print out.
-
 Step 2
Gather up all your materials.
-
 Step 3
Attach the pattern onto the paper or cardstock. The painter's tape will hold it in place but will not damage the paper when you lift if off.
-
 Step 4
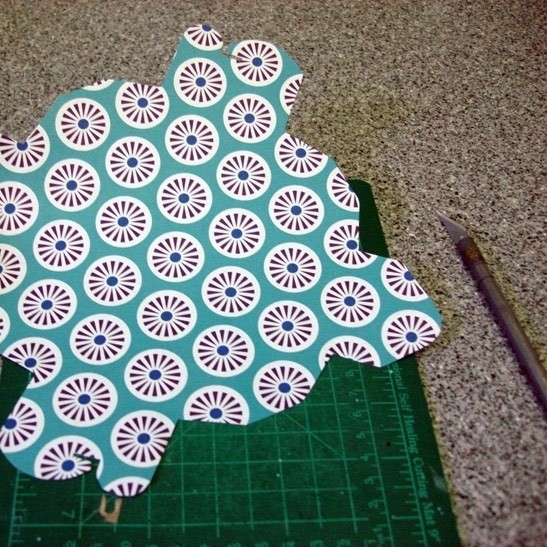
Cut out the pattern. I used scissors for the straight parts and the x-acto for the curves and complicated part.
-
 Step 5
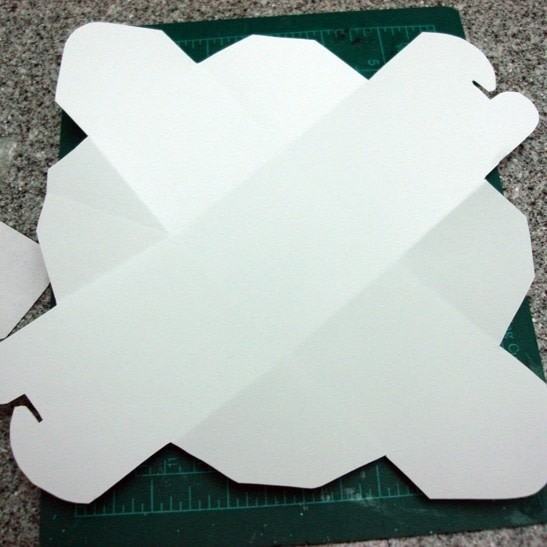
Score the paper along the lines on the pattern. I'm not very good at scoring, so I just folded along the lines, making sure the fold was crisp.
-
 Step 6
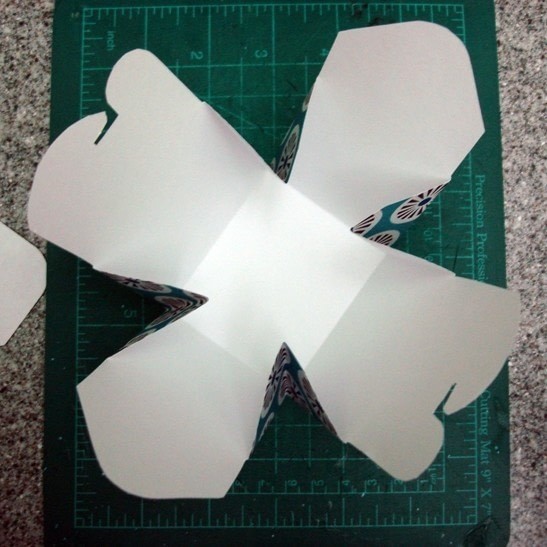
The part between the sides of the box need to be folded in, to create the corners.
-
 Step 7
It should start to look like this.
-
 Step 8
You need to place glue on the corners to hold them together.
-
 Step 9
I don't have the patience to hold the corners until they dry, so I place paperclips to hold the corners together while they dry.
-
 Step 10
Do all four corners. After they finish drying, you can remove the clips and place additional glue on one side of the flaps and glue them to the sides of the box (so that they're not in the middle).
-
 Step 11
Fold the top flaps down to close the box. You're done!


http://sybariticjewelry.blogspot.com/2010/08/paper-box.html
laneybug459@gmail.com
could you please send to me?
the_line_is_drawn@yahoo.com
thank youu. (:
stbyrd60@yahoo.com
have a lovely day