About
Sew Perfect Pets
The owl doorstop is a lovely project to sew, with a few different techniques to try. The fabrics and trims you choose will make it totally unique to you. Have fun creating the front of the owl!
Pattern Sheet
Pattern sheet B, Owl Doorstop in orange
Finished size
• 20cm (8in) high
Tags
Downloads
- 2018-11-01-095105-Owl+doorstop+templates.jpg 253 KB [ Download ]
-
 Key West Witch favorited Owl Doorstop
05 May 08:31
Key West Witch favorited Owl Doorstop
05 May 08:31
-
 Julie from Sum of their Stories favorited Owl Doorstop
25 Mar 22:57
Julie from Sum of their Stories favorited Owl Doorstop
25 Mar 22:57
-
 Search Press published her project Owl Doorstop
02 Dec 09:00
Search Press published her project Owl Doorstop
02 Dec 09:00
You Will Need
-
Step 1
Cut out your fabric pieces using the pattern. Position the wings on either side of the owl front, matching the notches. Pin and sew along the un-notched curve of the wing approximately 2mm (1⁄16in) from the edge.
-
 Step 2
Pin and sew the ric rac along the edge of the wings, hiding the raw edge and the first row of stitching.
-
Step 3
Attach fusible webbing to the eye background piece. Position it onto the owl front and iron in place, allowing for the 1cm (3⁄8 in) seam allowance at the top. Zigzag around the outside of the felt to secure the eye background in position. (To stop thinner fabrics puckering around the eye section, you can iron a rectangle of medium-weight iron-on interfacing onto the wrong side of the fabric, behind the eye section.)
-
 Step 4
Position the white felt eyes on top of the eye background and hand sew in place. Then hand sew the buttons on for the pupils.
-
 Step 5
Sew on the beak using a zigzag stitch or by hand across the top.
-
Step 6
Place the felt feet either side of the centre notch on the base seam with the raw edges together. Tack in place. The feet should point up towards the owl’s face.
-
Step 7
Place the owl back face down onto the finished owl front, pin and sew around the curved edges of seam 1. Clip the curves and cut off excess fabric from around the ears to reduce bulk.
-
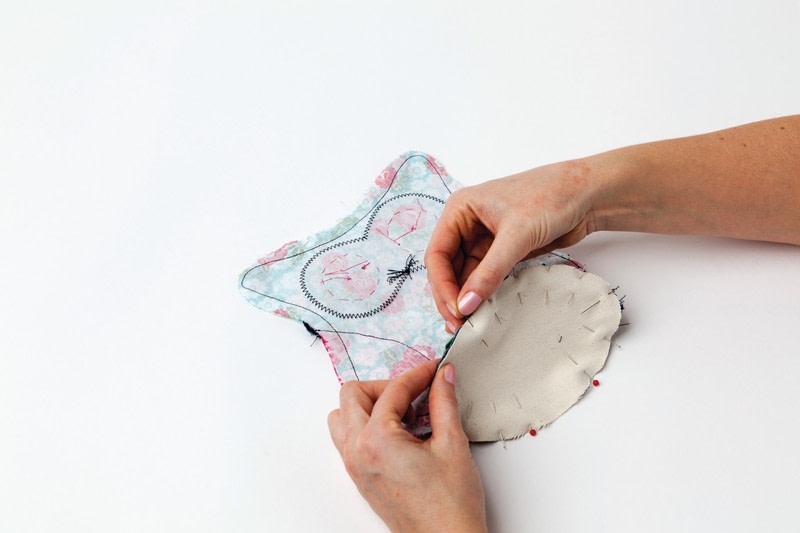
Step 8
Now you need to match the base to the owl body at seam 2. Make sure that you mark all four notches on your base pattern and the centre notches on the bottom of the owl front and back.
-
 Step 9
Match the end notches to the side seams and the other centre notches to the centre points. Get those four points pinned in first. Your right sides are together and raw edges together.
-
Step 10
Now pin each quarter. If you struggle to pin it flat, you can clip into the seam of the owl front and back by 0.7cm (1⁄4in) to help ease it in before sewing a 1cm (3⁄8 in) seam allowance. Leave a gap at the centre back of about 7.5cm (3in).
-
 Step 11
Turn through and fill two-thirds of the owl with toy stuffing and then put rice or a bag of sand in the bottom to weigh it down. Sew up the gap by hand.
Tip
If you are new to appliqué then use felt for the eye background section and just use fusible webbing to attach it, as the felt won’t fray.